|
My Collection
HP-01
Test Equipment
Model Rocketry
Bryan's Old Computers
| |
| |
|
|
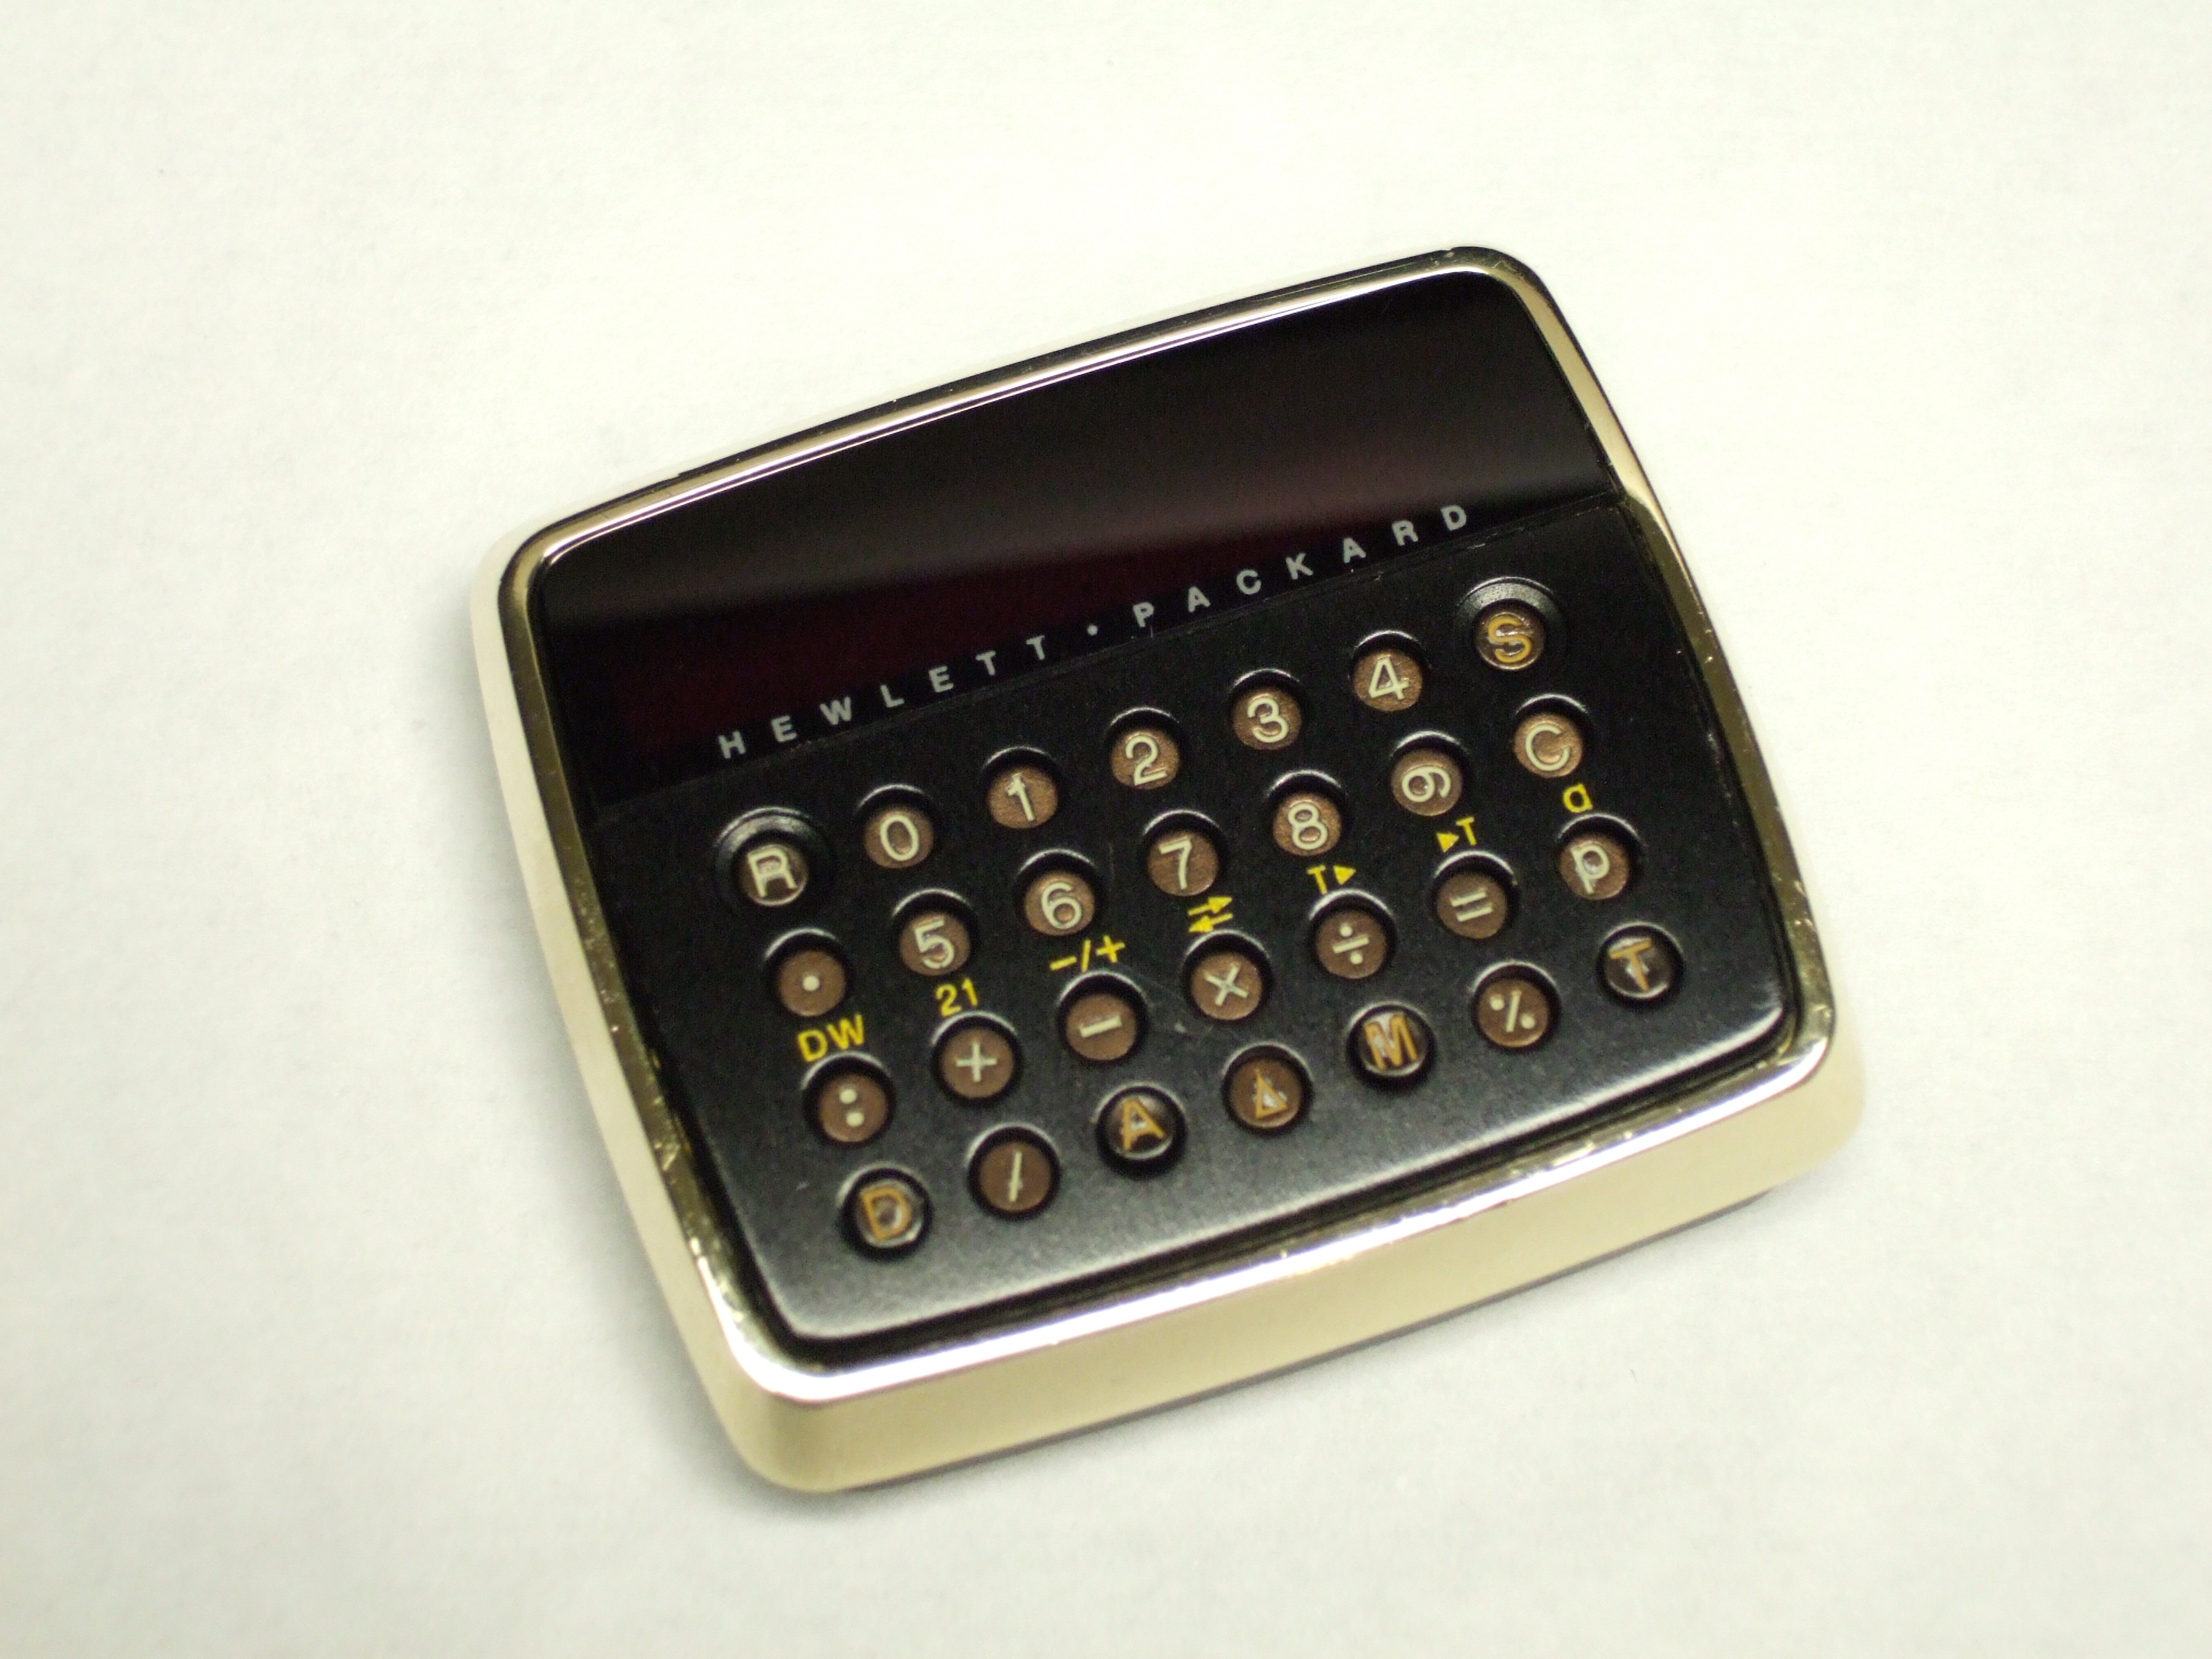
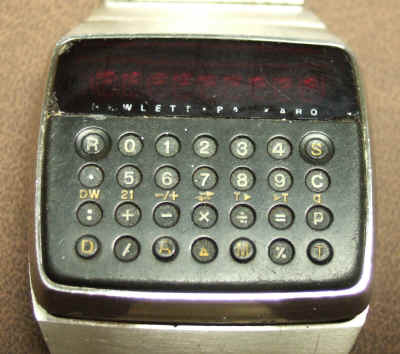
The HP-01
The HP-01 is the only wristwatch ever made by Hewlett-Packard, and it was also
an algebraic calculator. This was very unusual for 1977, but what makes
this watch truly unusual, even today, is that HP integrated the time and
date functions into the calculator! What this means is that the
HP-01 can do time math, in real time! For example, enter in your hourly
wage, multiply by time, and viola! Your earnings are displayed in real
time, updated each second! This was touted as a tool for measuring the
cost, in real time of such things as a long distance telephone call
(always pricey in 1977).
Another very cool function is the date calculator. With
this, you can calculate days between dates, and even find the day of the
week. The calendar is valid over 200 years, making this watch usable until
the year 2100 without compensation. What fun...
The watch had at least a couple of bugs: One leap year date cannot
be set directly. Y2K if I recall, although if set previously, the date
would read correctly when it rolled around. The other is a divide by zero
within a time calculation, as I recall. Don't do it! The watch will
supposedly lock up (destructively?) until the batteries are removed! I
have never verified either. I'm chicken.
If you would like more info on the HP-01, I know of no better source
than The
Museum of HP Calculators. I will not try to duplicate the information
here. My page is a record of the restoration of
two HP-01's; both a gold and a stainless steel version.
|

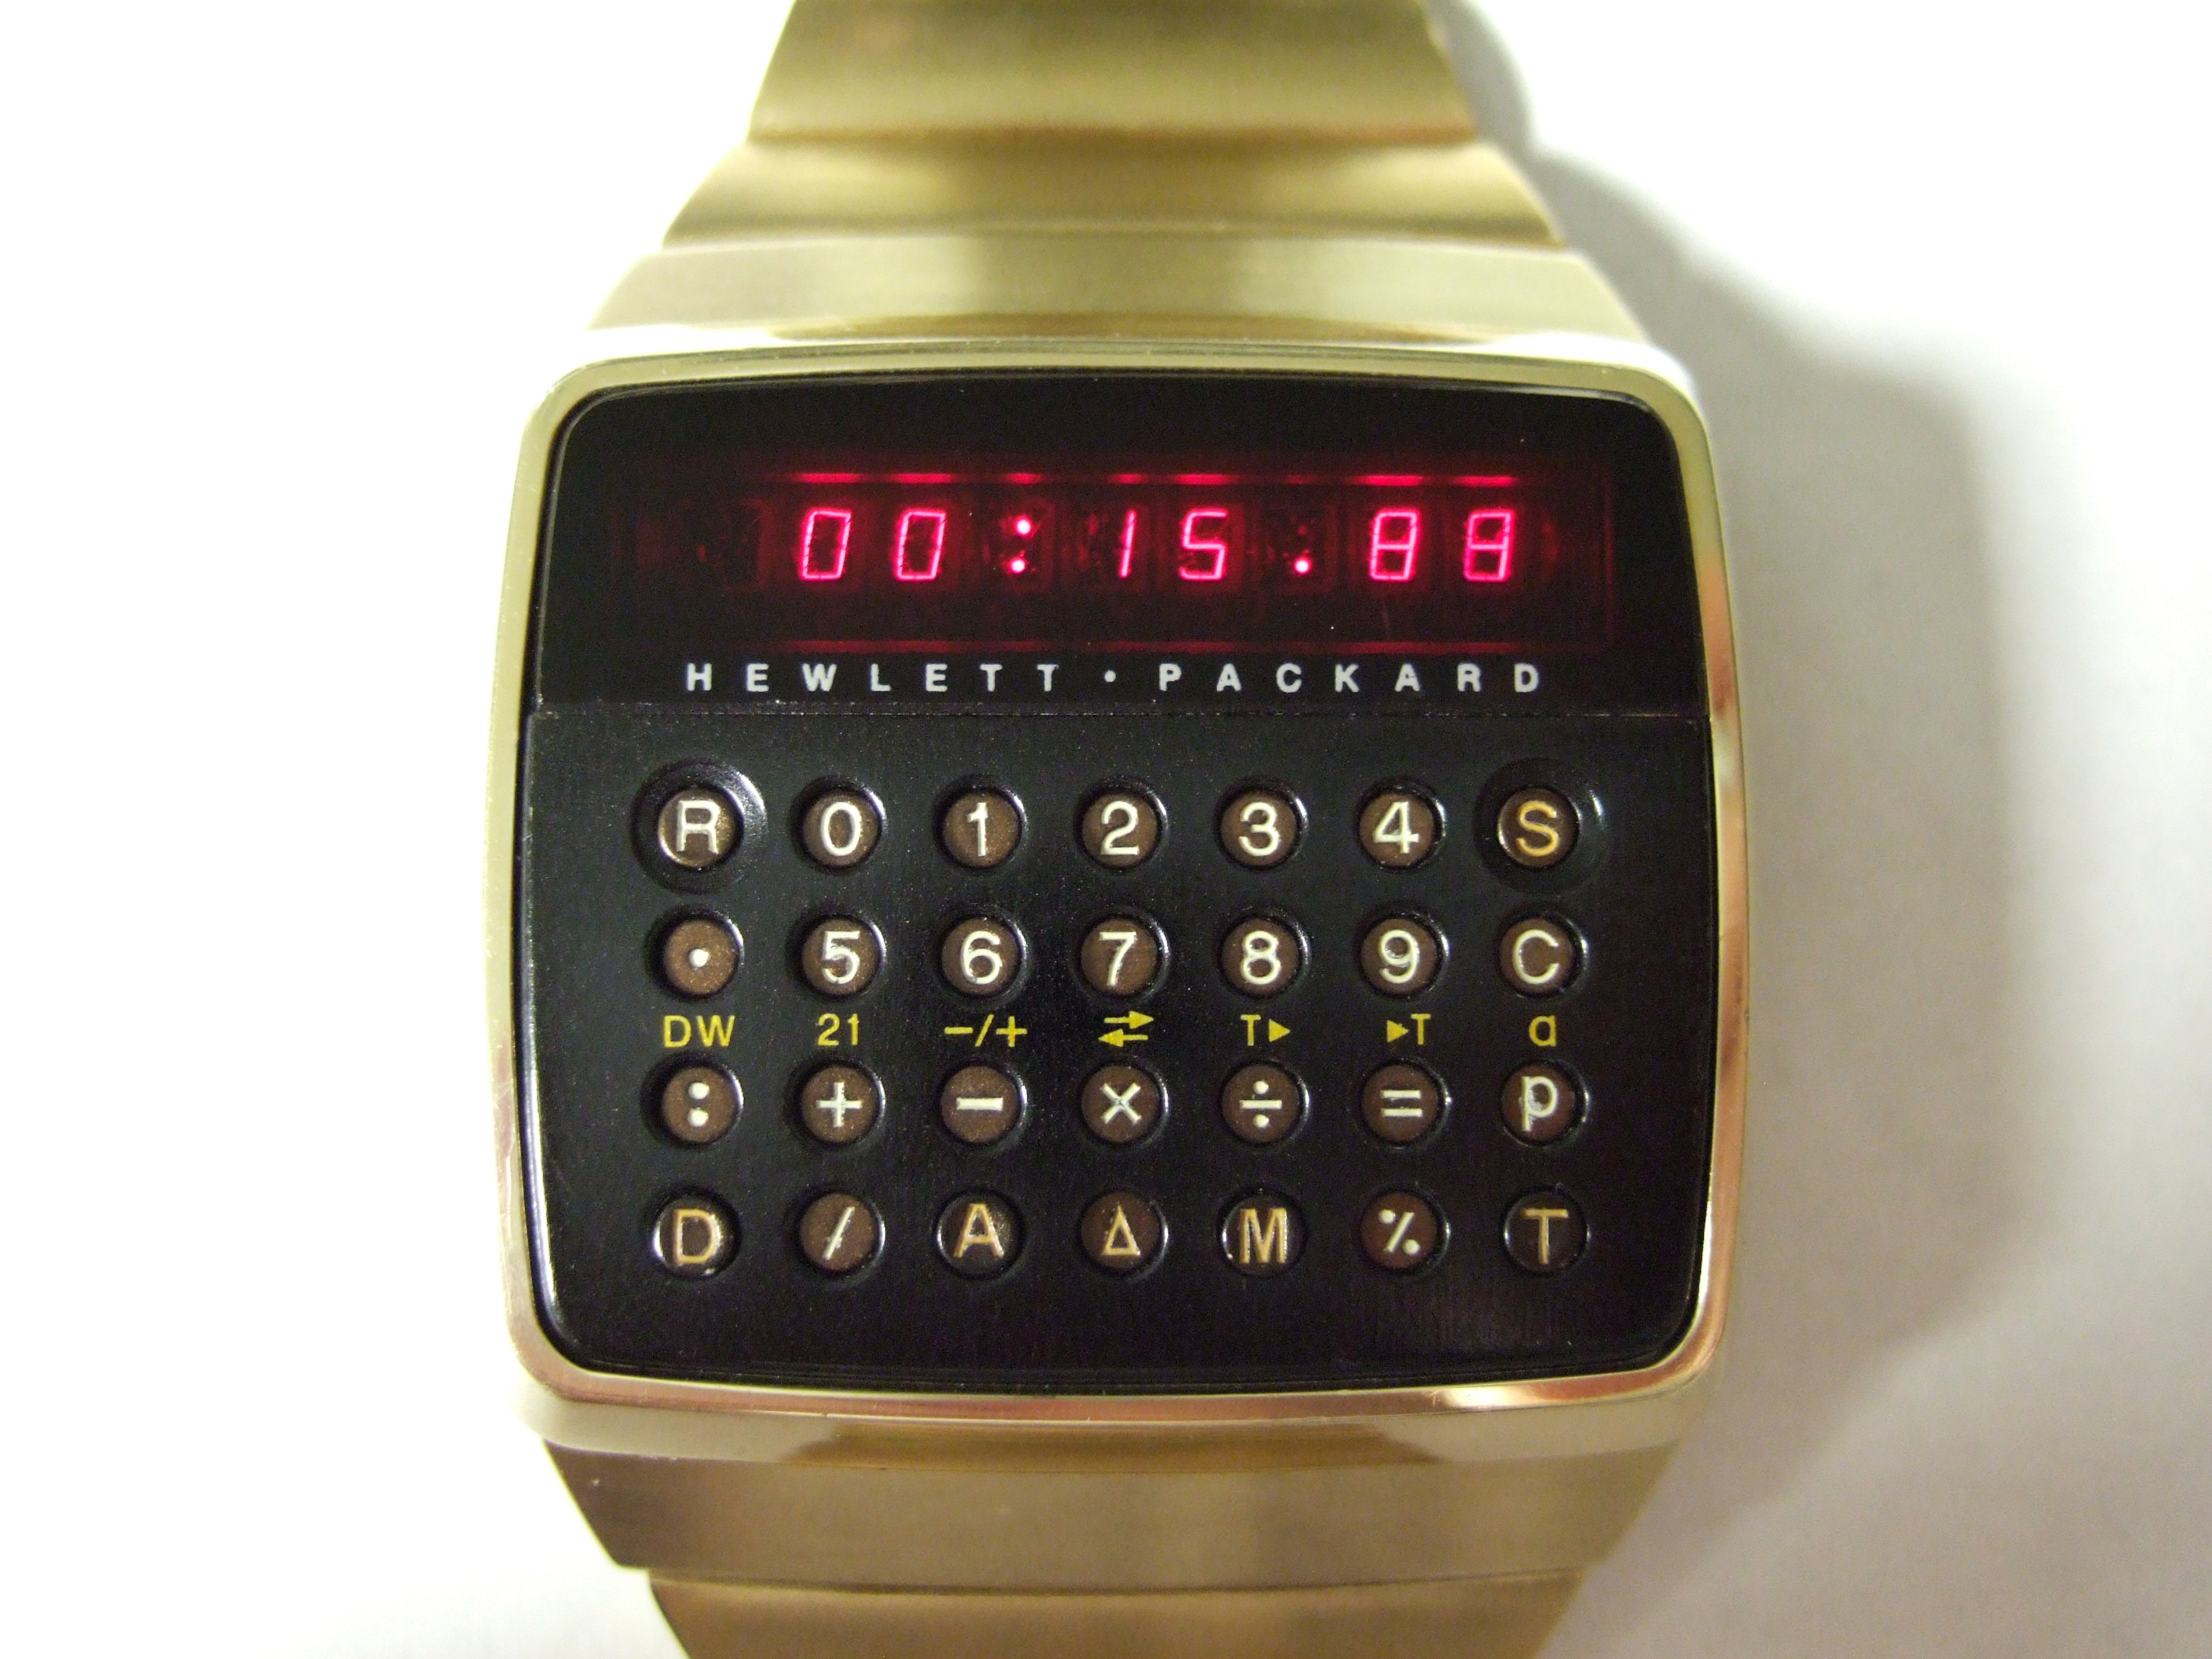
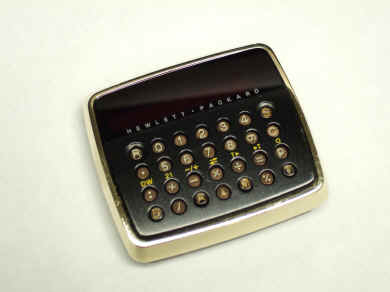
My gold HP-01, fully restored.
|
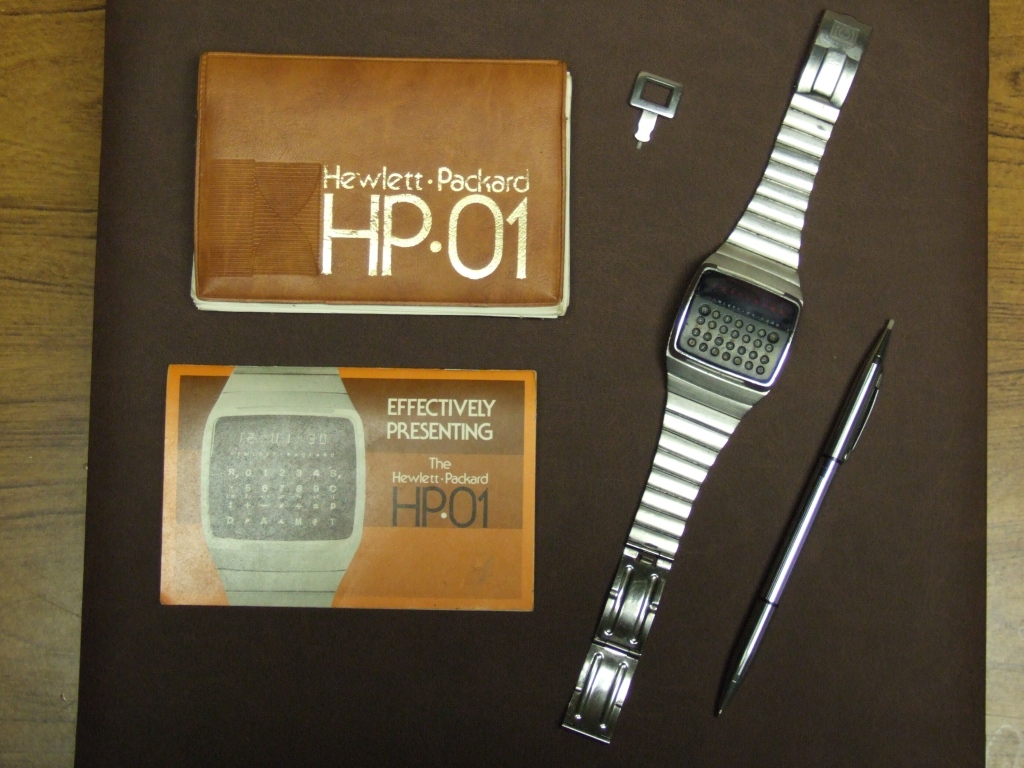
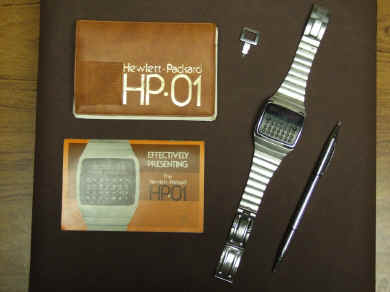
| Both of my HP-01's were purchased though ebay. I paid too much for both of
them, but they met my target price, and I knew I could restore them for
less than the cost of buying one in better condition. The gold watch arrived in the most
awful packaging I have ever seen, sparse toilet paper wrapping in a single
box. Surprisingly, the watch was working and in pretty good physical
condition other than a lot of small scratches. Fortunately, there were no
problems with the glass. The stainless model arrived well packed, but in
poor condition. The glass was chipped, and everything was well scratched
and scraped; the stainless one had seen regular use over a long period of
time. The stainless came with a case and accessories, and I was happy to
get them, though I was disappointed with the overall condition.
|
|
HP-01 Restoration
Since I had never worked on an HP-01 before, the first
part of this job was to figure out the disassembly. This got easier when I
picked up a replacement battery pack with built-in cover remover! Getting
beyond the back cover was a little more tricky though. Since I did not
have the custom housing tools from HP, I had to improvise with a pair of
long needle nose pliers. I took an old pair, bent them and ground
the tips down for a perfect fit.
Several notes of caution are in order here: This is a very
old, very delicate, and expensive collectable watch. If you are not a
skilled technician or at the very least, a skilled jeweler, don't do this!
Also, work at a static free work station is mandatory!! (Skip this step at
your own peril!) Also, the rear cover must be removed with a cover
tool, NOT needle-nose pliers--damage to the piezoelectric buzzer can
result, not to mention the pretty rear cover.
Finally, be very careful not to damage the water tight
gaskets if you do not have replacements available! There are two of them,
one just under the rear cover, the other between the two housing sections.
|

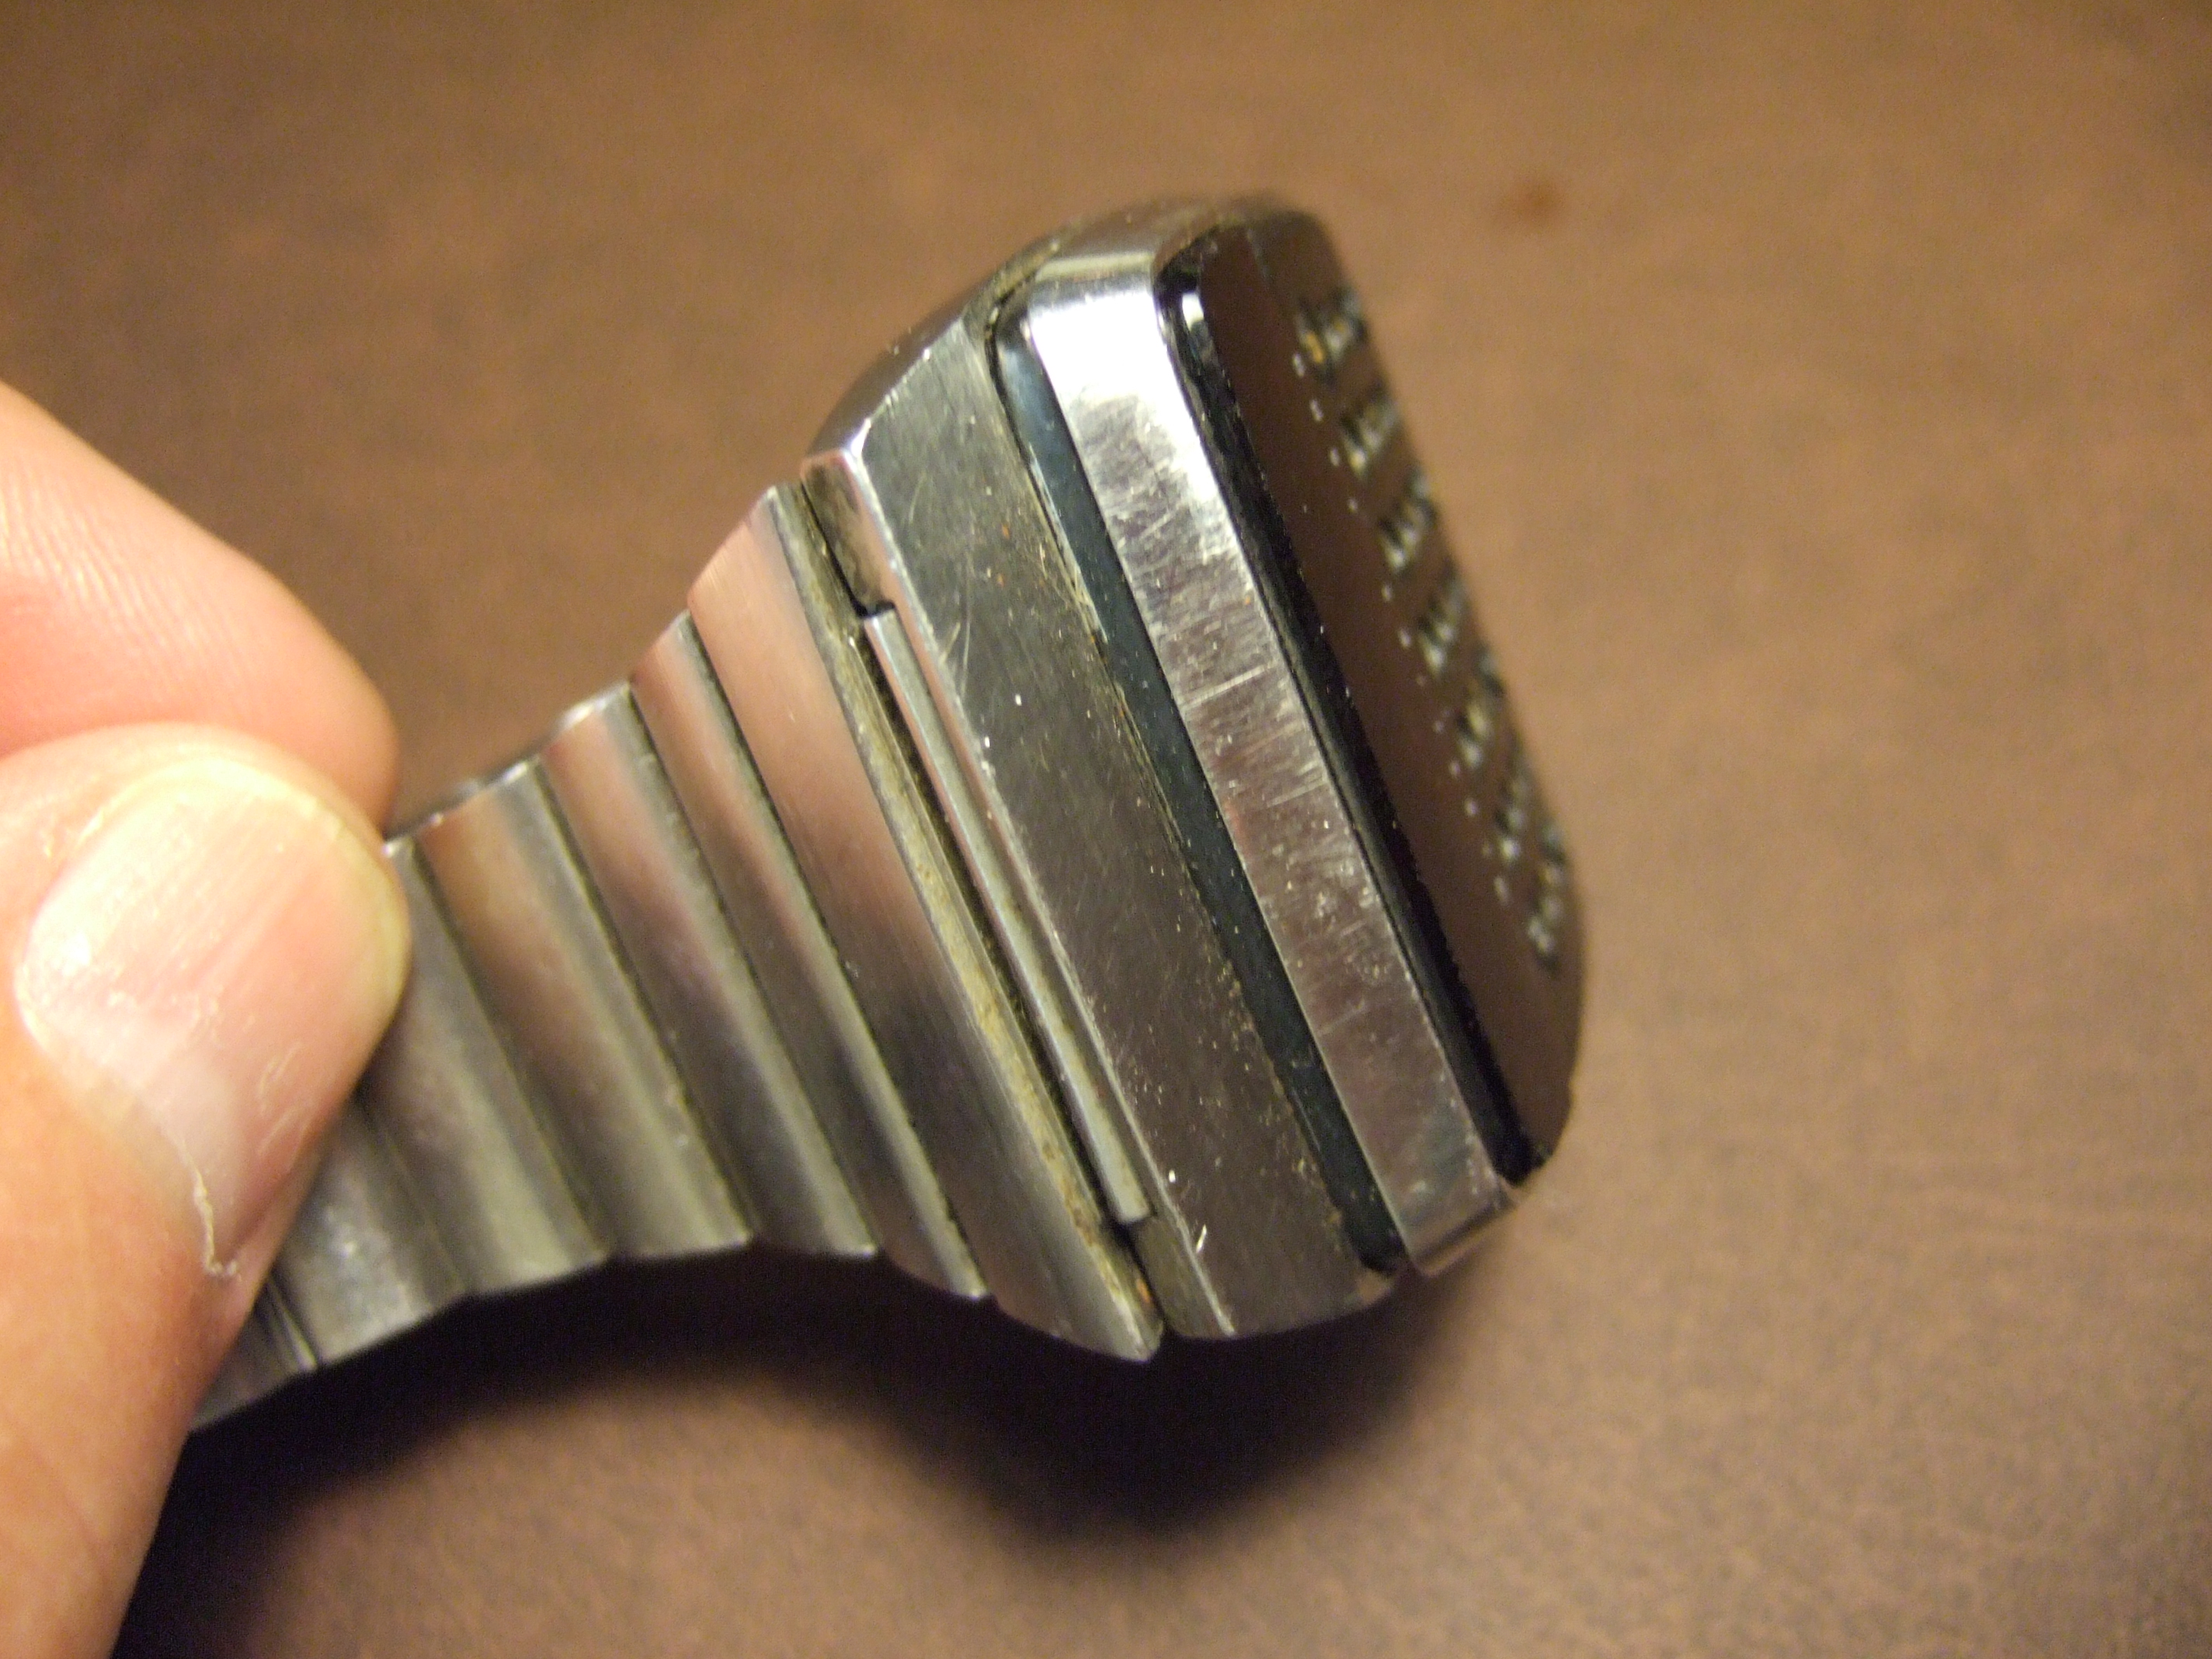
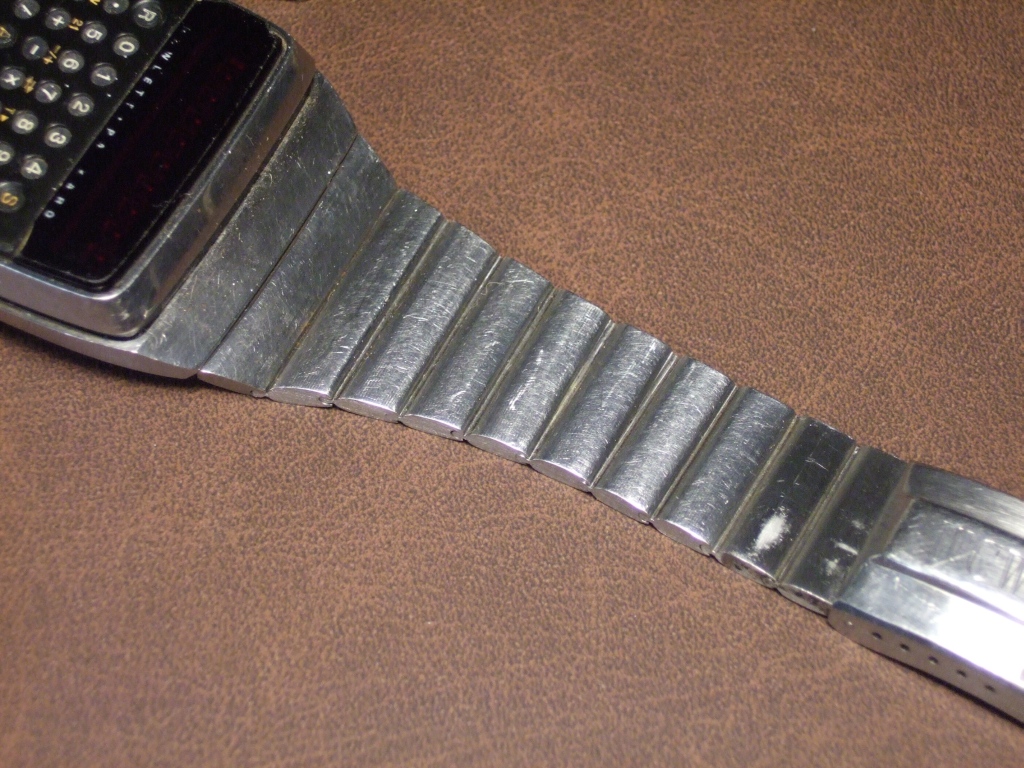
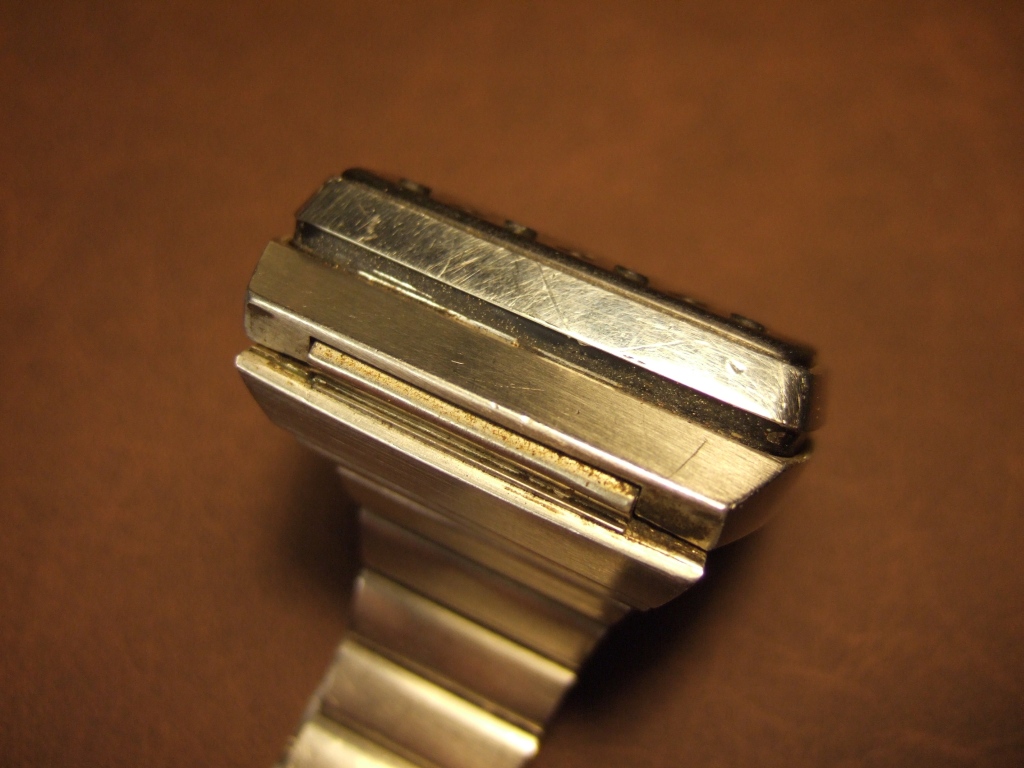
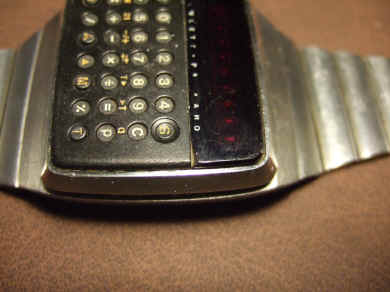
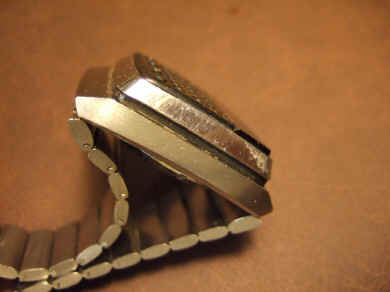
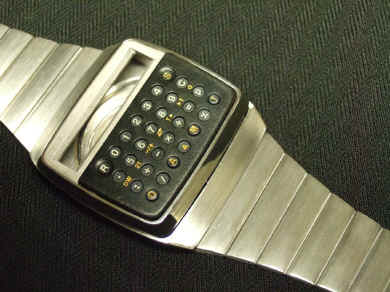
Stainless steel model, all scratched up
|
|
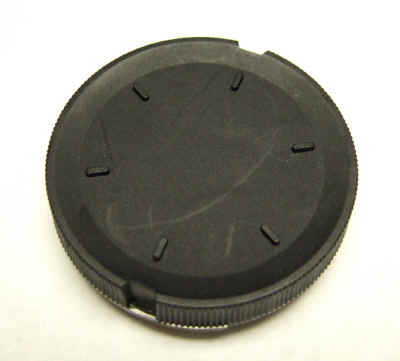
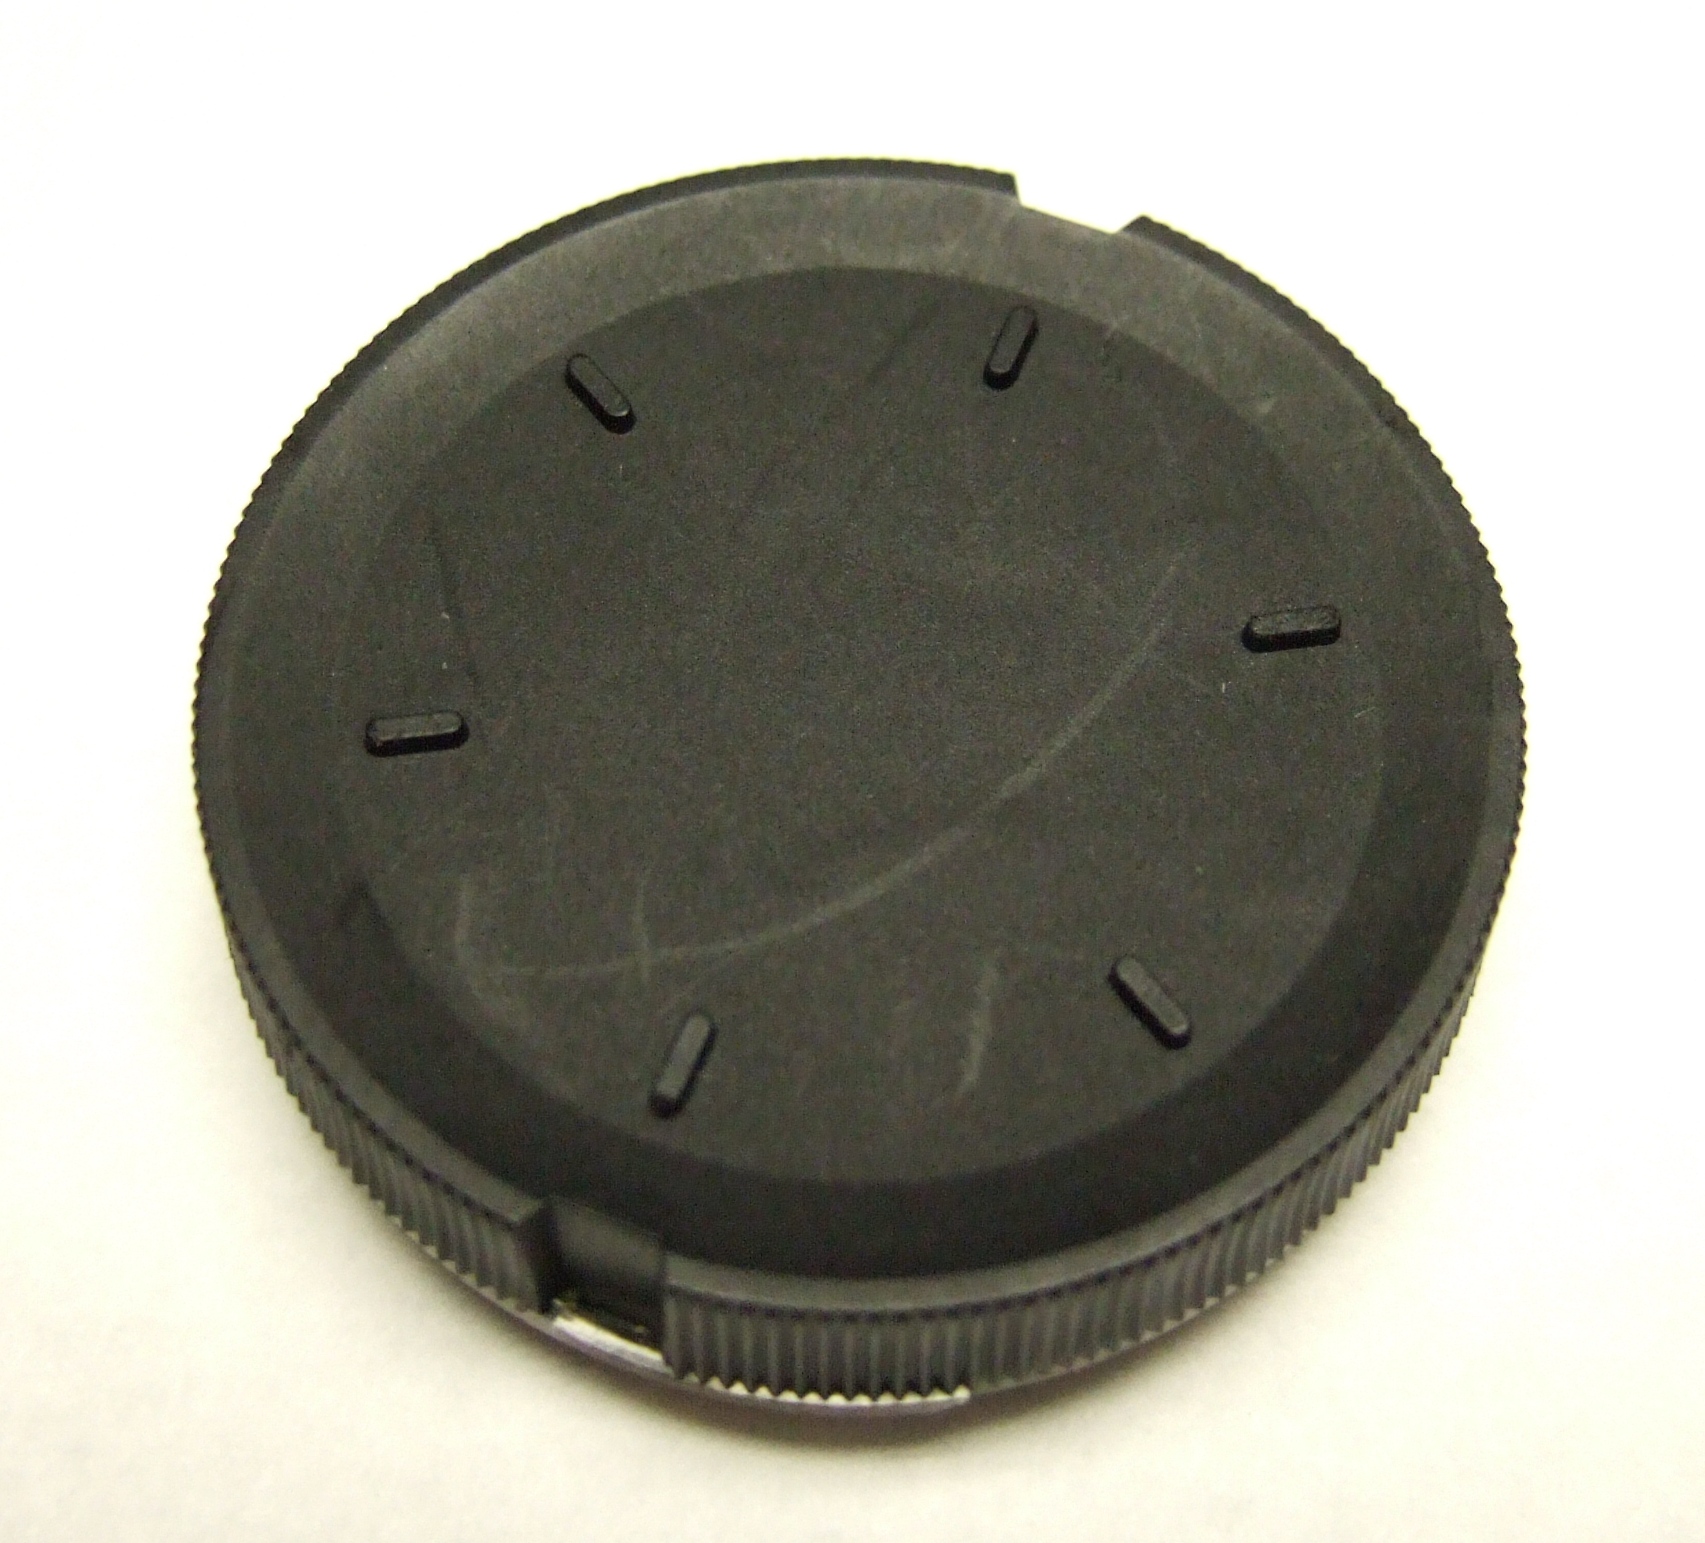
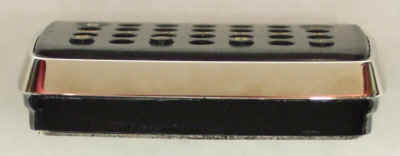
Cover removal tool
|

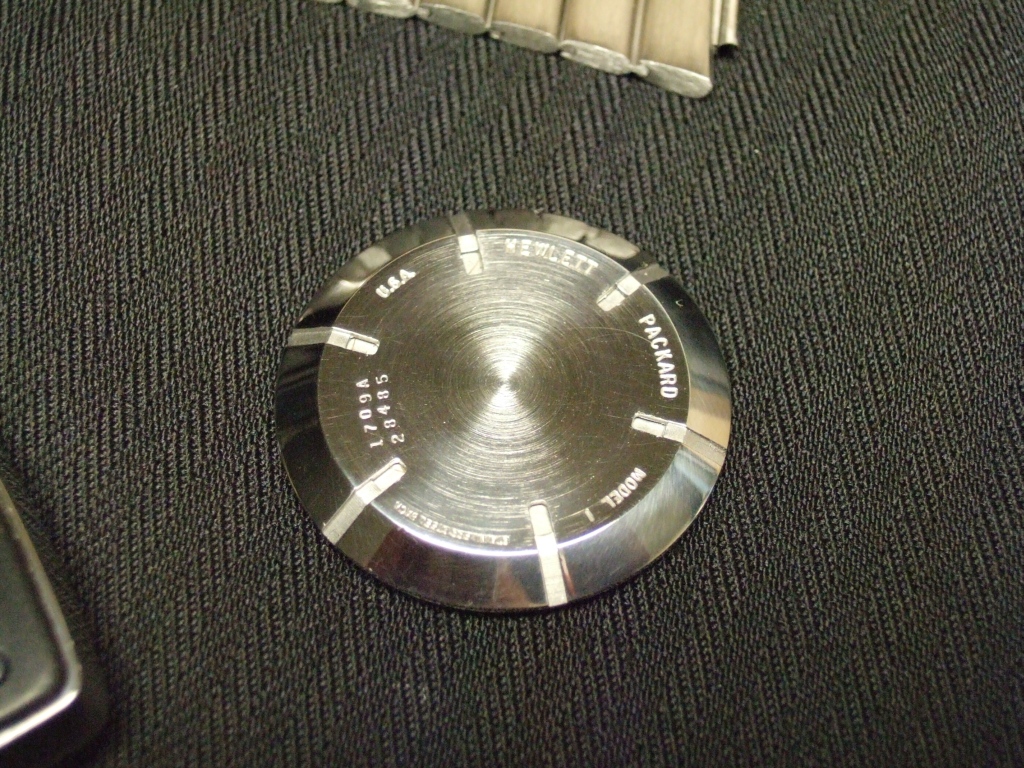
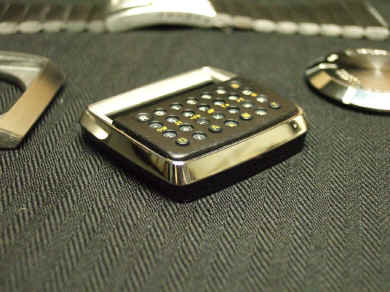
Cover
|
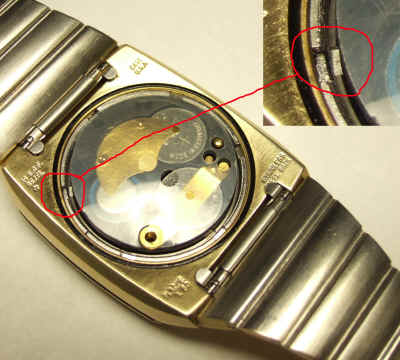
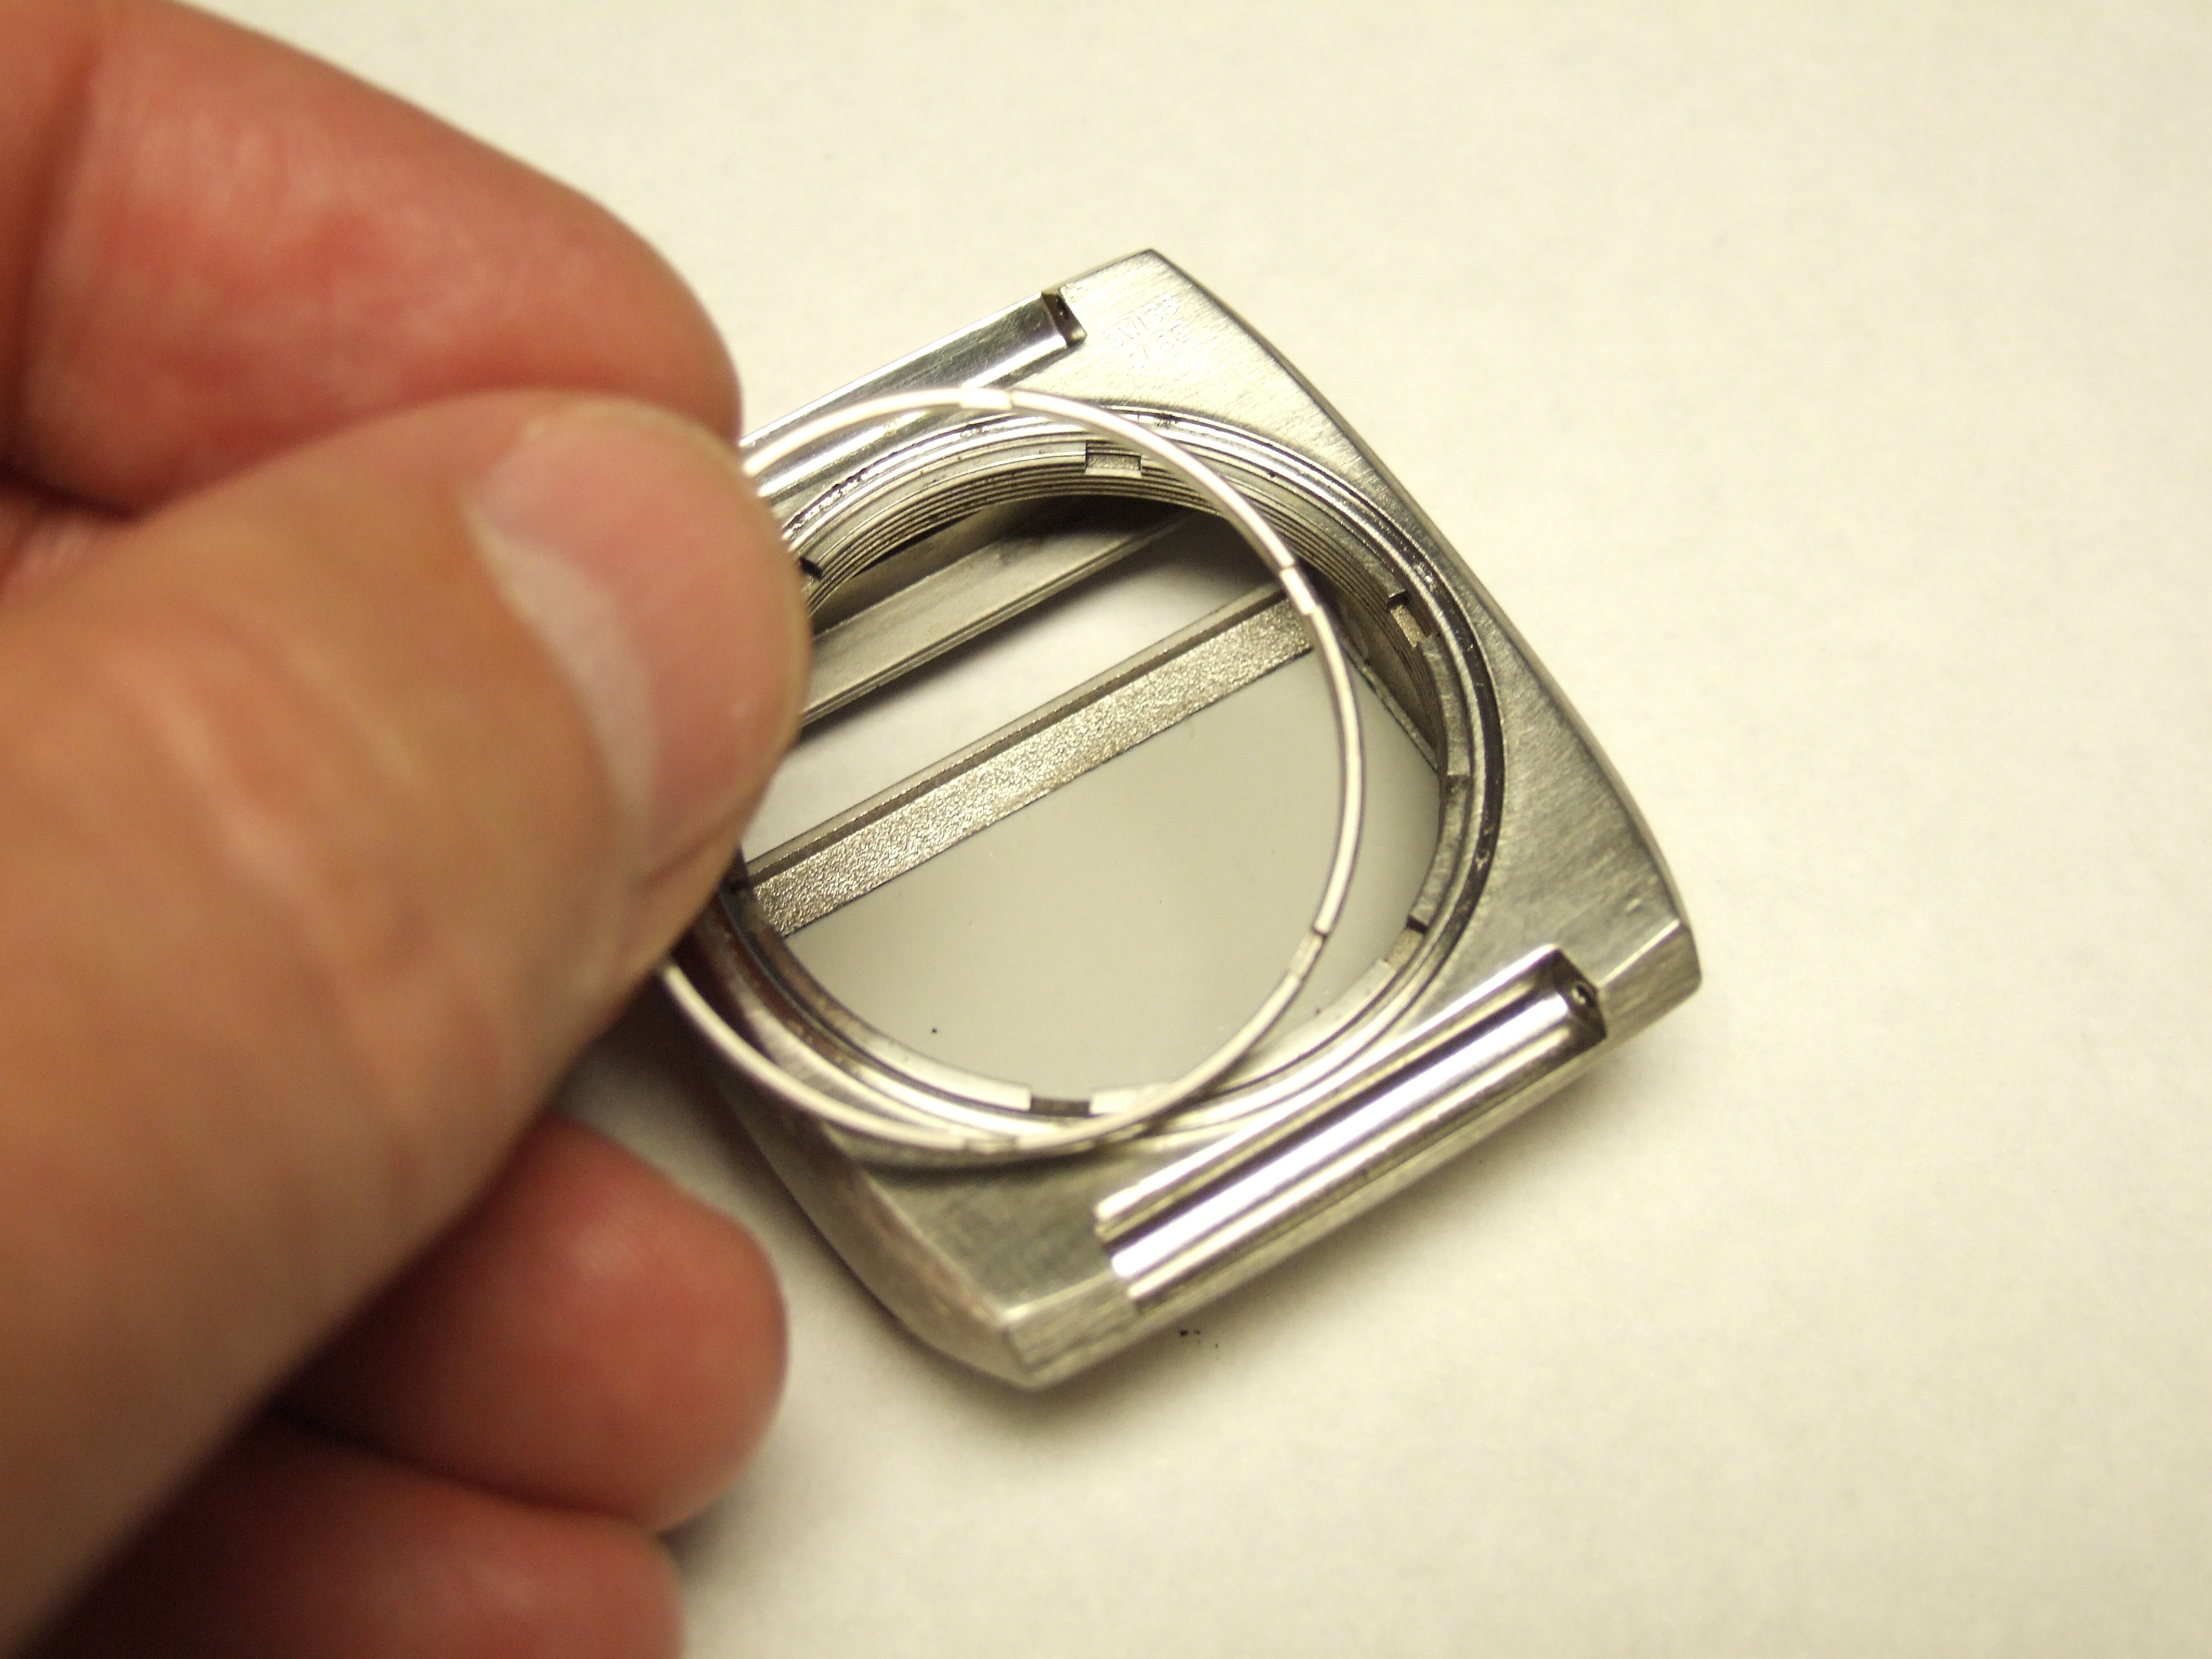
Slotted rings & close-up
|

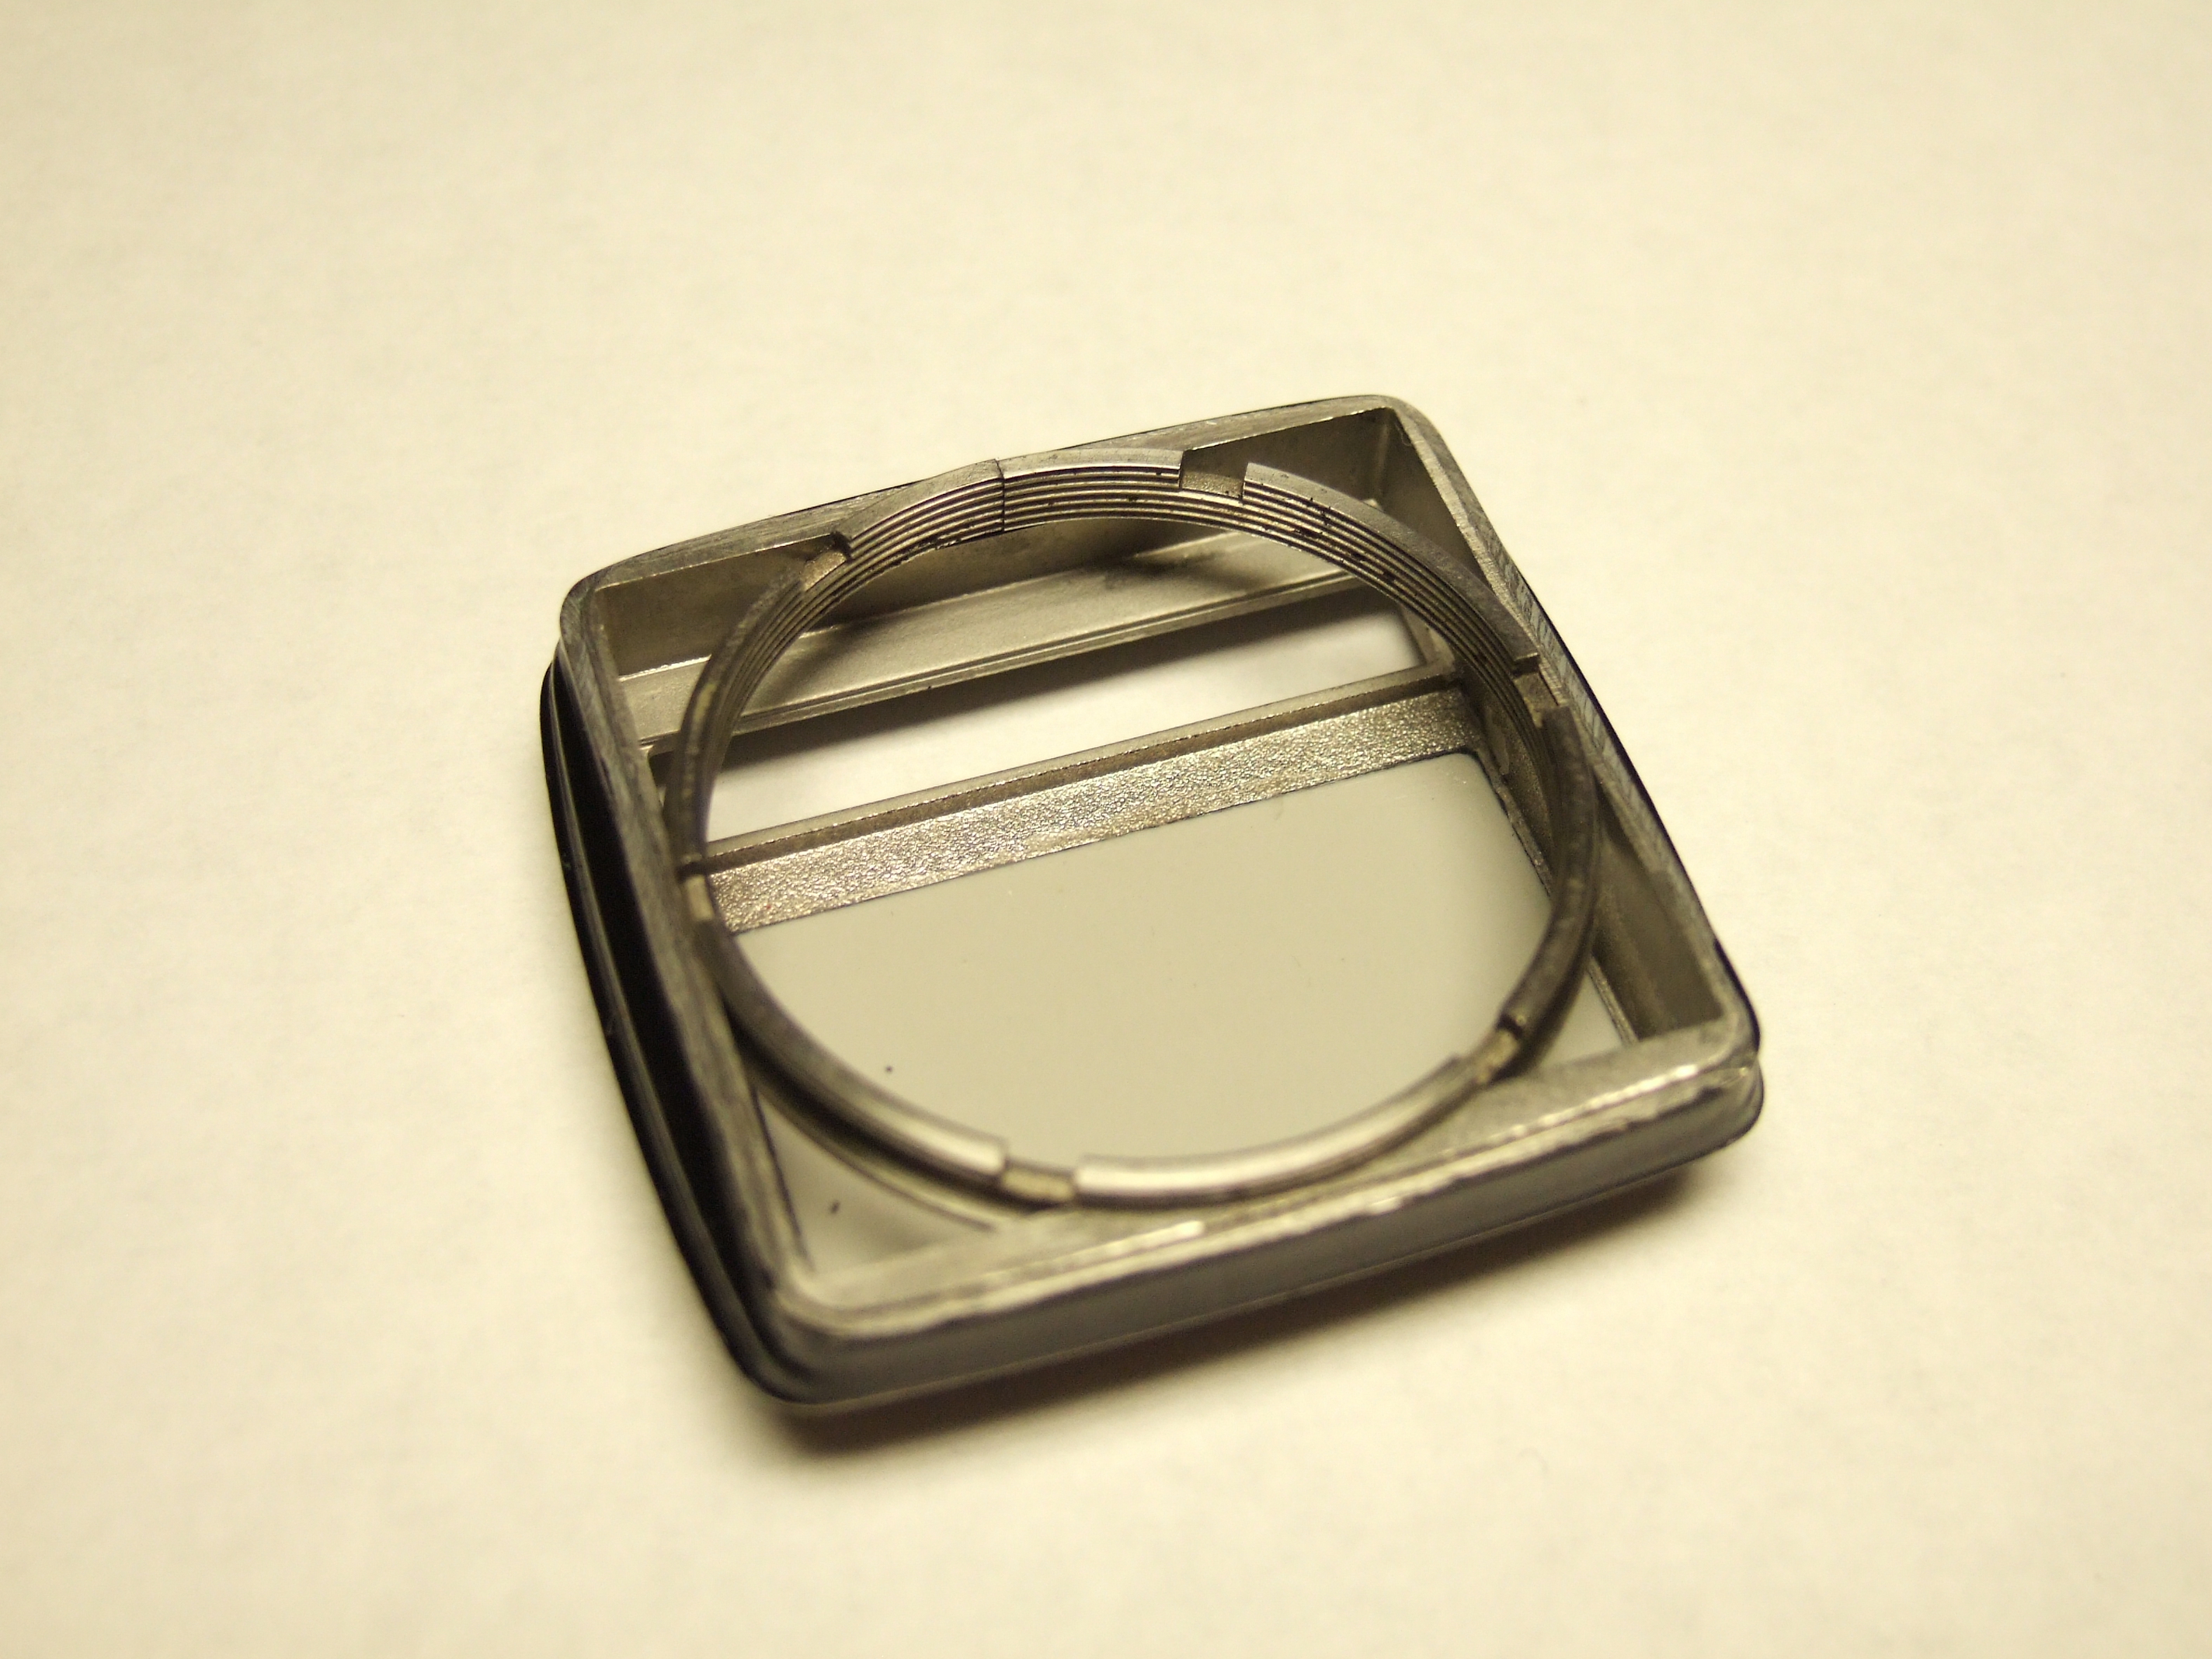
Inner ring removed
|
|
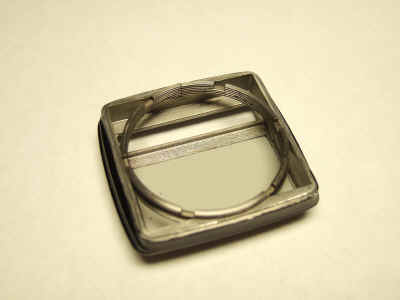
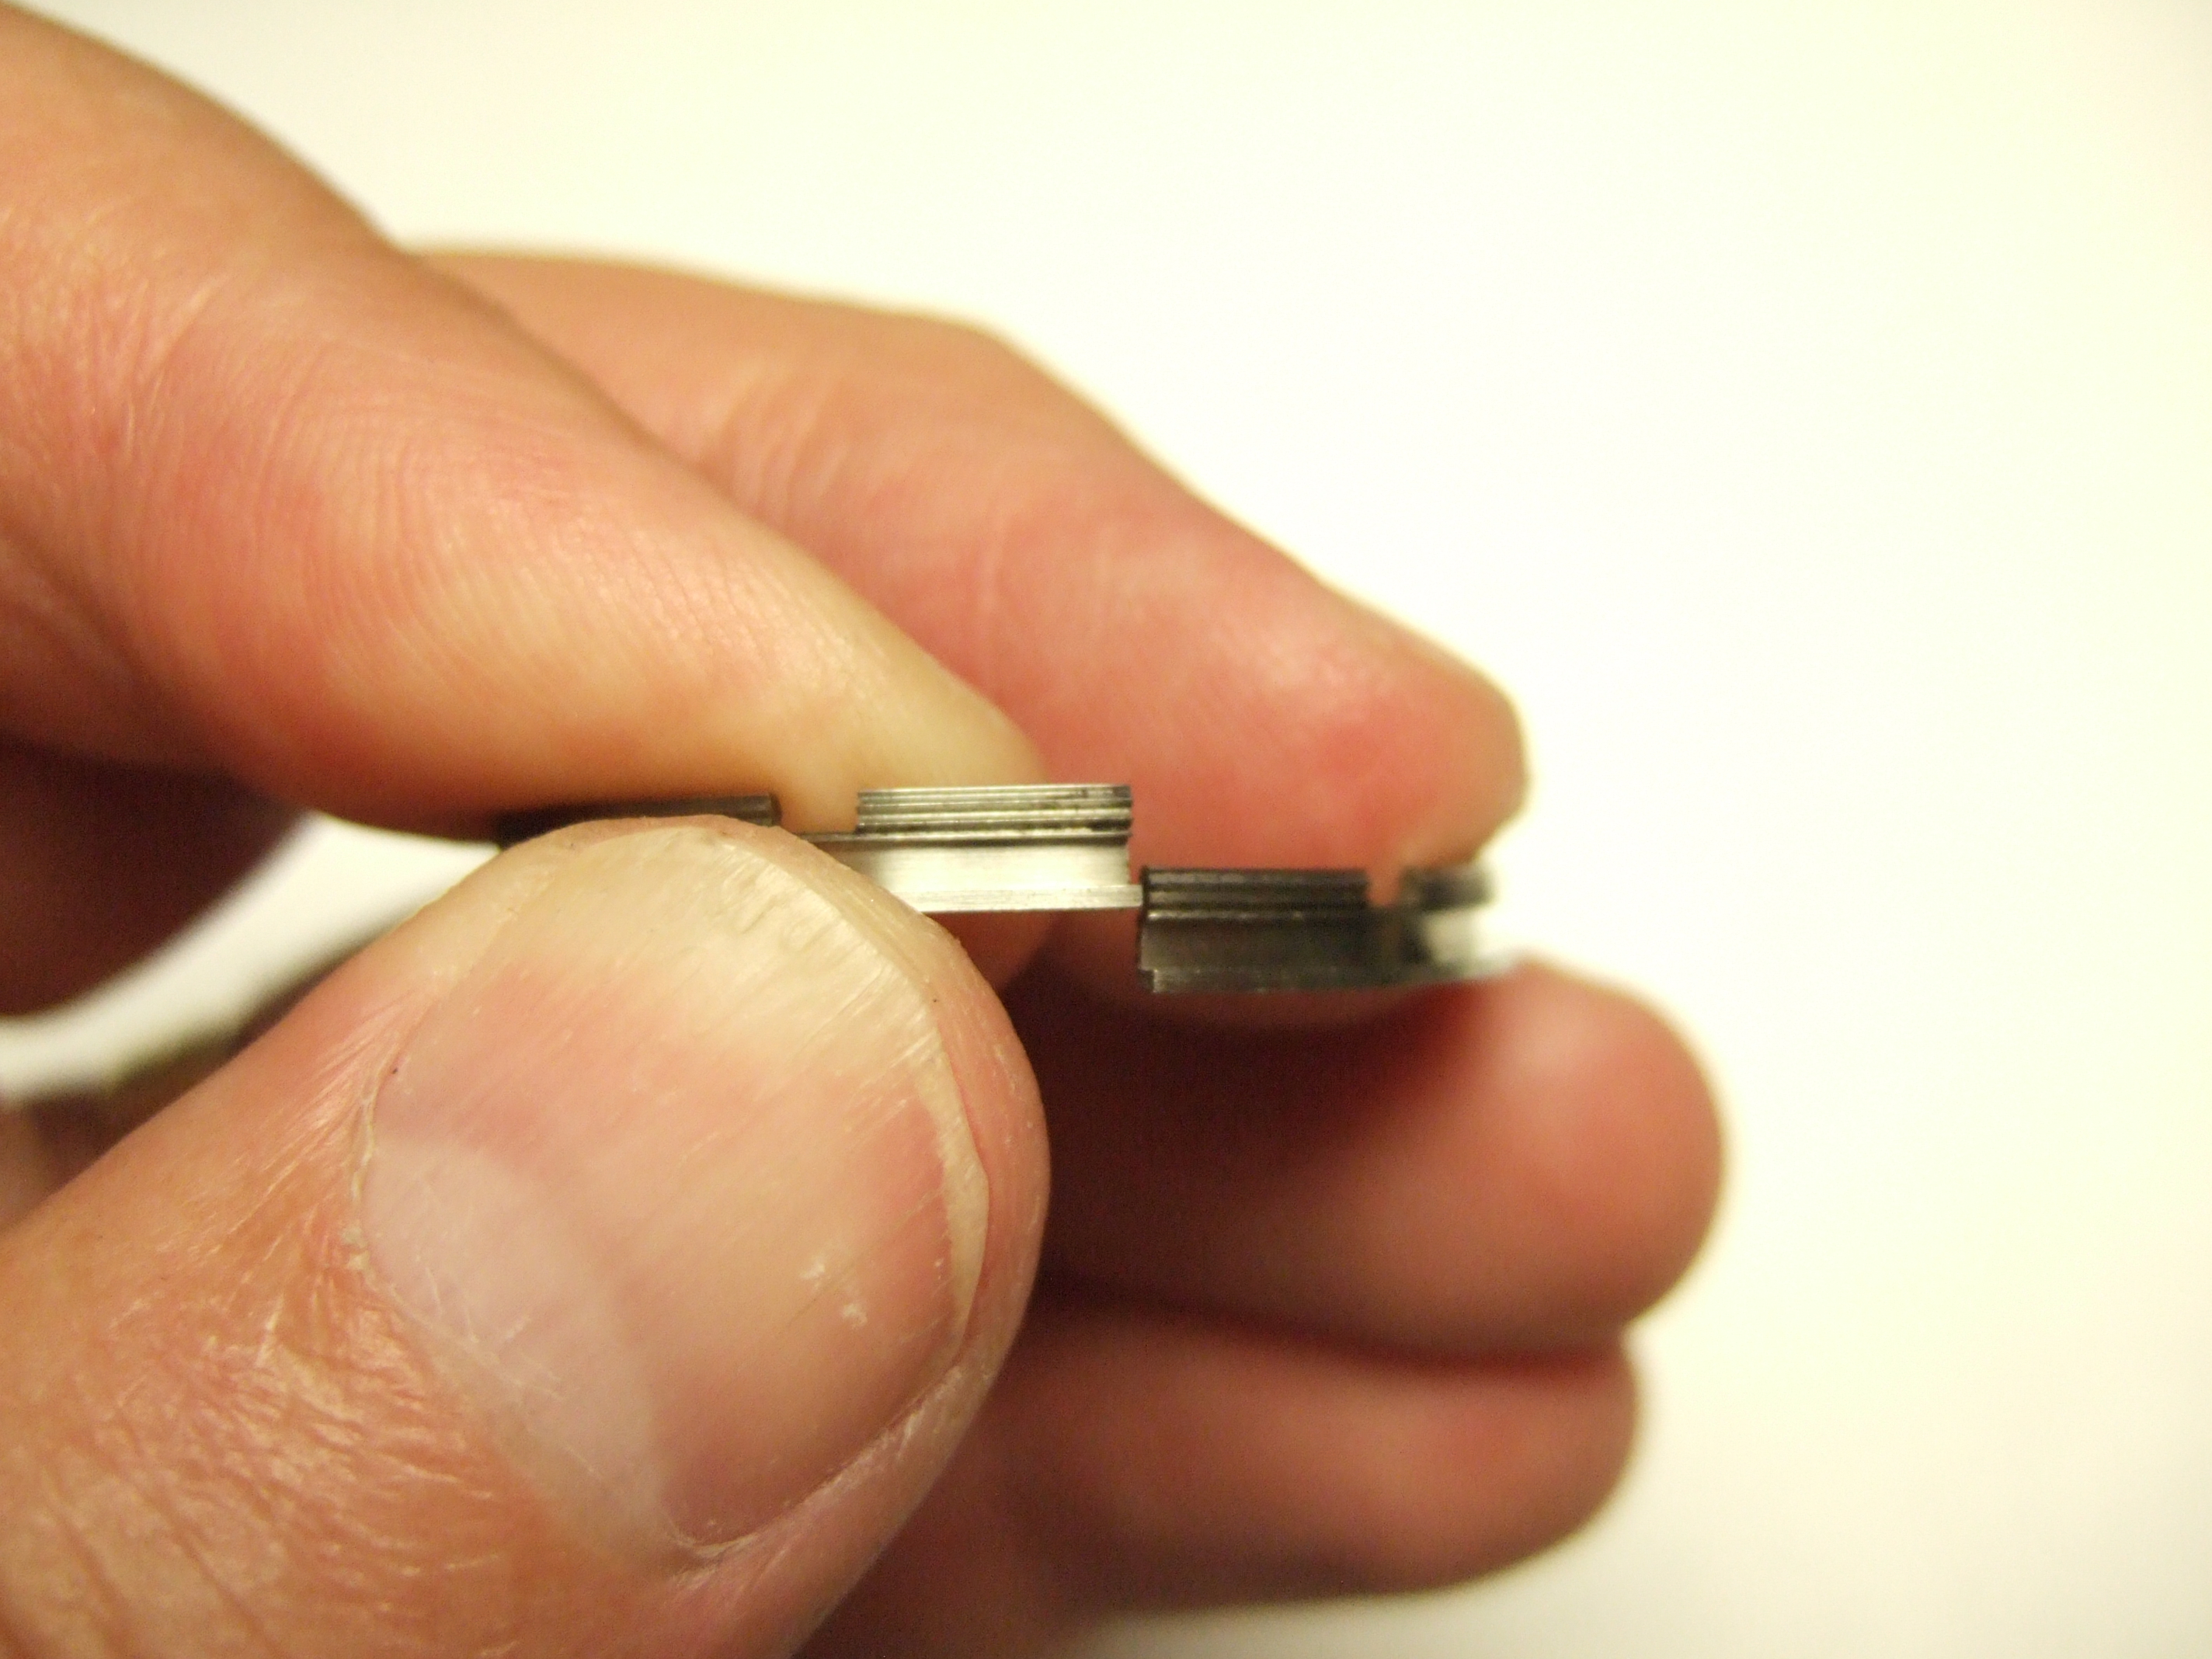
Split ring, in front housing
|

Close up of split ring
|
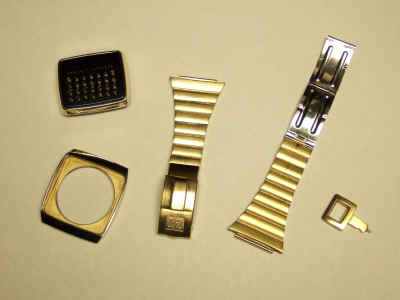
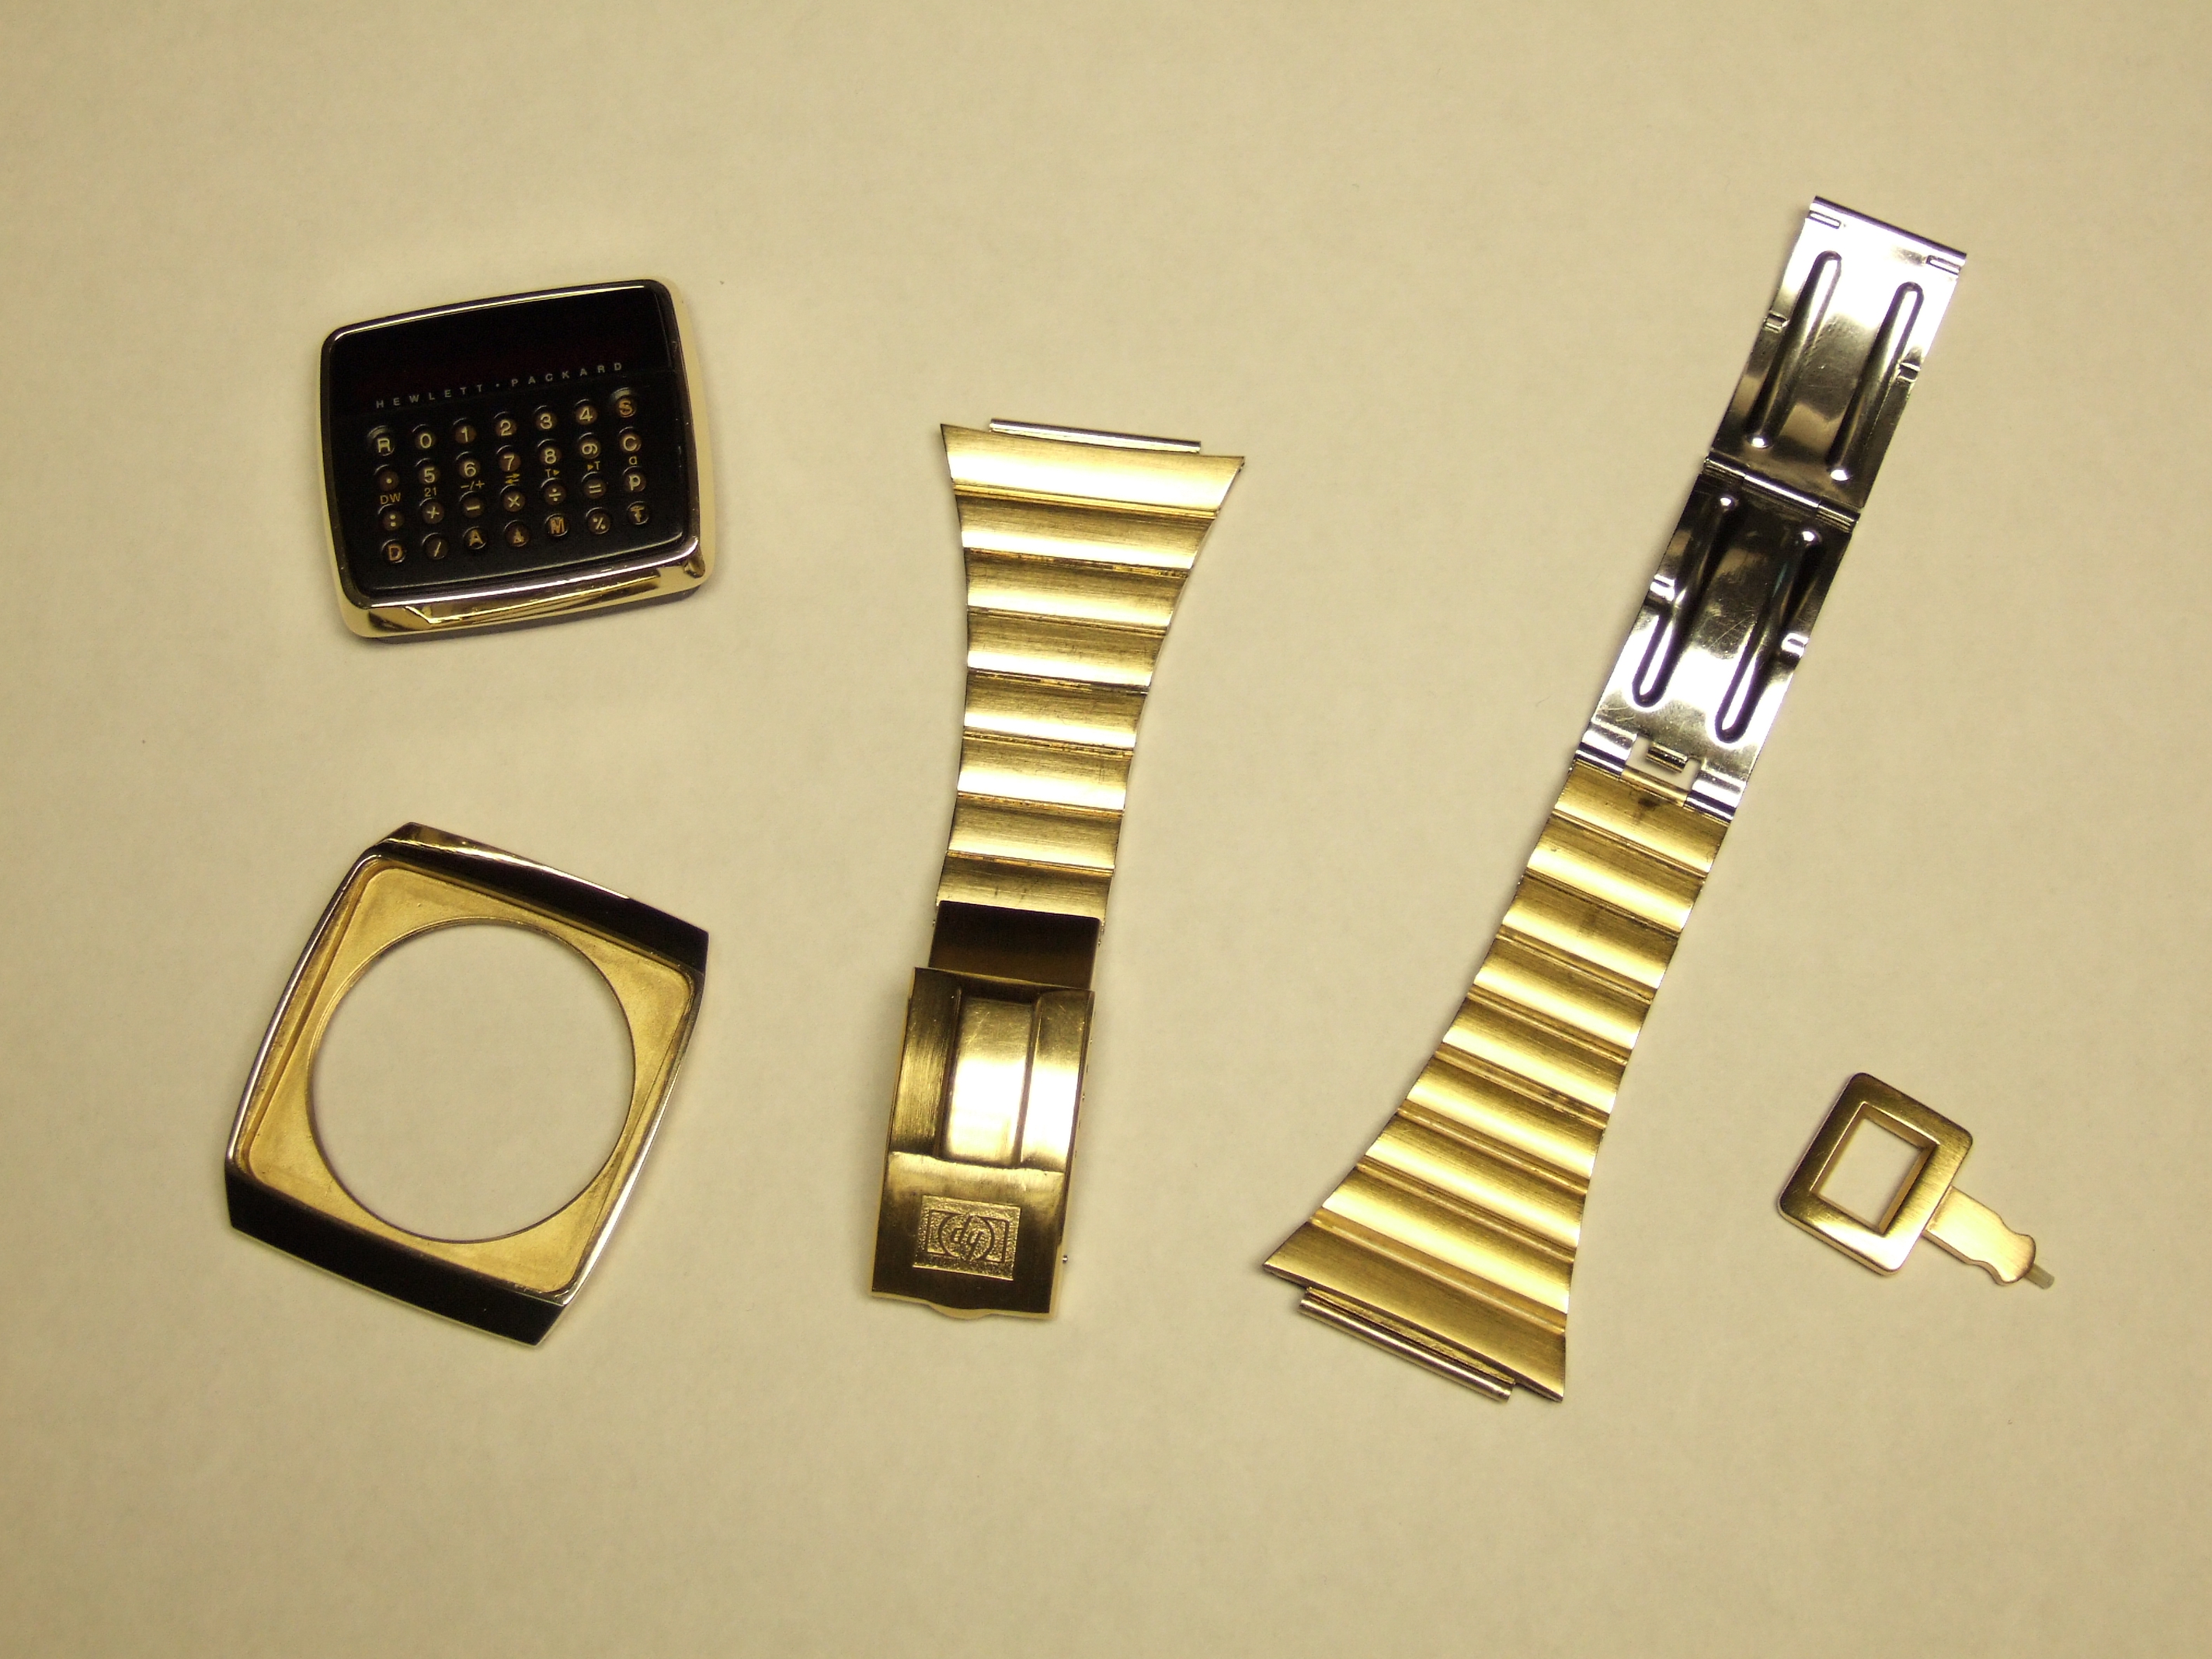
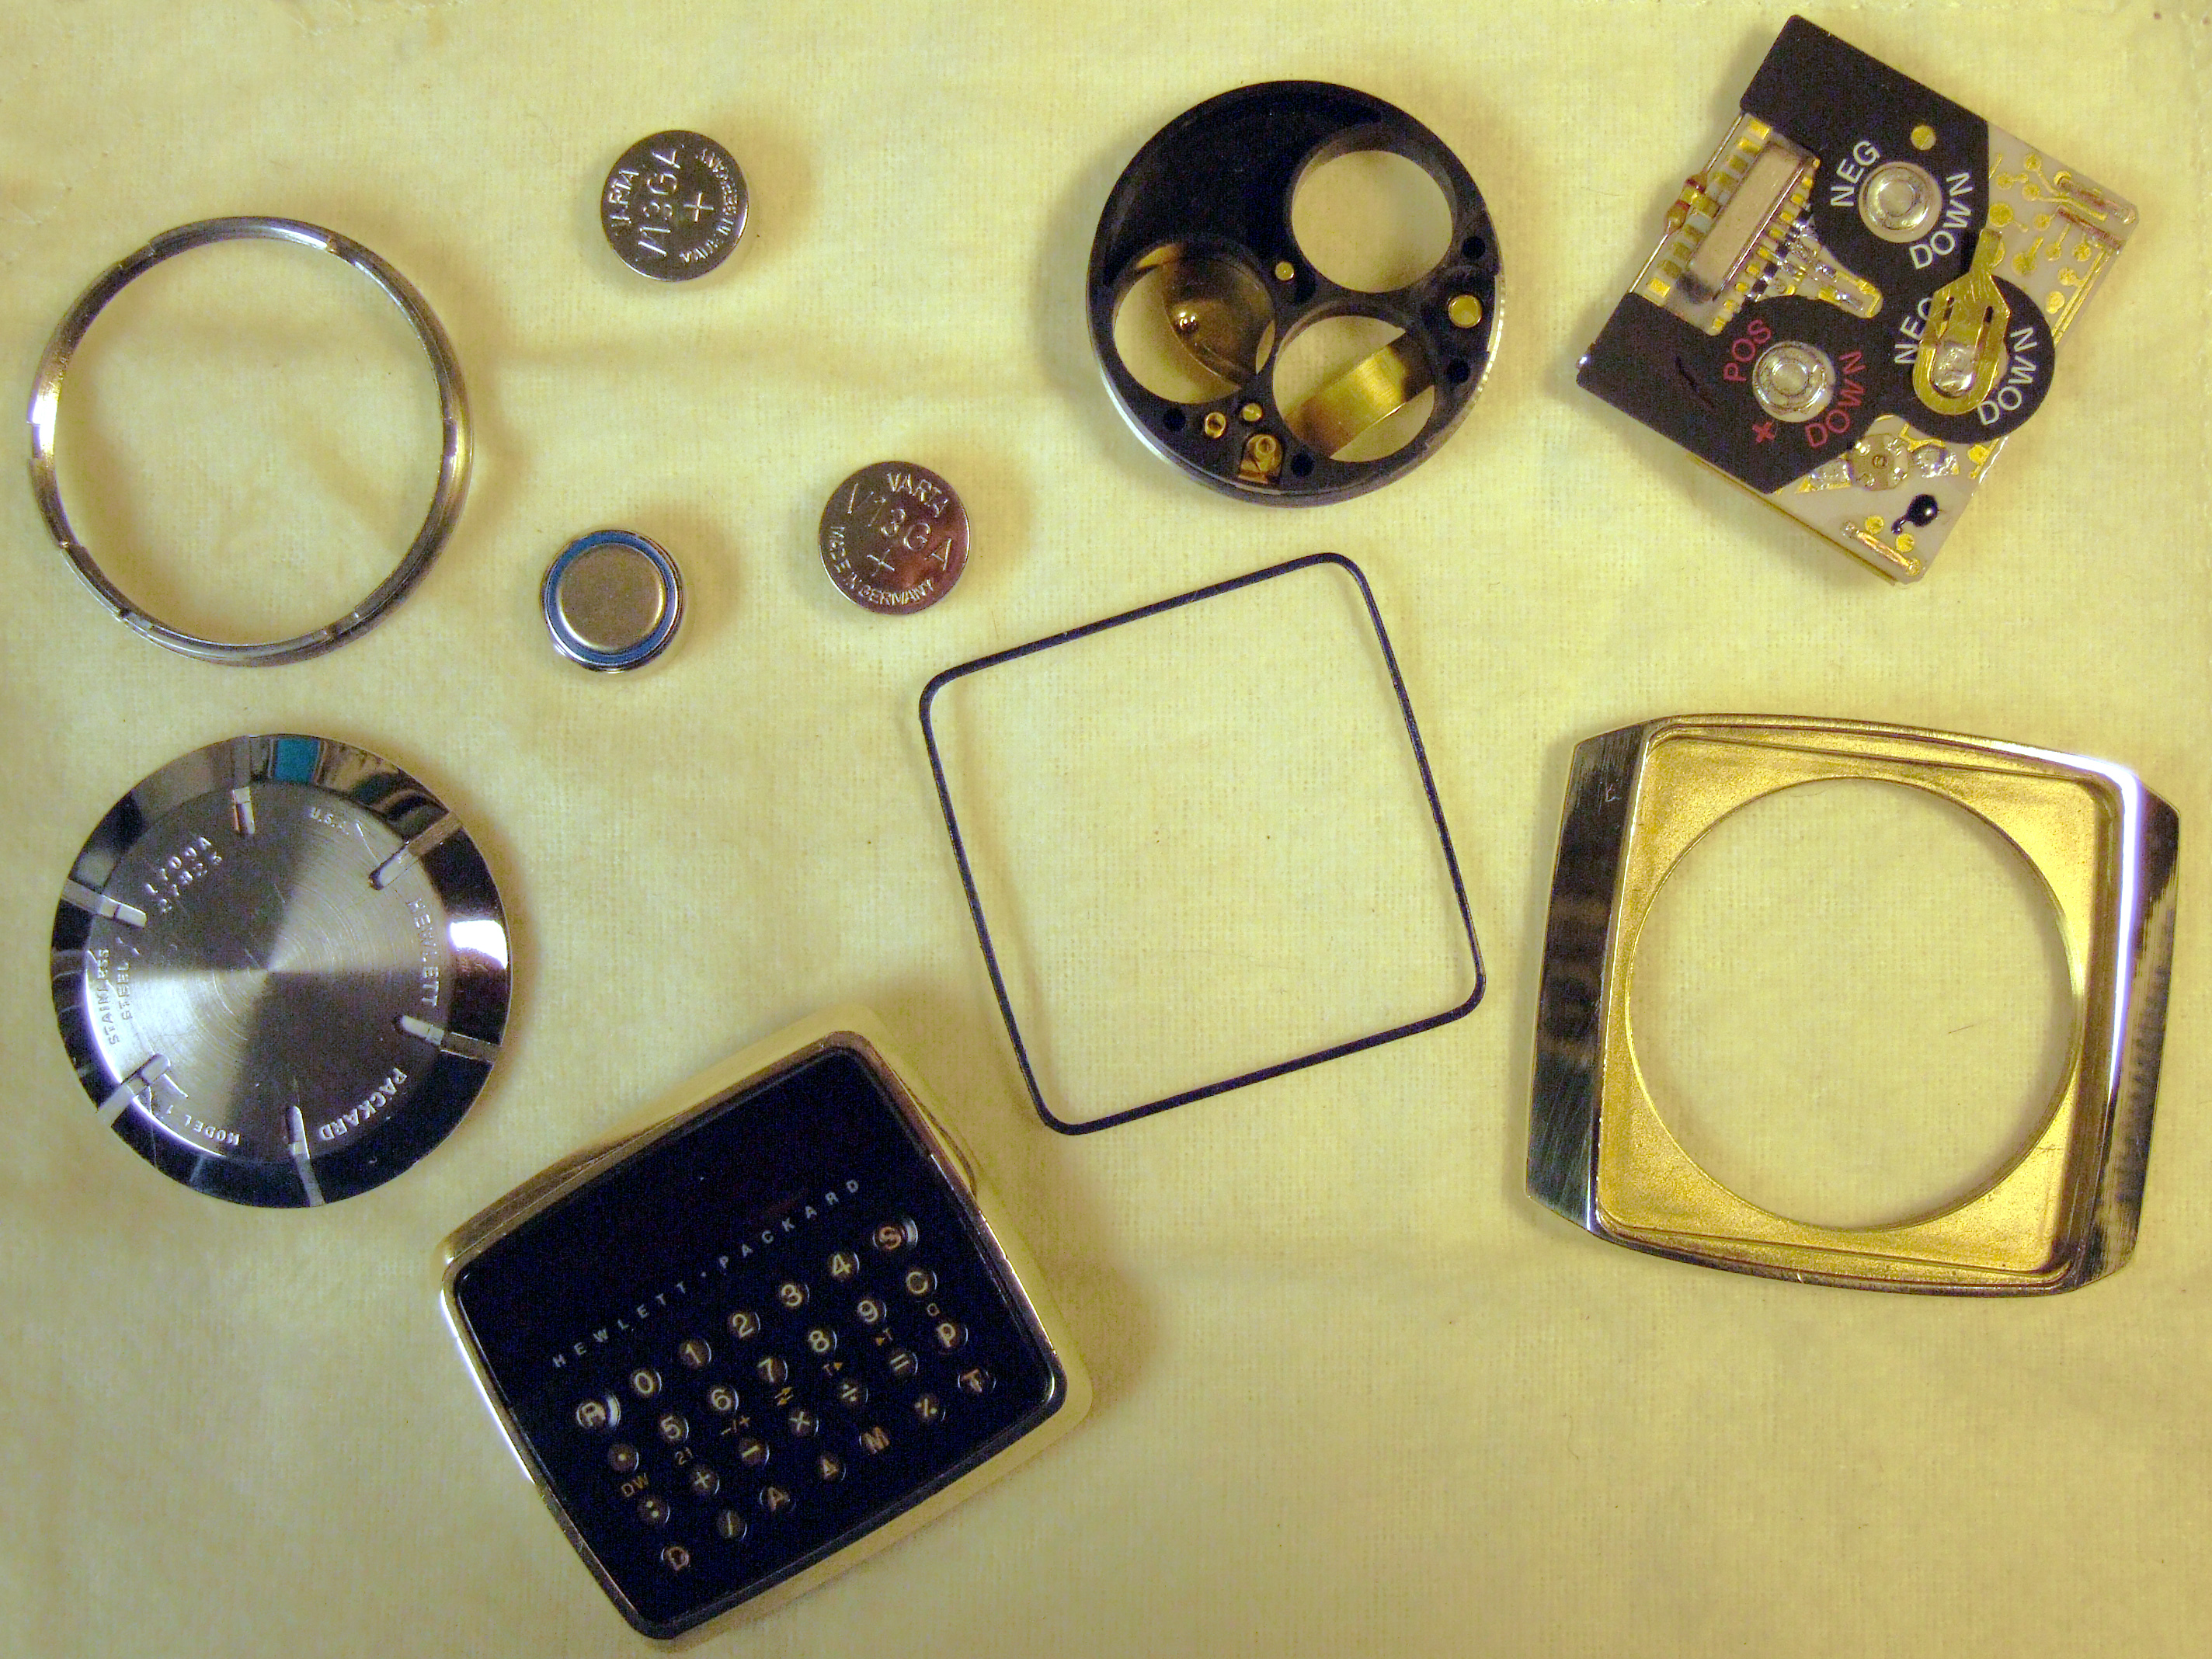
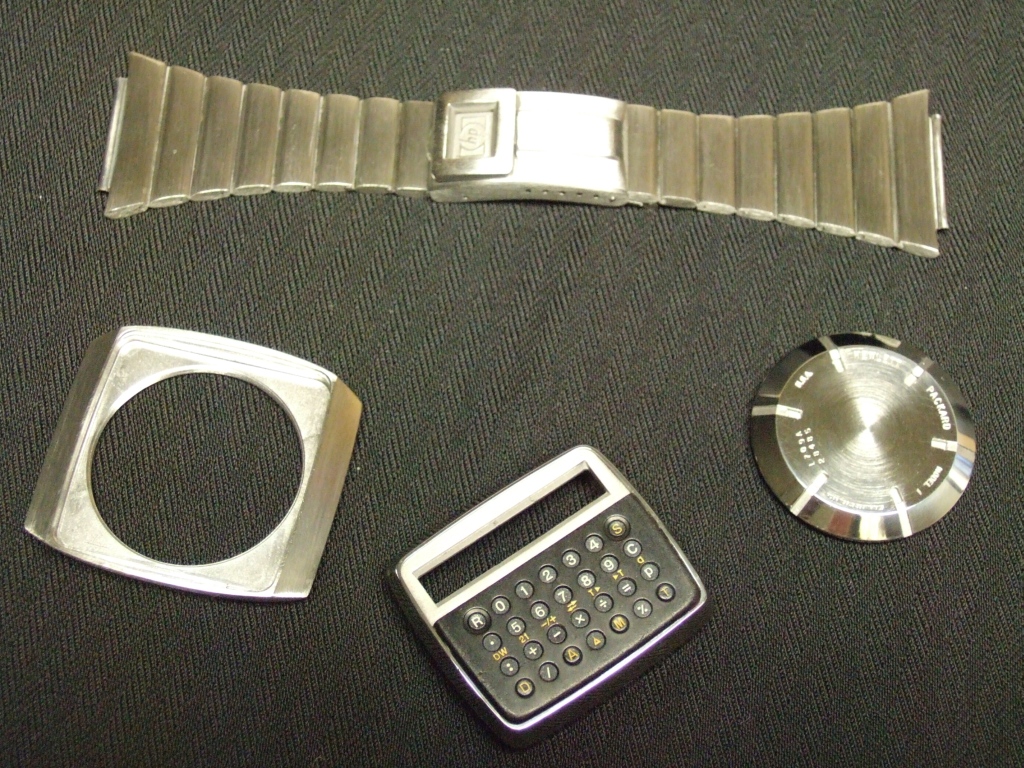
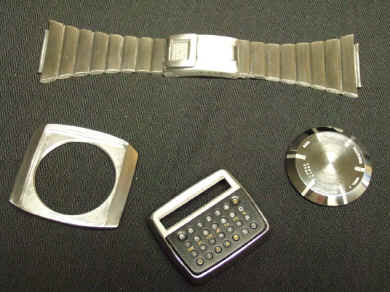
Shiny parts, cleaned and polished.
|
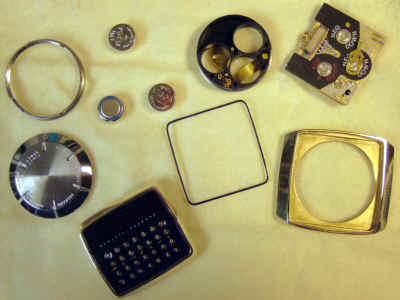
Watch bits, cleaned and polished
|
|
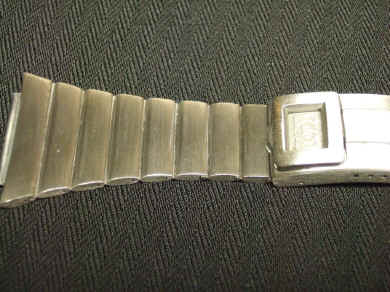
Disassembly
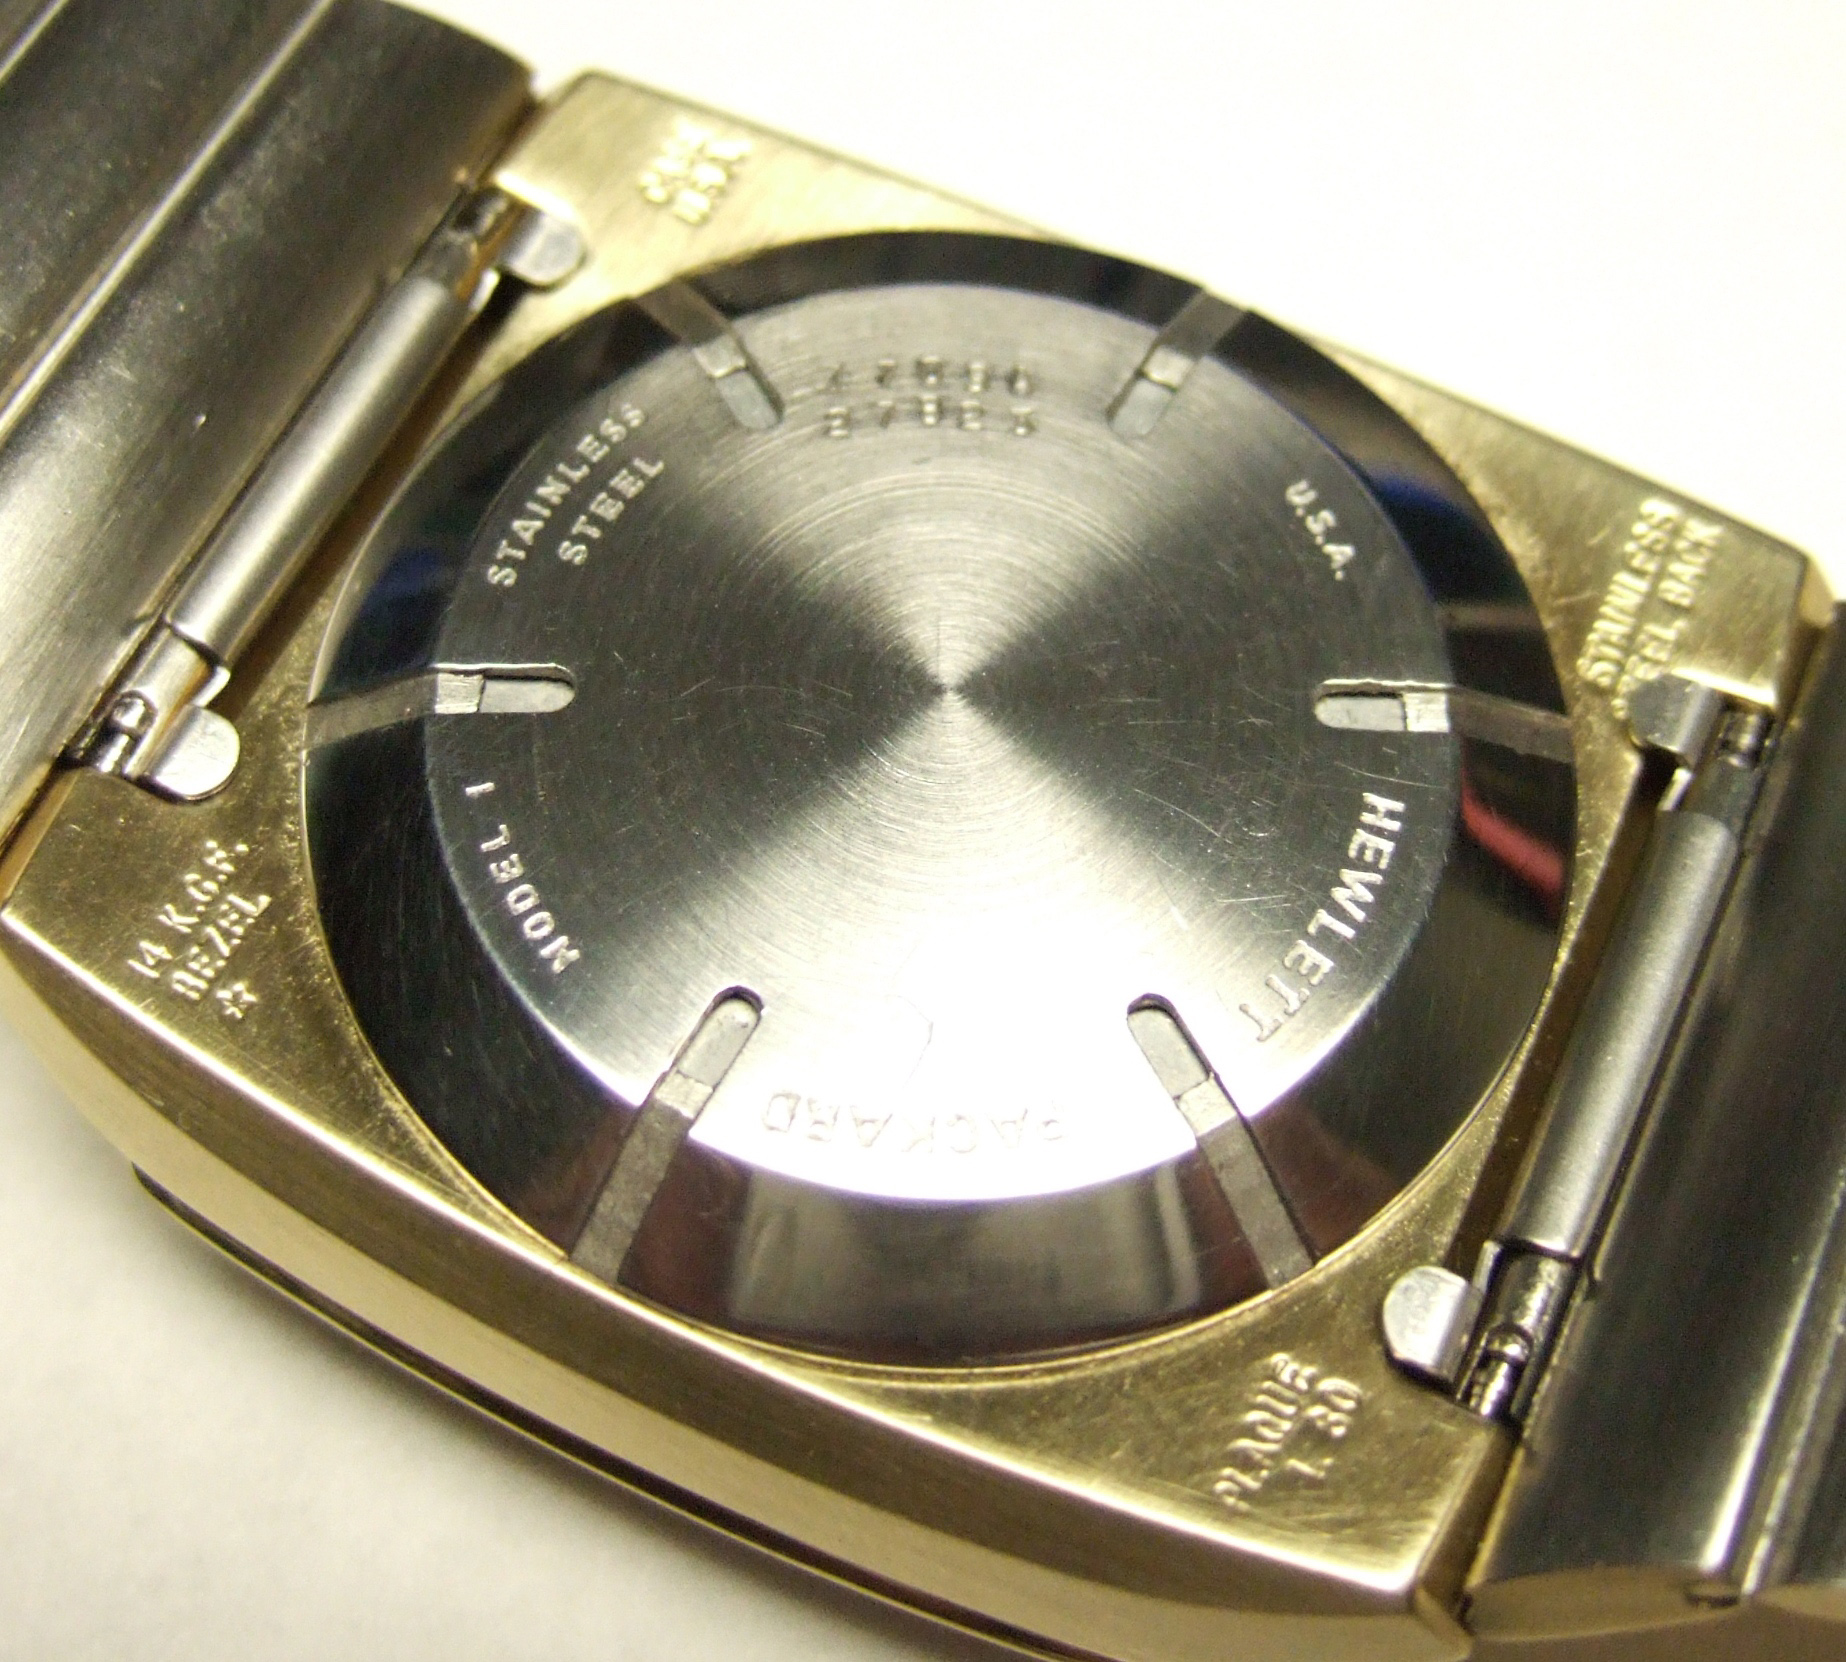
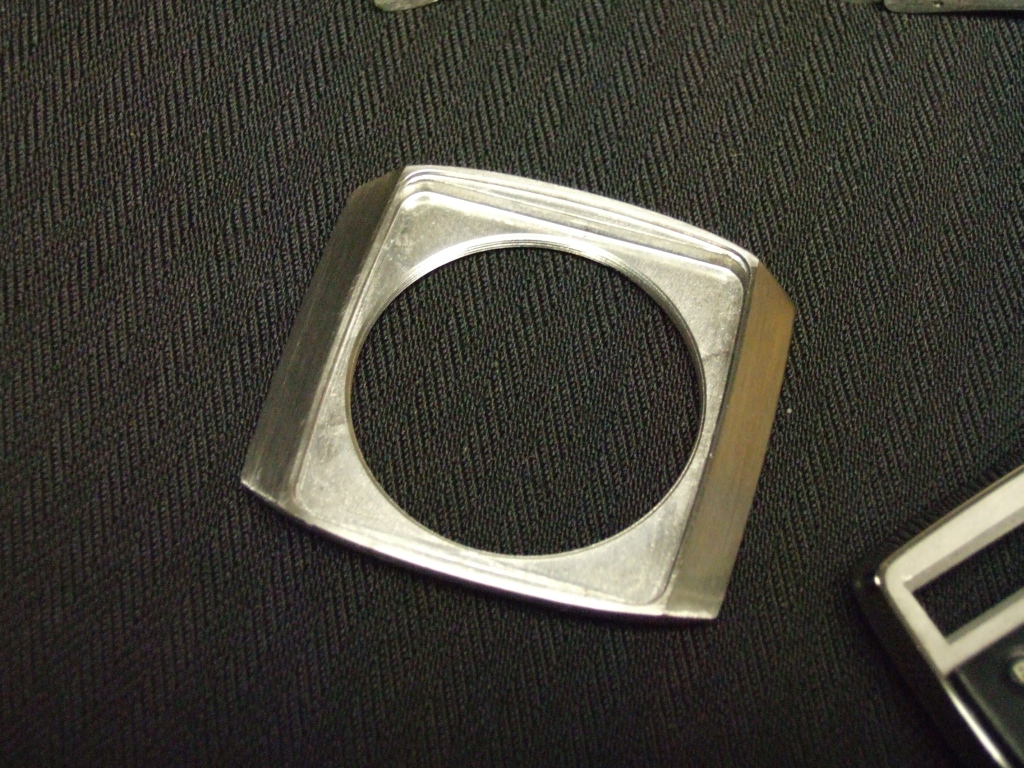
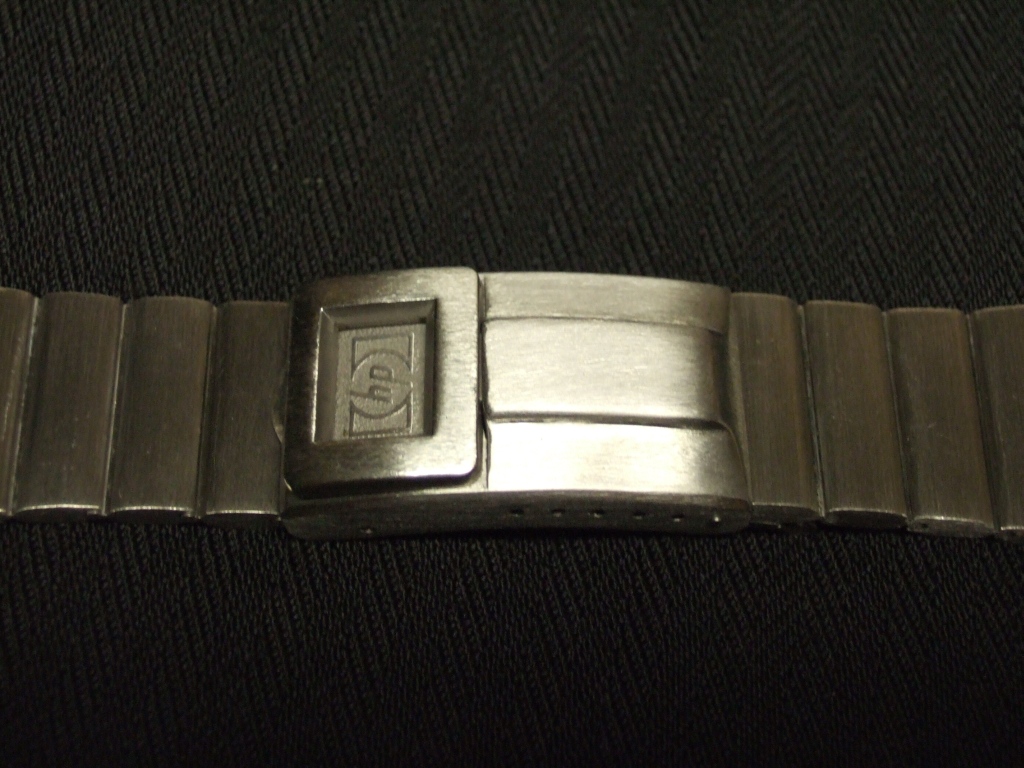
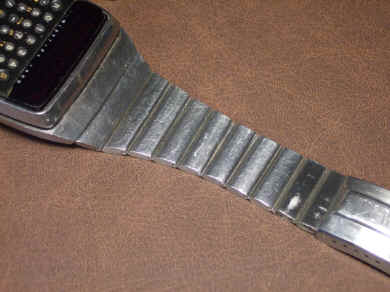
Ready? Here's how it goes: Remove the rear cover, batteries, and watch
band. The watch band is fairly standard, but notice the small tabs at each
corner. All of mine were bent out of shape--they are meant to lay flat
against the bottom housing as can be seen in my 'cover' photo above.
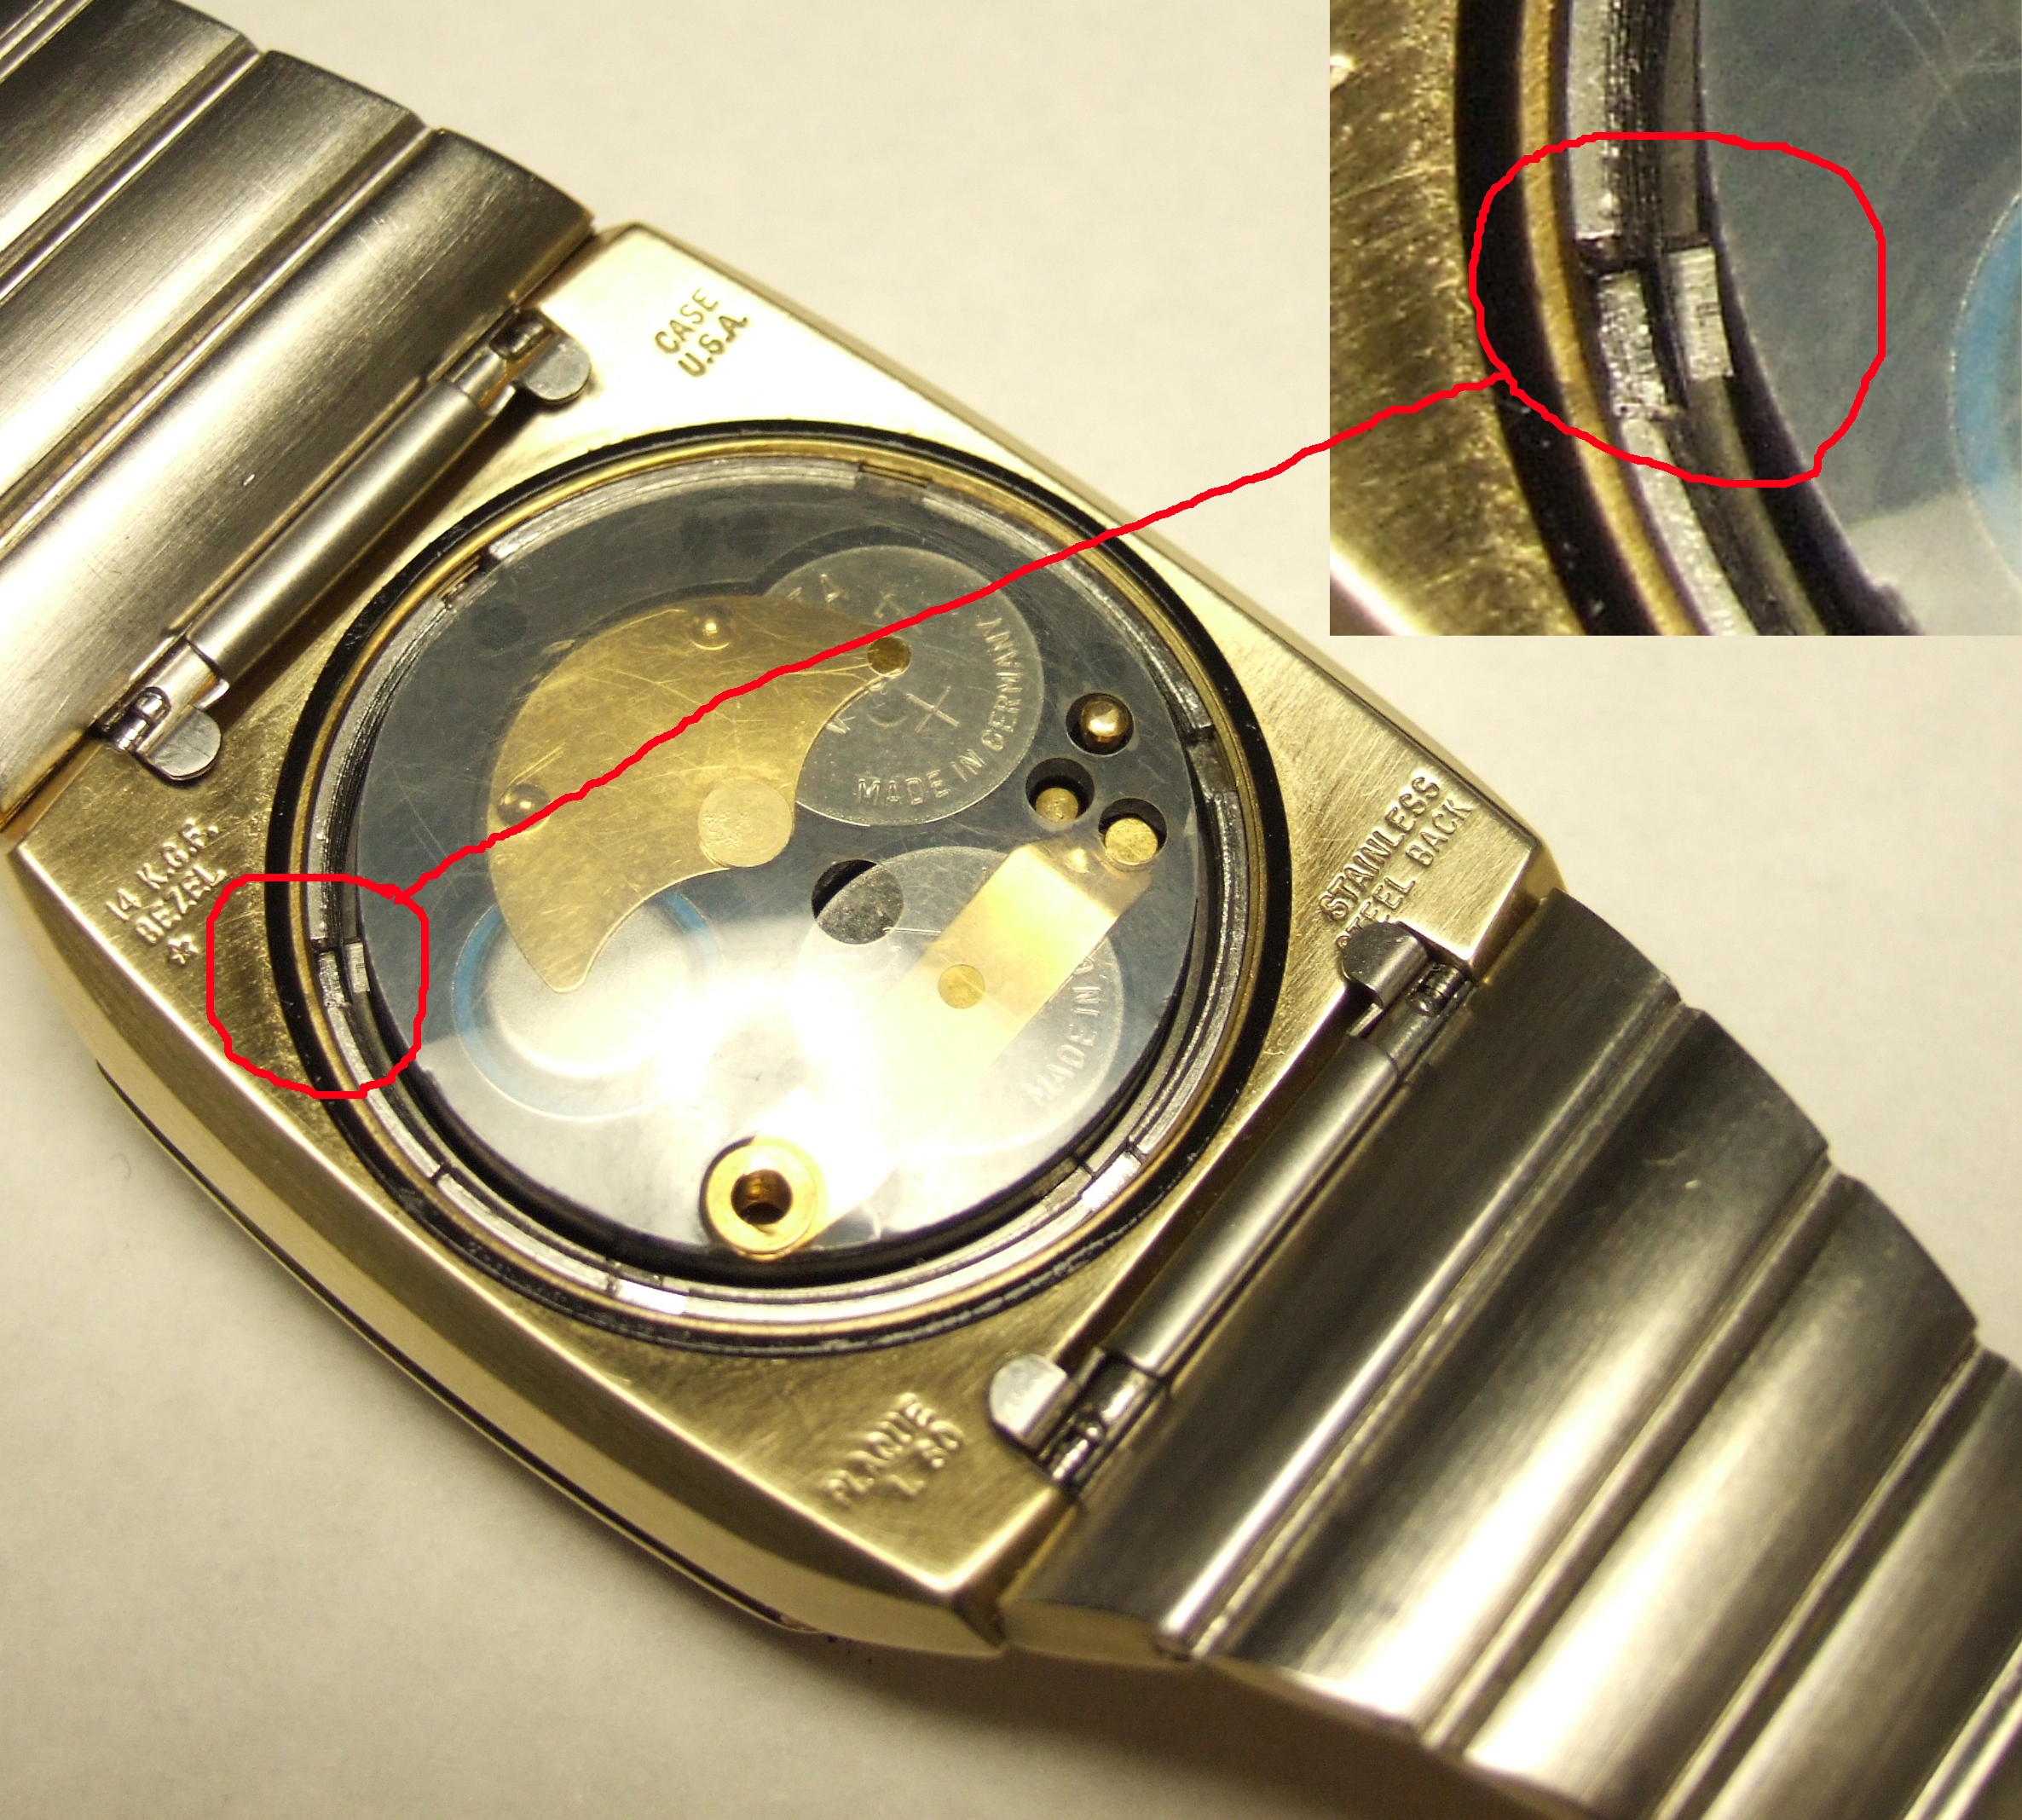
Circled in the next photo, you can see two slotted rings under the rear
cover. The inner ring is holding the plastic battery compartment tight in
the housing, the other is holding the two halves of housing
together. Remove the inner ring by straddling the ends of the needle-nose
pliers into slots on each side, and carefully turning counter-clockwise.
Remove the plastic battery compartment.
|
The remaining ring must then be loosened to
allow the separation of the housing, and removal of the electronics. This
ring is loosened using the needle-nose pliers in the same fashion,
however, turn CLOCKWISE. The ring is held captive in the front housing,
and after the housings are separated, removing this split ring to release
the electronics can be done by raising one side, and then rotating the
ring like unscrewing a light bulb. The raised end will rotate the ring
right out of the housing. Easy, huh?
|
| Electronics
HP considered the electronics module to be a single, non-repairable
item. If a watch was returned for warranty service, a faulty module was
discarded and a new module inserted. This was the extent of repair
available.
I have a different philosophy: Anything that ever worked can be made to
work again, and anything that has ever been made can be made again. The
only consideration is economy.
I suspect that most failures with the HP-01 electronics could be
repaired economically today. This is based on my 25+ years of repairing somewhat
similar items. I would not consider die replacement economical, but
many other failures could be undertaken with patience and a steady hand!
|
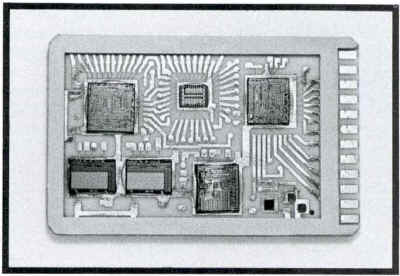
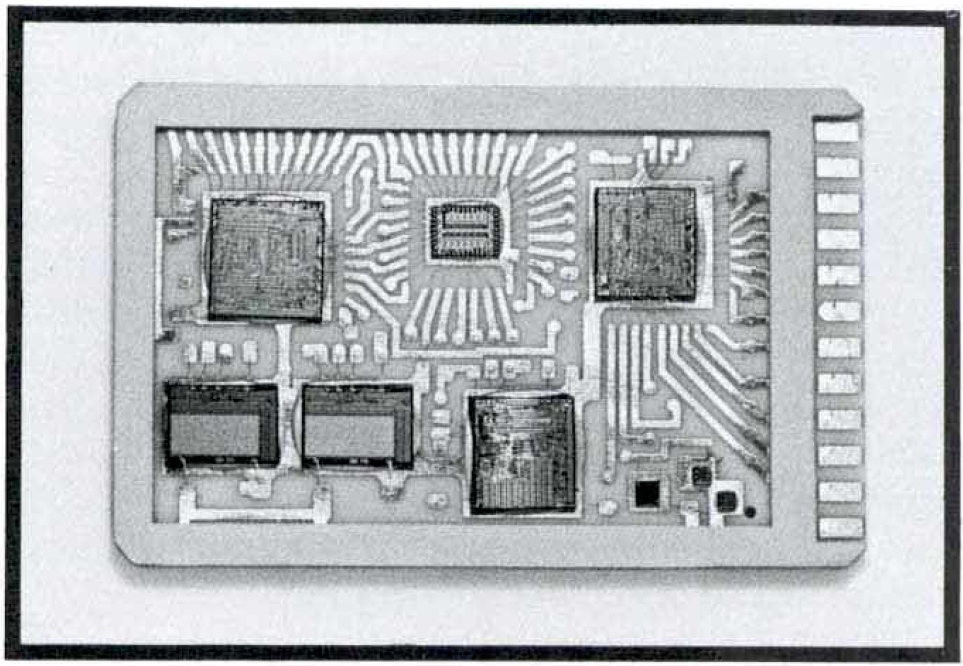
Hybrid module, lid-keypad removed, picture
from HP
|
For example, in the hybrid photo, note the
connector fingers along the right edge. The contacts are made between the
modules halves with a 'zebra' strip, a flexible pad with many rows of
conductors tightly spaced so as not to require a critical placement. The
trouble with those things is that they can lose elasticity--breaking the
intended connection, and may be a source of some module failures. Another
possible--and potentially repairable source of failure is from circuit
trace corrosion.
This type of failure would result in 'open' connections where the original
conductor has corroded away. This COULD be repairable by using a
conductive silver epoxy or other conductive 'trace-on' circuit repair pen, if the
damage is not too extensive and if the chips are not damaged. The hybrid
appears to be hermetically sealed, if the seal is damaged, and the module
is not working, this might be a hint of one of those 'uneconomical to
repair' situations, but I would still not give up without a fight! :)
|
| On the back side of the module, visible is the
trimmer capacitor in the lower left corner. This is an easily replicable
item, probably about 27pf. The crystal (cylinder in center of photo) is also easily replaced, and
according to HP information, it is 38.4 KHz. Digikey is likely to carry
this in stock for a dollar or two--though probably not in gold! The only other component visible here
is the display current trimmer resistor of 330 ohms, 1/8 th watt. Ah, but
the display!
OK, the display could pose a problem, but really, the only reasons
imaginable for the display failure is physical damage or corrosion. It is
possible that the solder connections could fail for a variety of reasons,
but careful and skillful use of a good soldering iron can fix that. If the
display is physically damaged, then repair could consist of trace repair
with epoxy conductive glue, or replacement. I know of no source for
replacement, but I would at least look before giving up.
Do you have a dead HP-01? Don't give up on it, it may yet be
repairable!
|
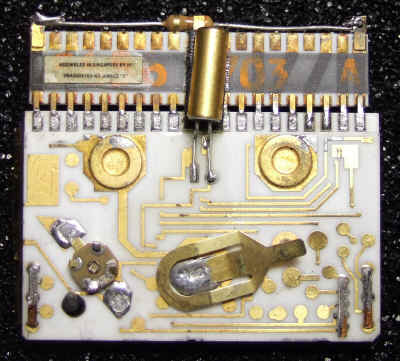
Module back side, photographed on static-free mat,
btw
|
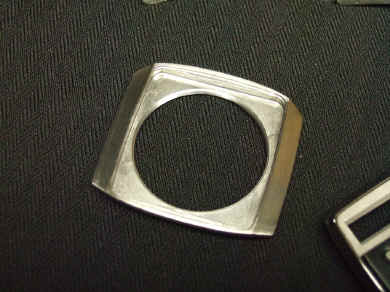
| Front Housing
After removing all front housing components, I used masking tape to
protect everything but the sides, which were to be buffed. The tape
was pressed carefully all along the front keypad to keep the polishing
process from touching.
Buffing was done on a 6 inch, 1/2 hp buffer, using red jewelers rouge
to facilitate the buffing. A clean buff was done after the rouge, just to
finish the job. This took patience, but removed nearly all scratches
completely, as can be seen in the photo. If you have never done this
before, I would advise practicing on something else first! Lots of
practice!
|
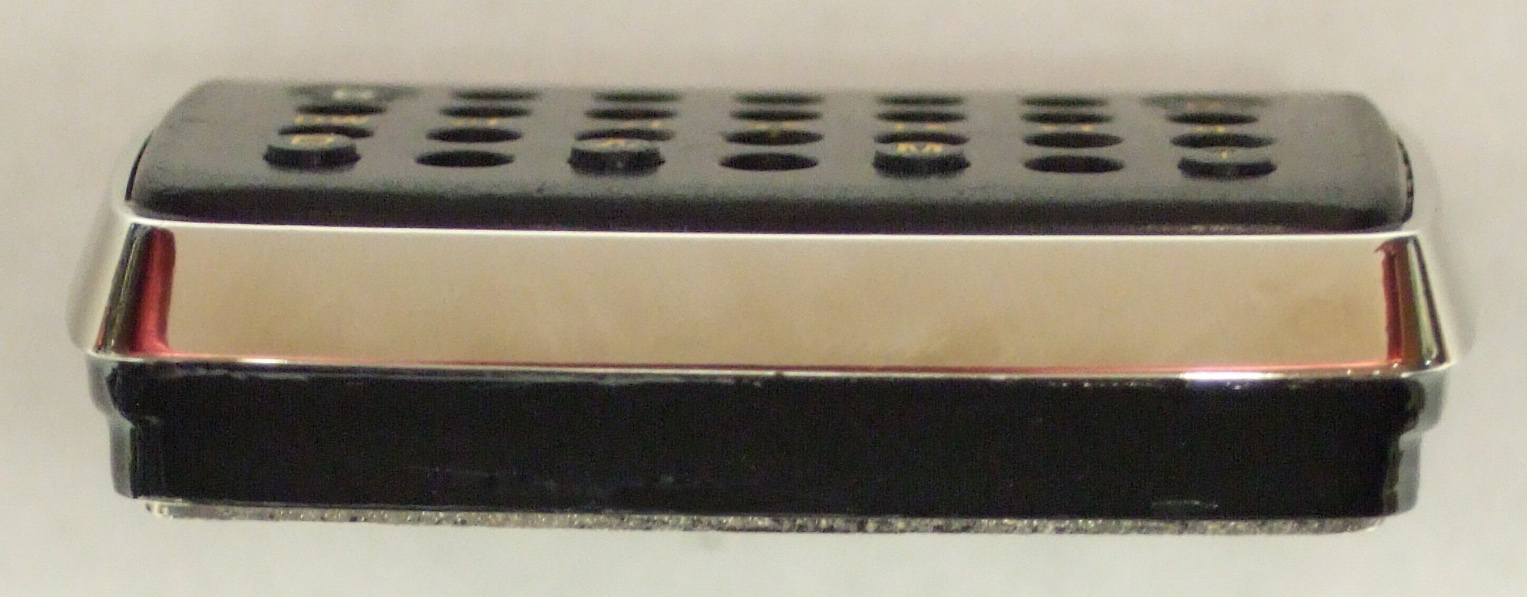
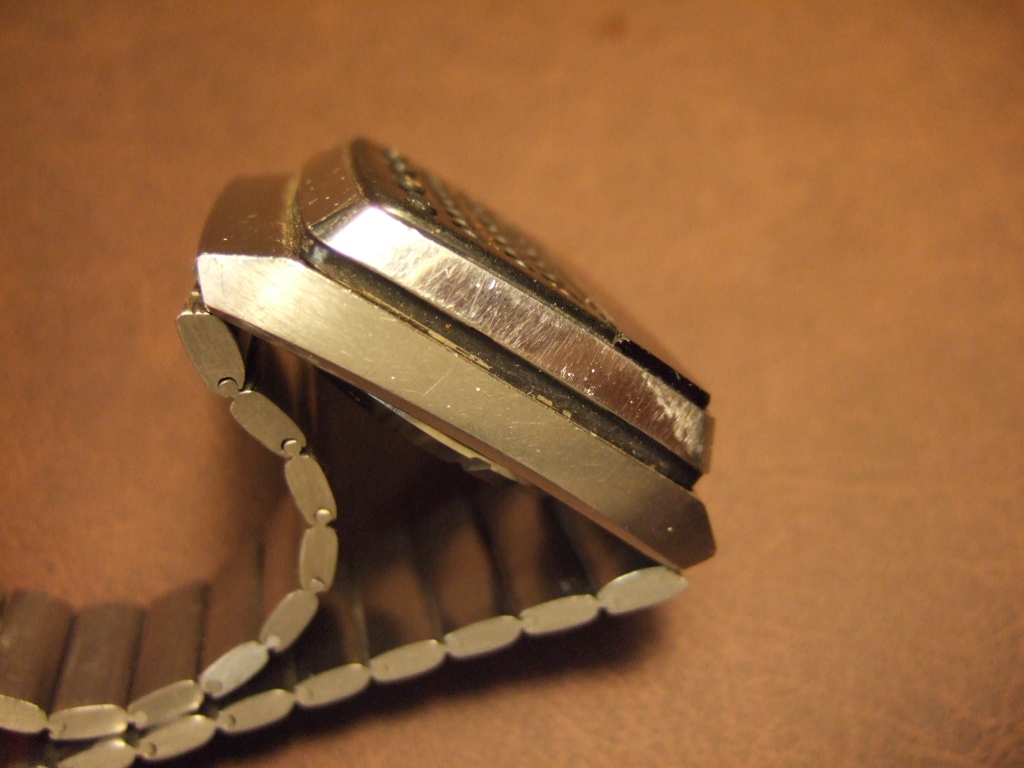
Side view of polished stainless steel front housing
|
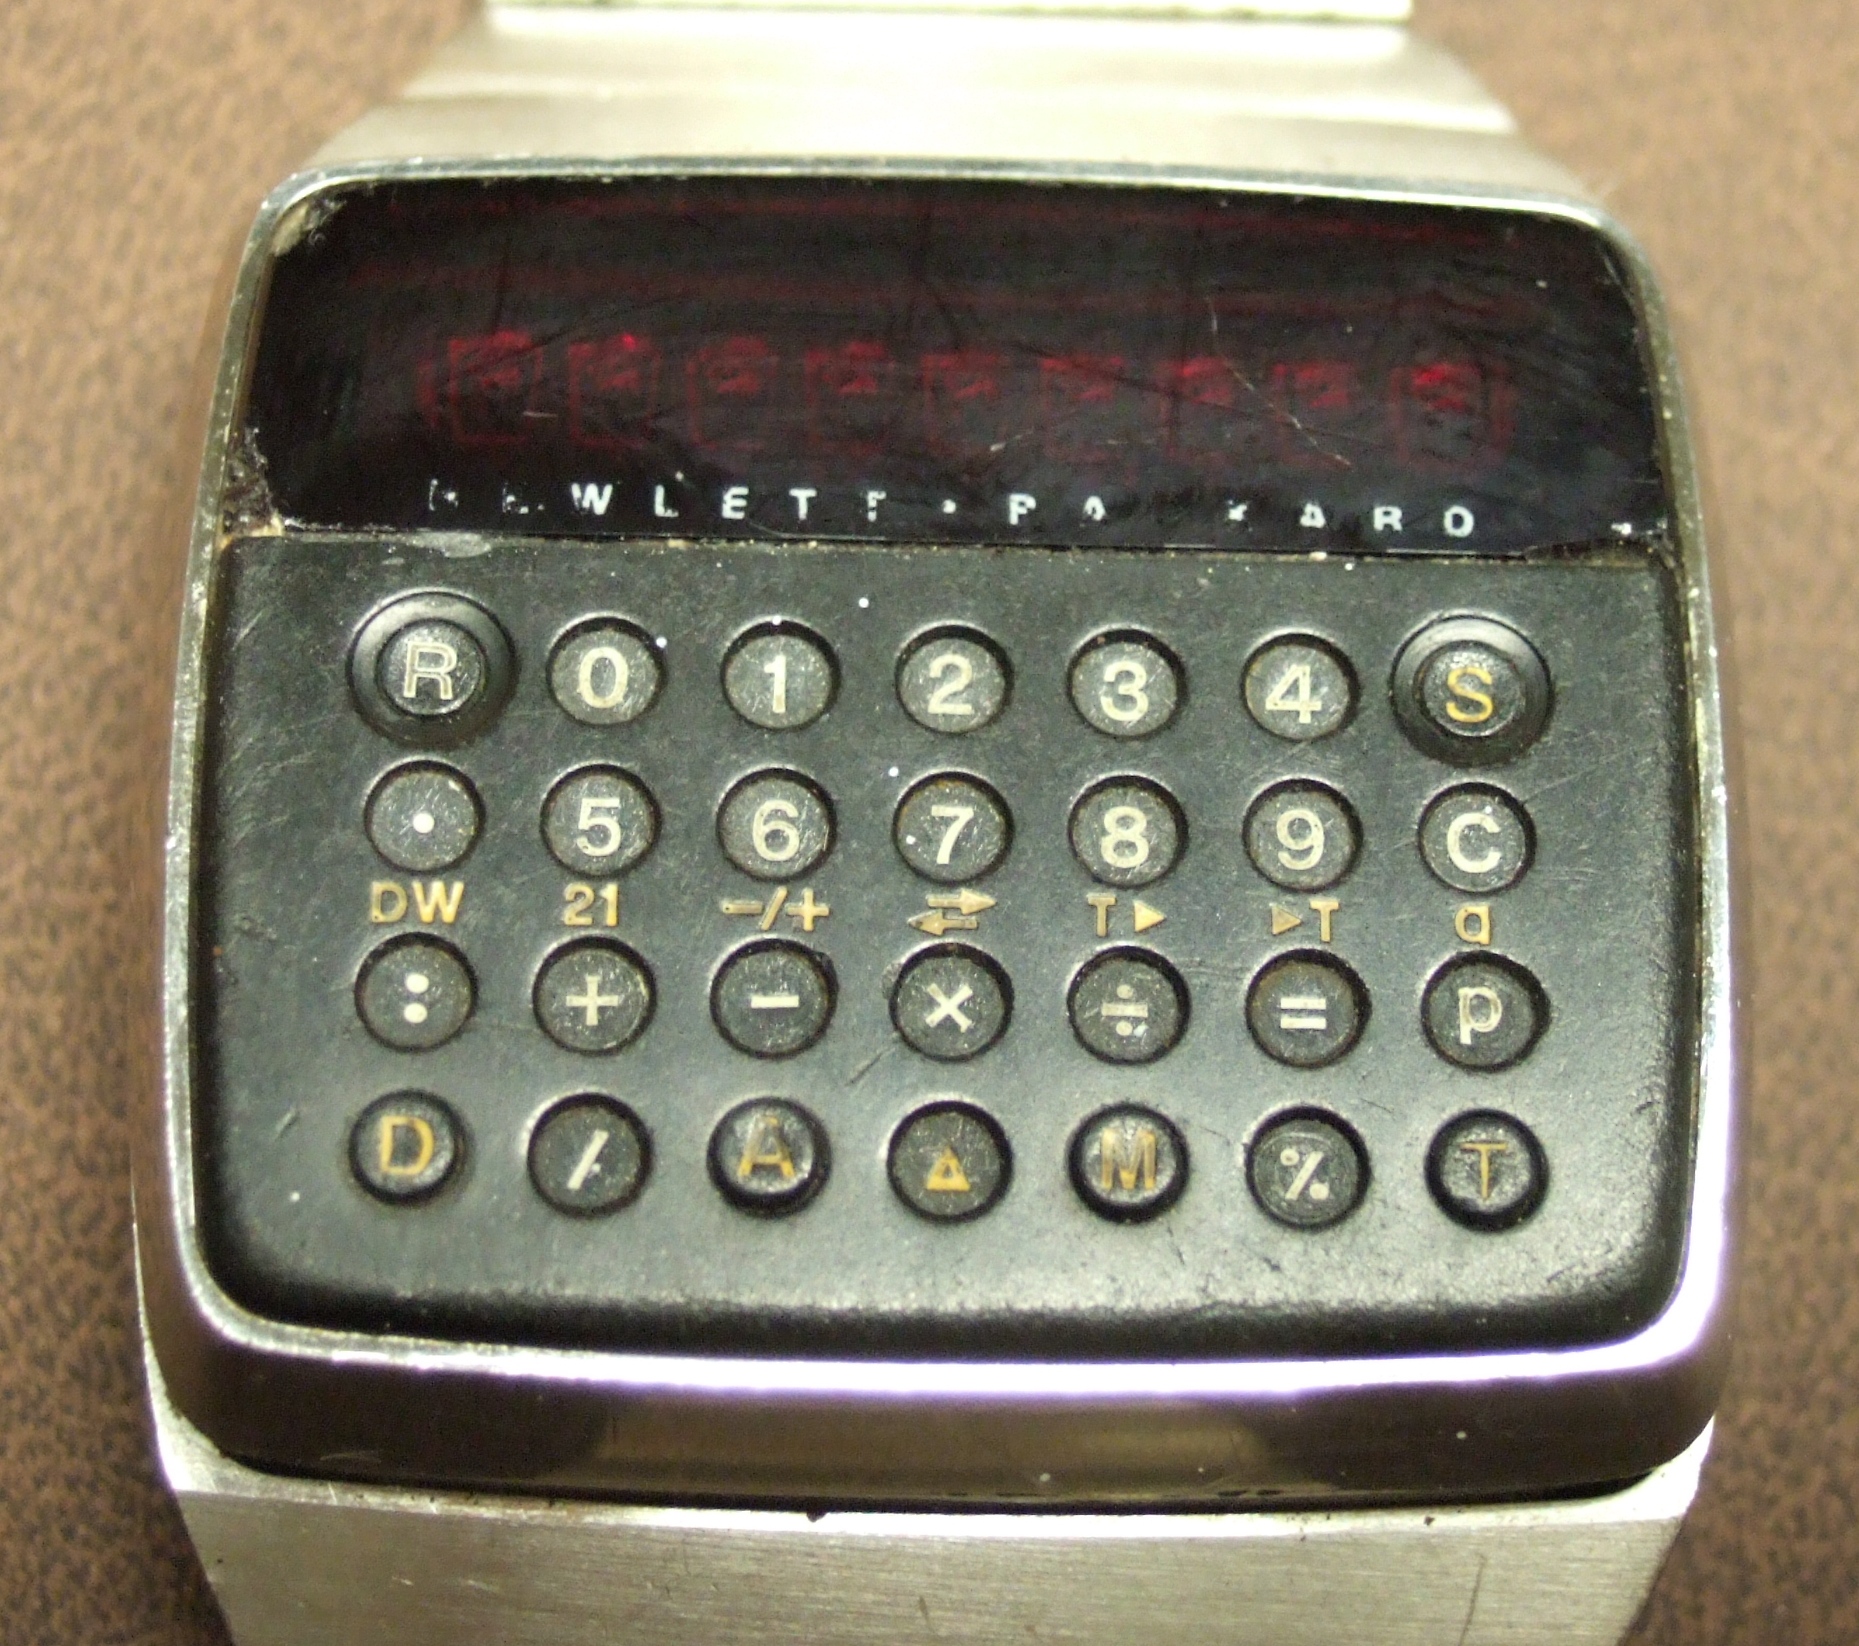
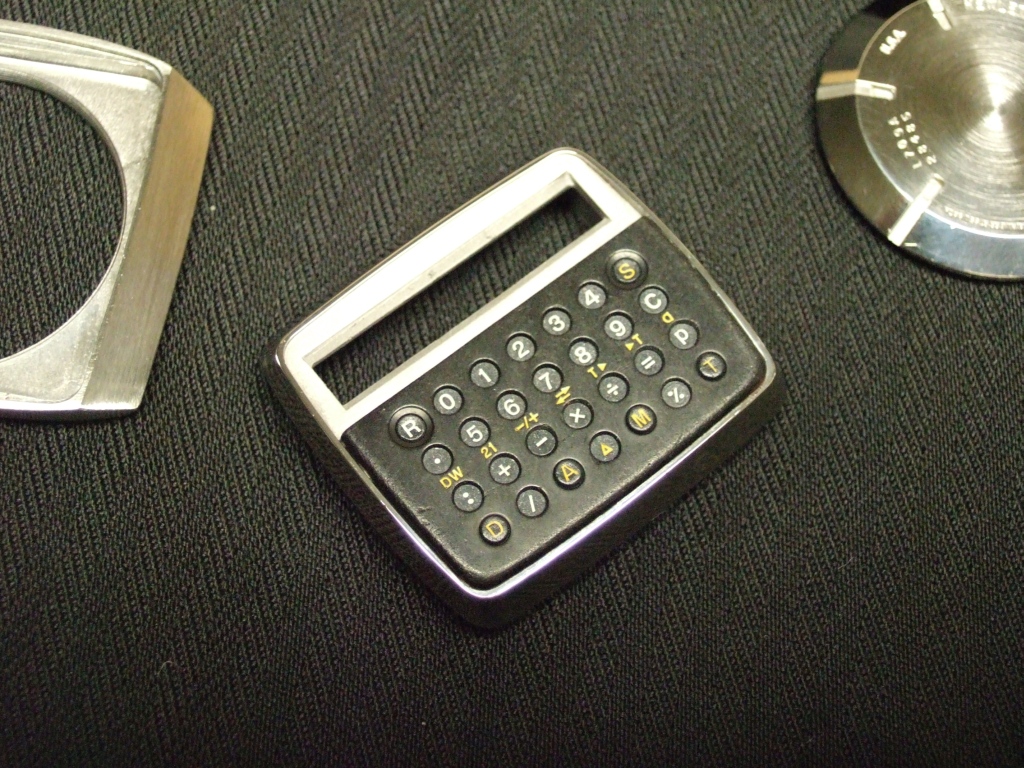
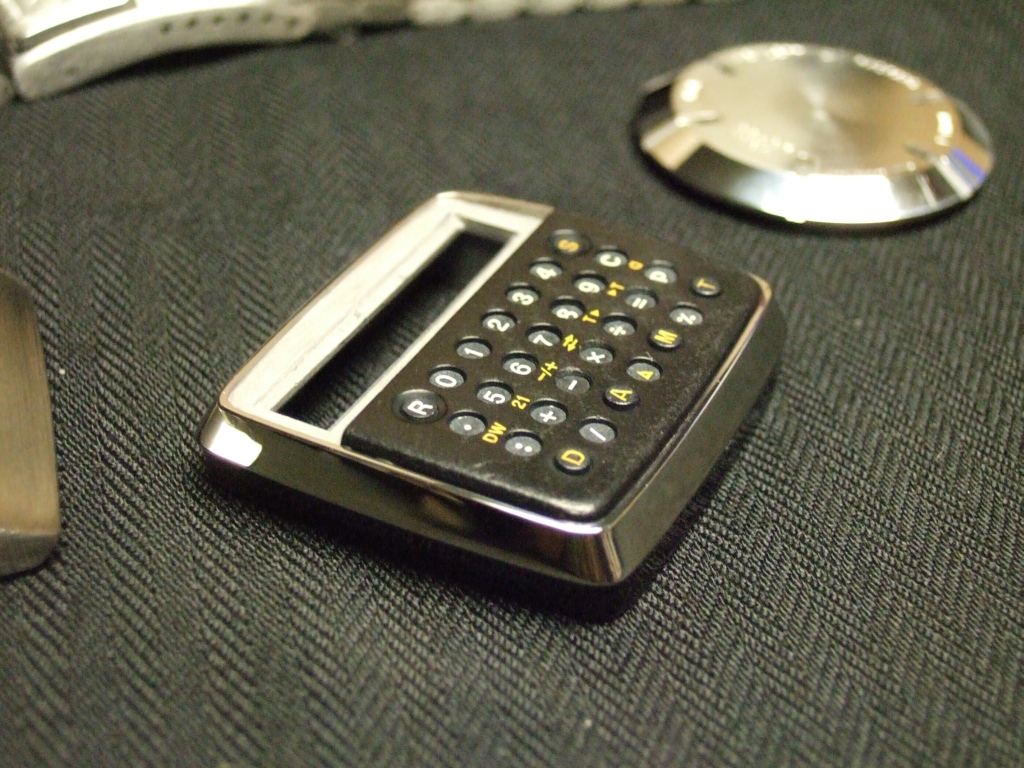
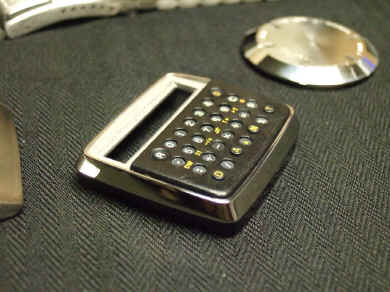
| Keys & Keyboard The keyboard
consists of small, round pins, with keyed placements to prevent rotation,
and inserted from behind
into holes in the
front housing. These are held in place by a rubber water-proofing pad
glued on the inner side. If needed, the lettering could be restored by steady hands and
careful use of a Dremel with an extremely fine-tipped bit or sharp hand
tools, but a laser would be best. This, with black, white, and yellow epoxy paint could yield
very nice results. My gold watch required minimal repainting, and turned
out quite nice as can be seen in the photos. The stainless model required
no reconditioning of the keys. (I do not recommend removing the keys from
the housing unless absolutely necessary.) The key base, or background,
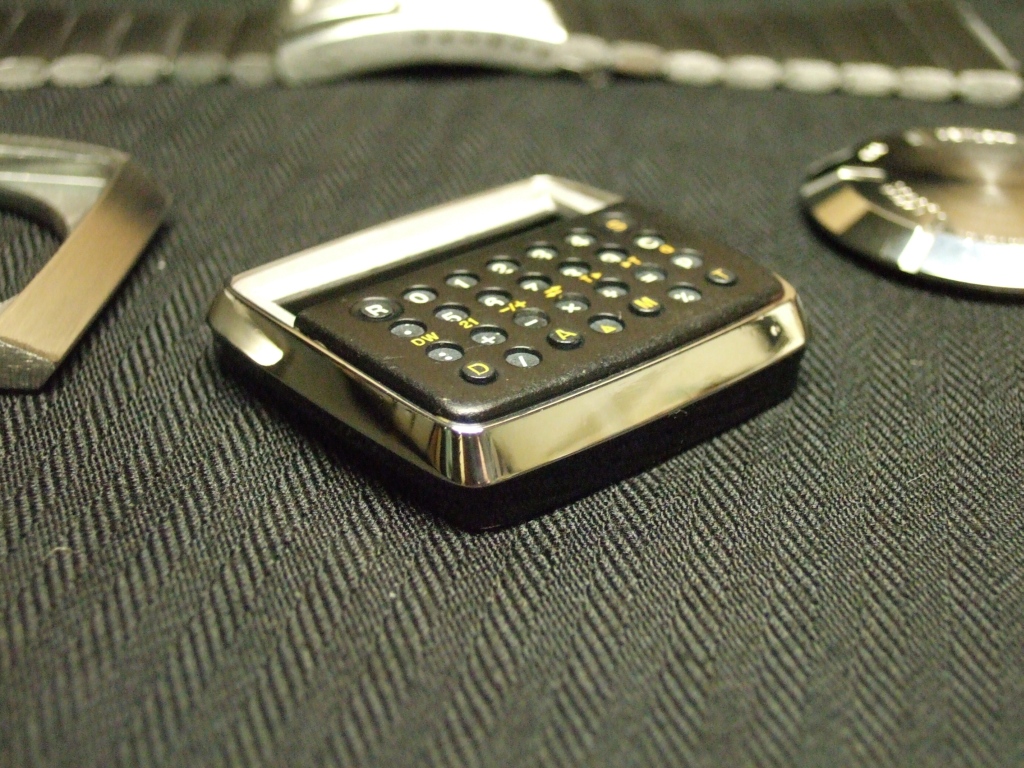
is black with yellow lettering across the mid section. I cleaned the
entire housing in soap and water, and dried with compressed air (Careful
not to blow the rubber away from the key backing, or to blow the keys out
of alignment! See photo below where the '9' key is rotated!). Next, I used
a pre-paint cleaner to prep the surface for painting. For painting, I
chose to use an airbrush with thicker paint than usual to lightly repaint
the needed areas, hoping to fill scratches with the thicker paint. This
worked well enough, I think. Finally, the sides were brush painted with
black gloss two-part epoxy paint (acquired from a silk-screen printing outfit).
|
Stainless Steel model, as received
|
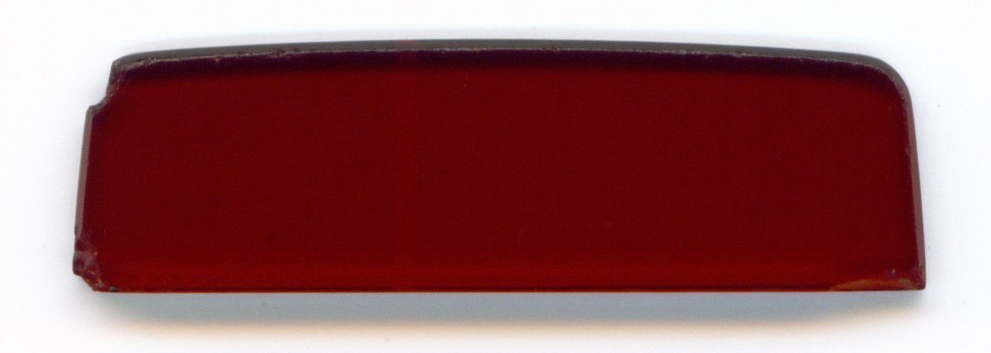
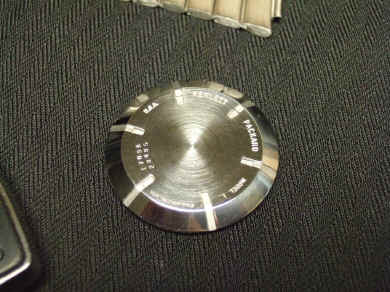
| Glass
The glass on my stainless model was beyond saving. My only option was
to live with chipped glass and a ruined silk-screen logo, or replace it
with a new one. The search was on. I checked every source I could find for
watch glass, and all to no avail.
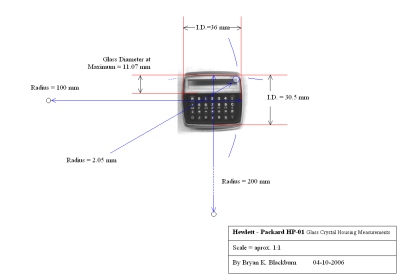
My only chance was to re-invent the wheel, and have new glass custom
made. I removed the existing glass and used it to reverse engineer a new
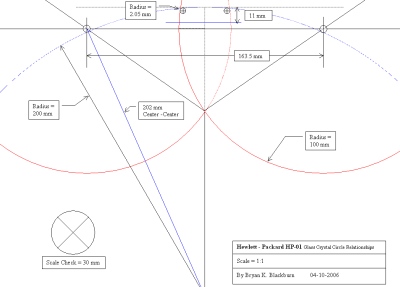
one. After measuring and calculating all the angles, I created an exact
duplicate in plastic and created a set of
plans with silk-screen layout. The plans and duplicate were submitted to a
manufacturing company, and as soon as I have trademark clearance, they are
ready to go.
|
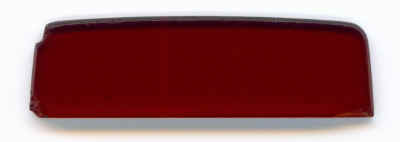
Chipped crystal, removed from housing and cleaned
|
If I can get permission from HP to use the
trademark, I will have a couple hundred of these made up and
silk-screened, and will make them available here sometime in the near
future. My estimate from the manufacturing company is nearly the same for
a quantity order, so there is no sense in having just a few made. Do you need a
new crystal? Contact me and I'll add your name to the list.
. |
|
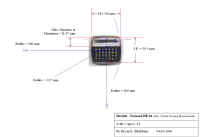
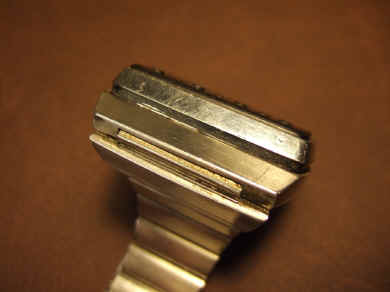
Housing dimensions
|
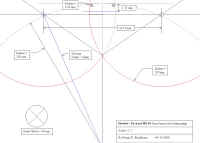
Glass dimensions & angles
|
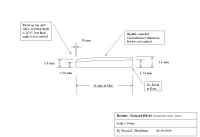
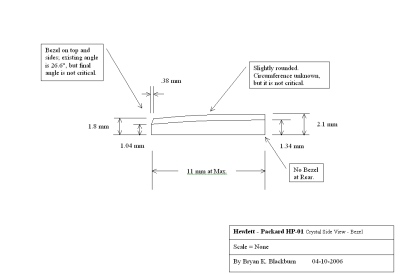
Glass profile
|
|
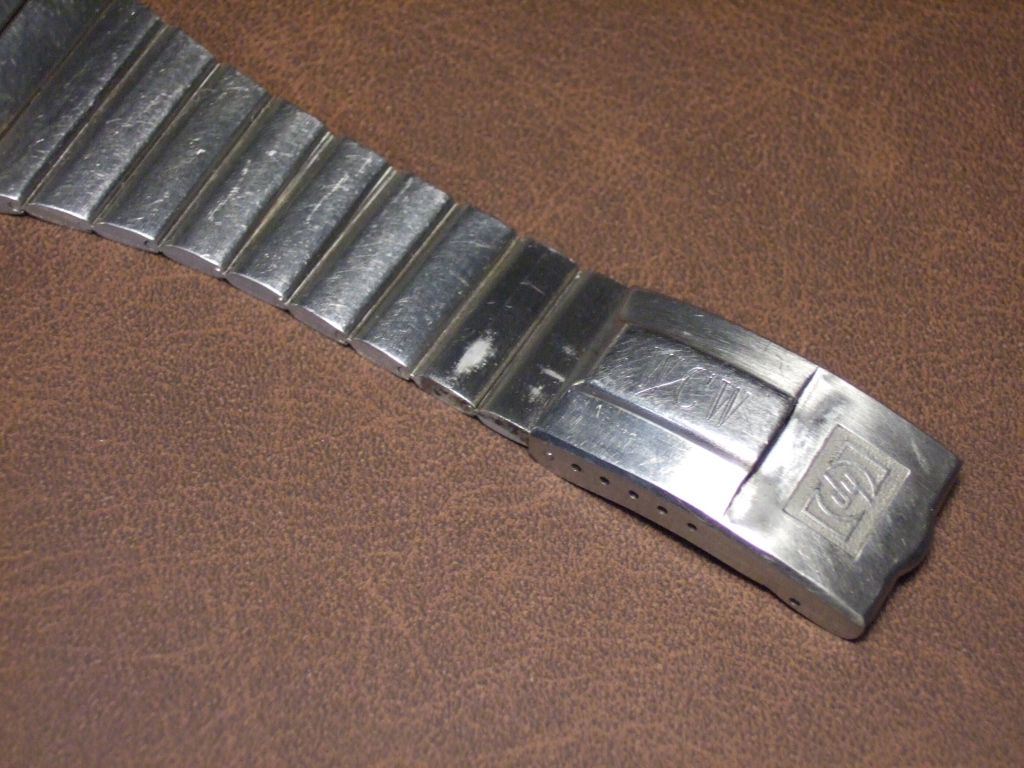
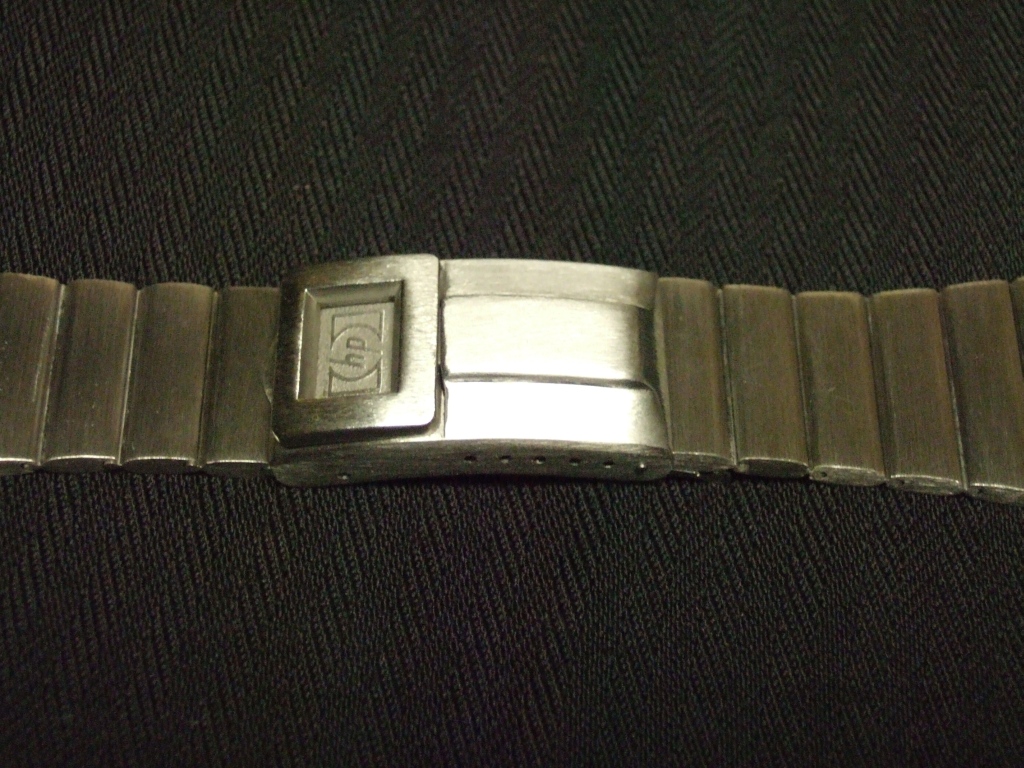
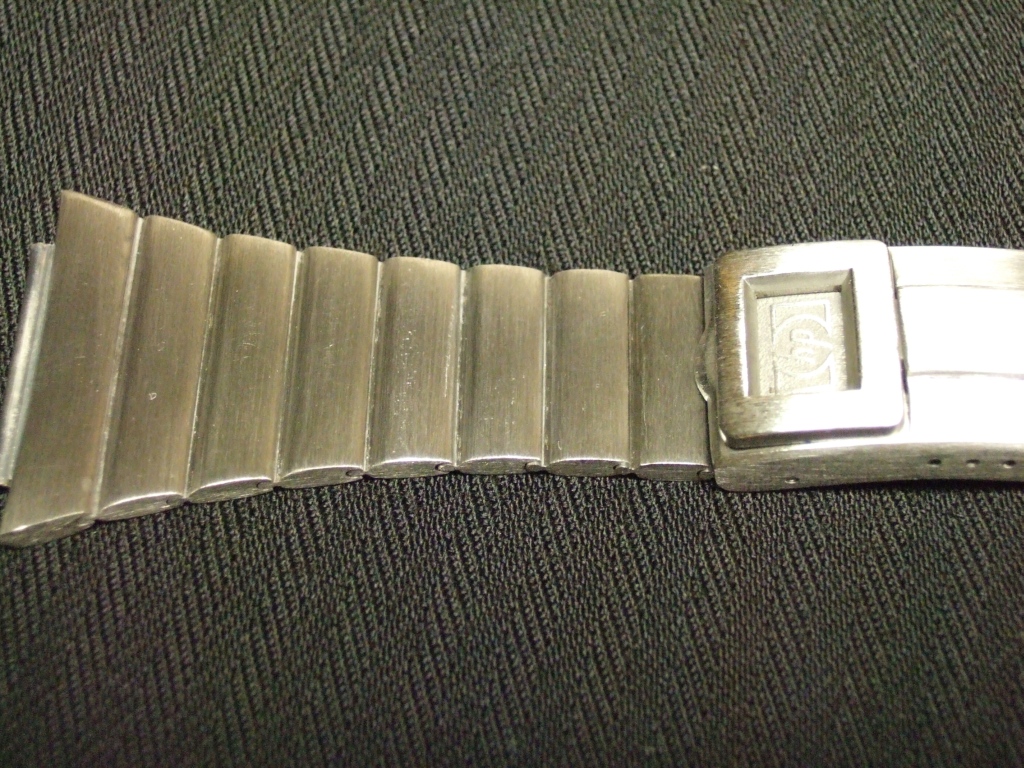
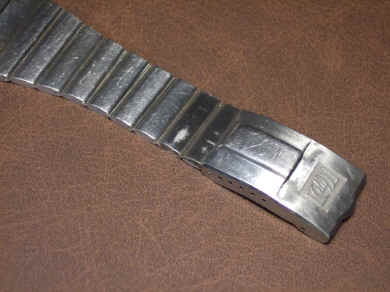
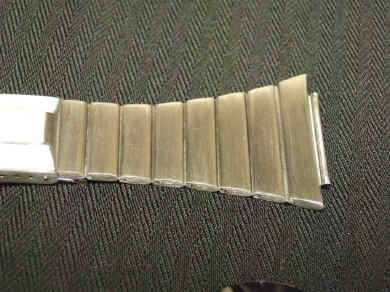
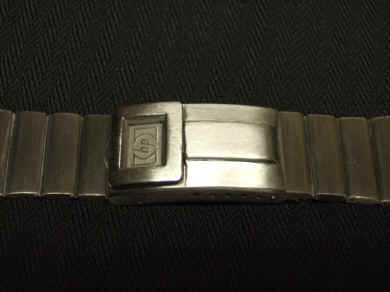
Lower Housing & Band
The scratched lower housing and worn and scratched band required a lot
of time and compromise to establish a workable restoration technique. The
compromise was the loss of original material and thickness--only slightly,
but when you are talking gold, anything is significant!
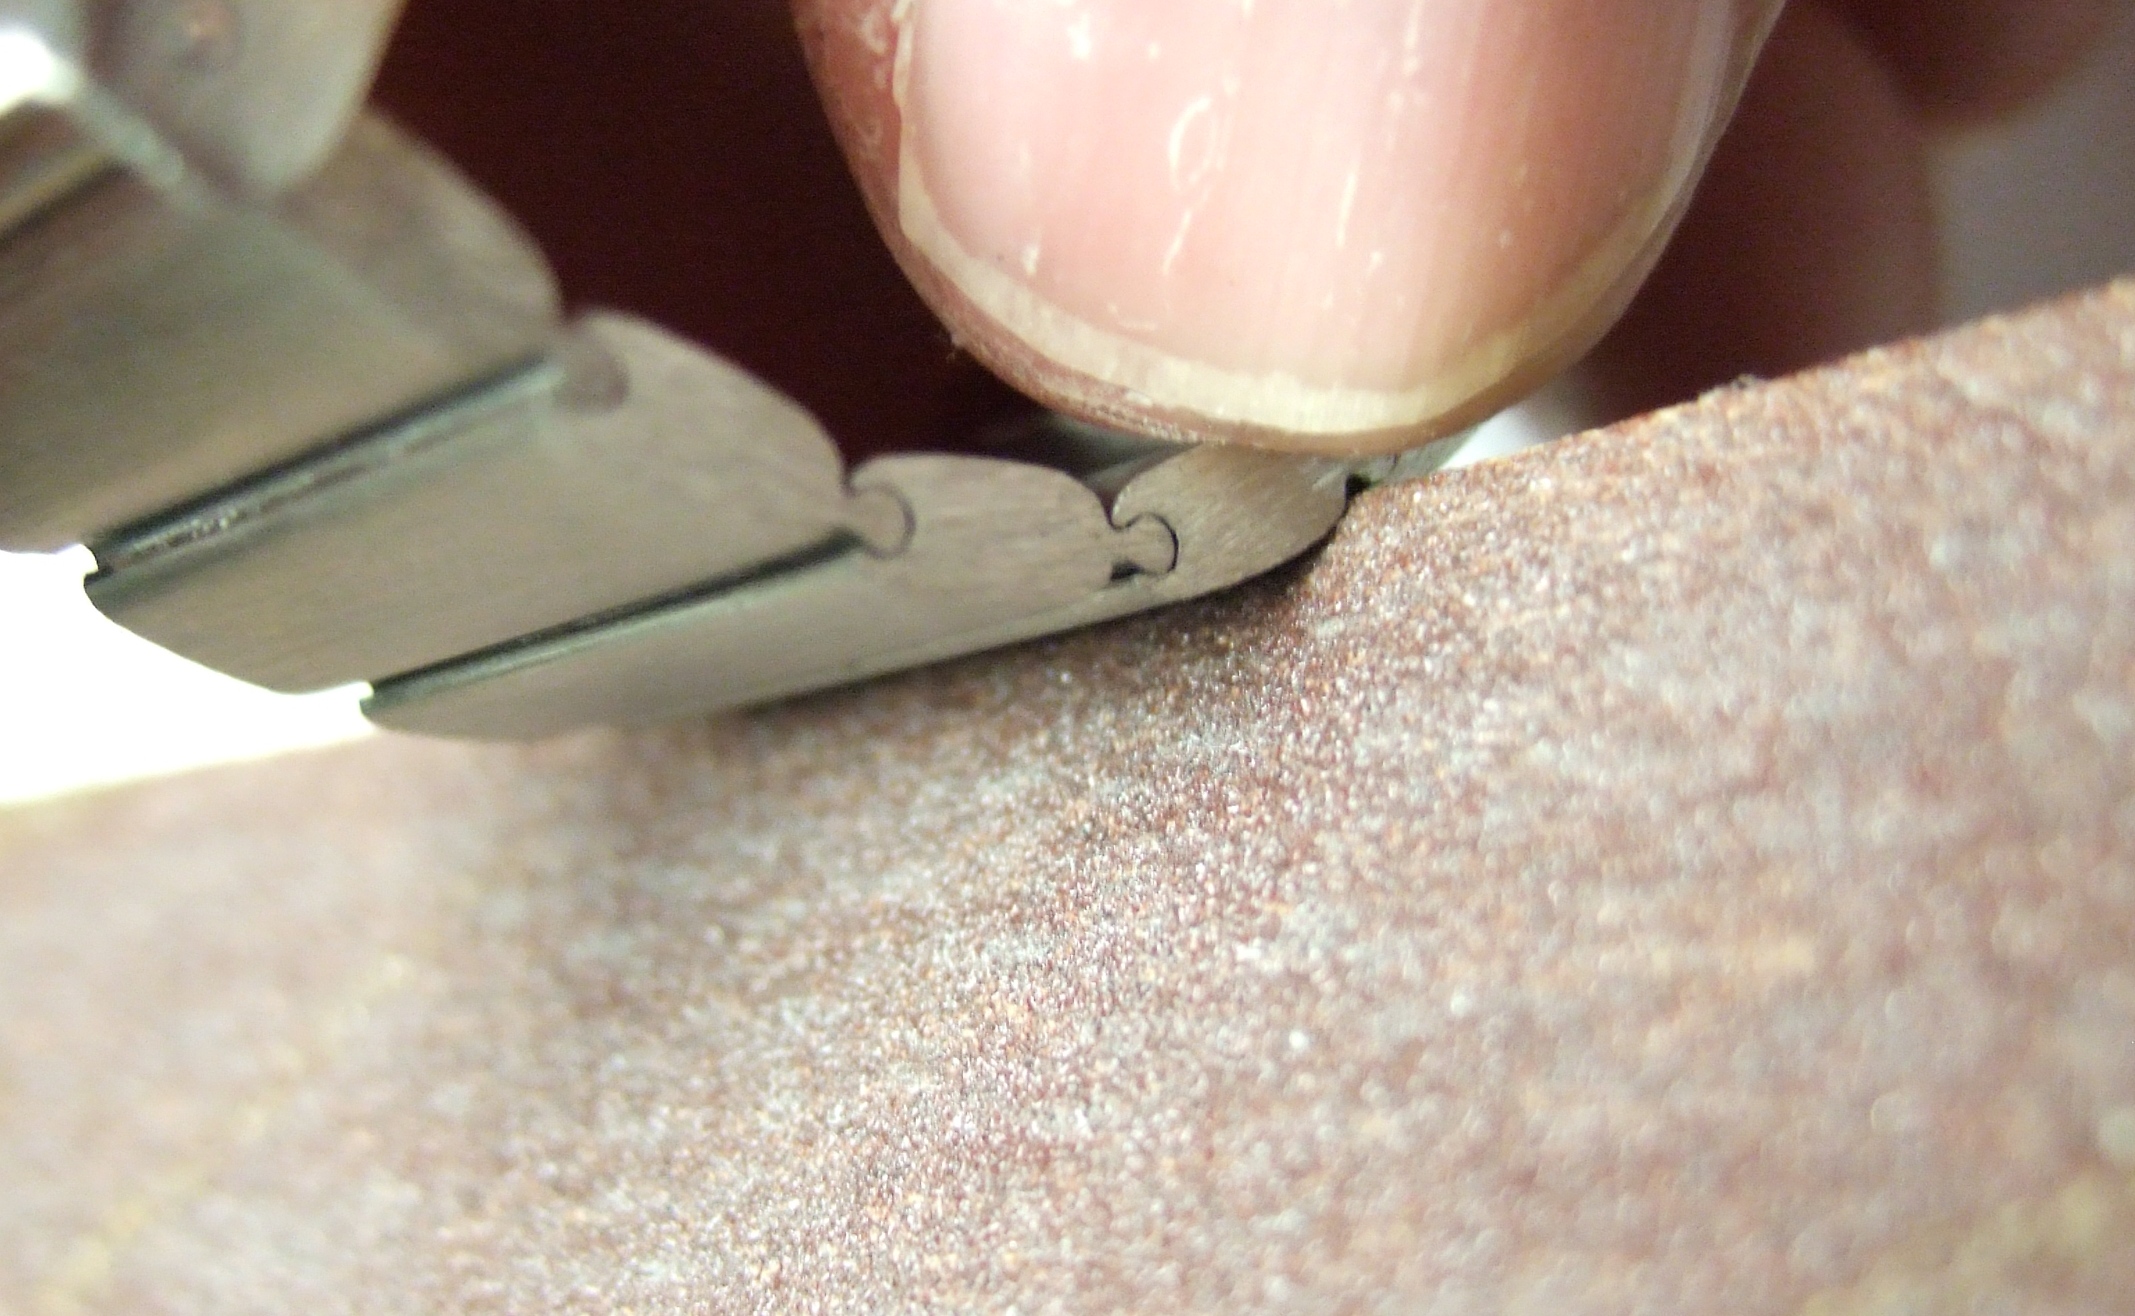
What I ended up doing was 'brushing' the metal with 120 grit sandpaper
on a hobby belt sander. The results were fantastic, removing nearly all
evidence of scratches and shine (where shine did not belong!), with a
minimal loss of original material. It even worked well enough to remove the original owners engraving from
the watch band! Sweet!
Before sanding the links, I used a hammer, small anvil, and a small, narrow,
piece of
flat steel to pound the 'C' shaped edge of the links to tighten them. Mine
were very loose, and this worked very well to bring them back to original form
and flexibility.
|
|

Brushing the band: rolling into the
belt--downward in this photo (belt shown is not moving for the
photo)
|
|
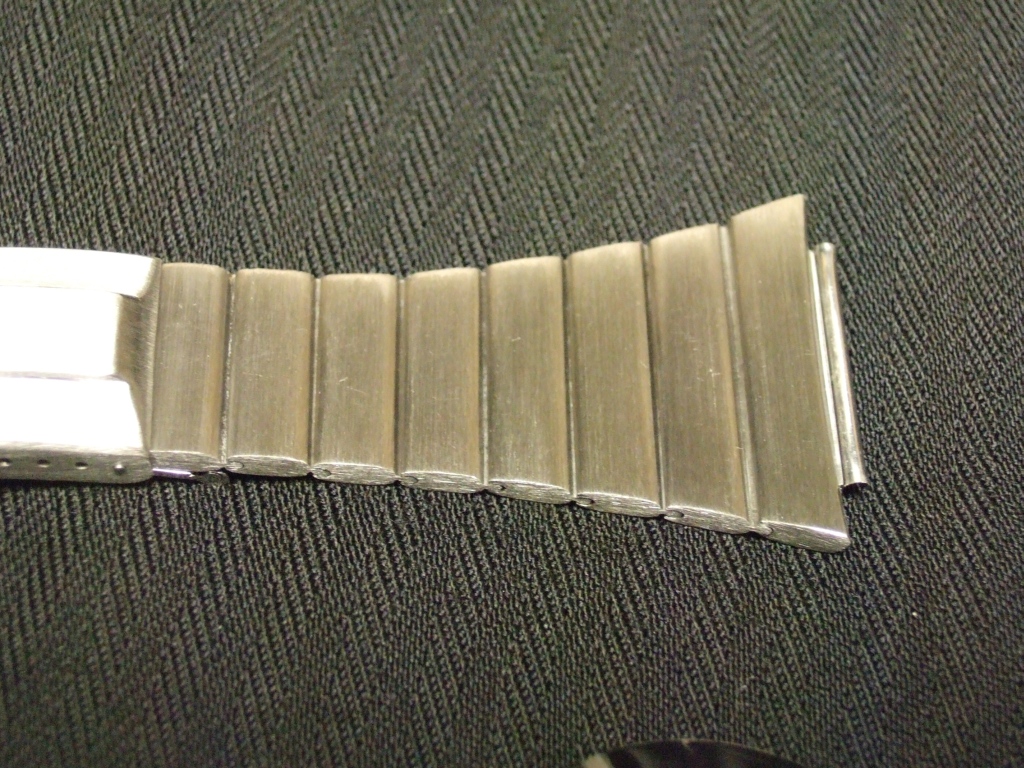
Also before sanding anything, I spent a lot of time practicing on
stainless steel scrap, perfecting the technique to my satisfaction. Here
is what I learned: run the belt sander at a medium speed, and at light pressure,
'roll' the work into the belt in the desired direction of the grain. Flat
surfaces were held evenly against the belt all at once. The band links
were not disassembled for this. Holding the band so as to roll it up in
the hand, each link was sanded end-to-middle starting at the belt edge
while rolling the hump of the link across the belt evenly at about two seconds per
link, turning over to complete the entire link, and repeating as needed.
|
|

And now, for the pictures
Before:
|
 |
 |
 |
 |
 |
 |
|
Mid-Restoration
|
 |
 |
 |
 |
 |
 |
 |
 |
 |
 |
 |
 |
|
After
|
 |
 |
|
|
|
|
|
|
|