|
DG Systems
Bytemaster
System Cards
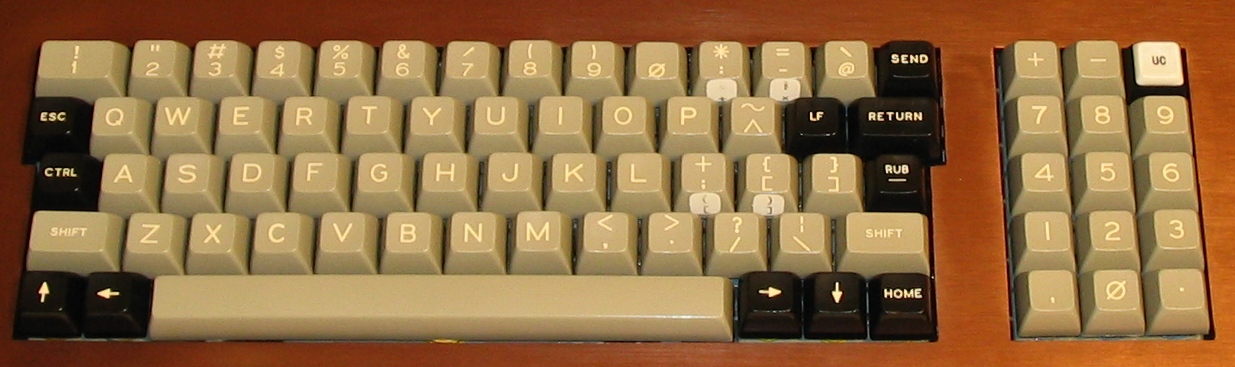
Keyboard
Printer A & B
Phideck
Disk Drives
Documentation
Software
Flyers
Magazine Ads
Mark-8 Minicomputer
Apple-1
MOS Kim-1
V C F
Imsai 8080
Kenbak-1
TV Typewriter
LSI ADM-3A
ASR-33
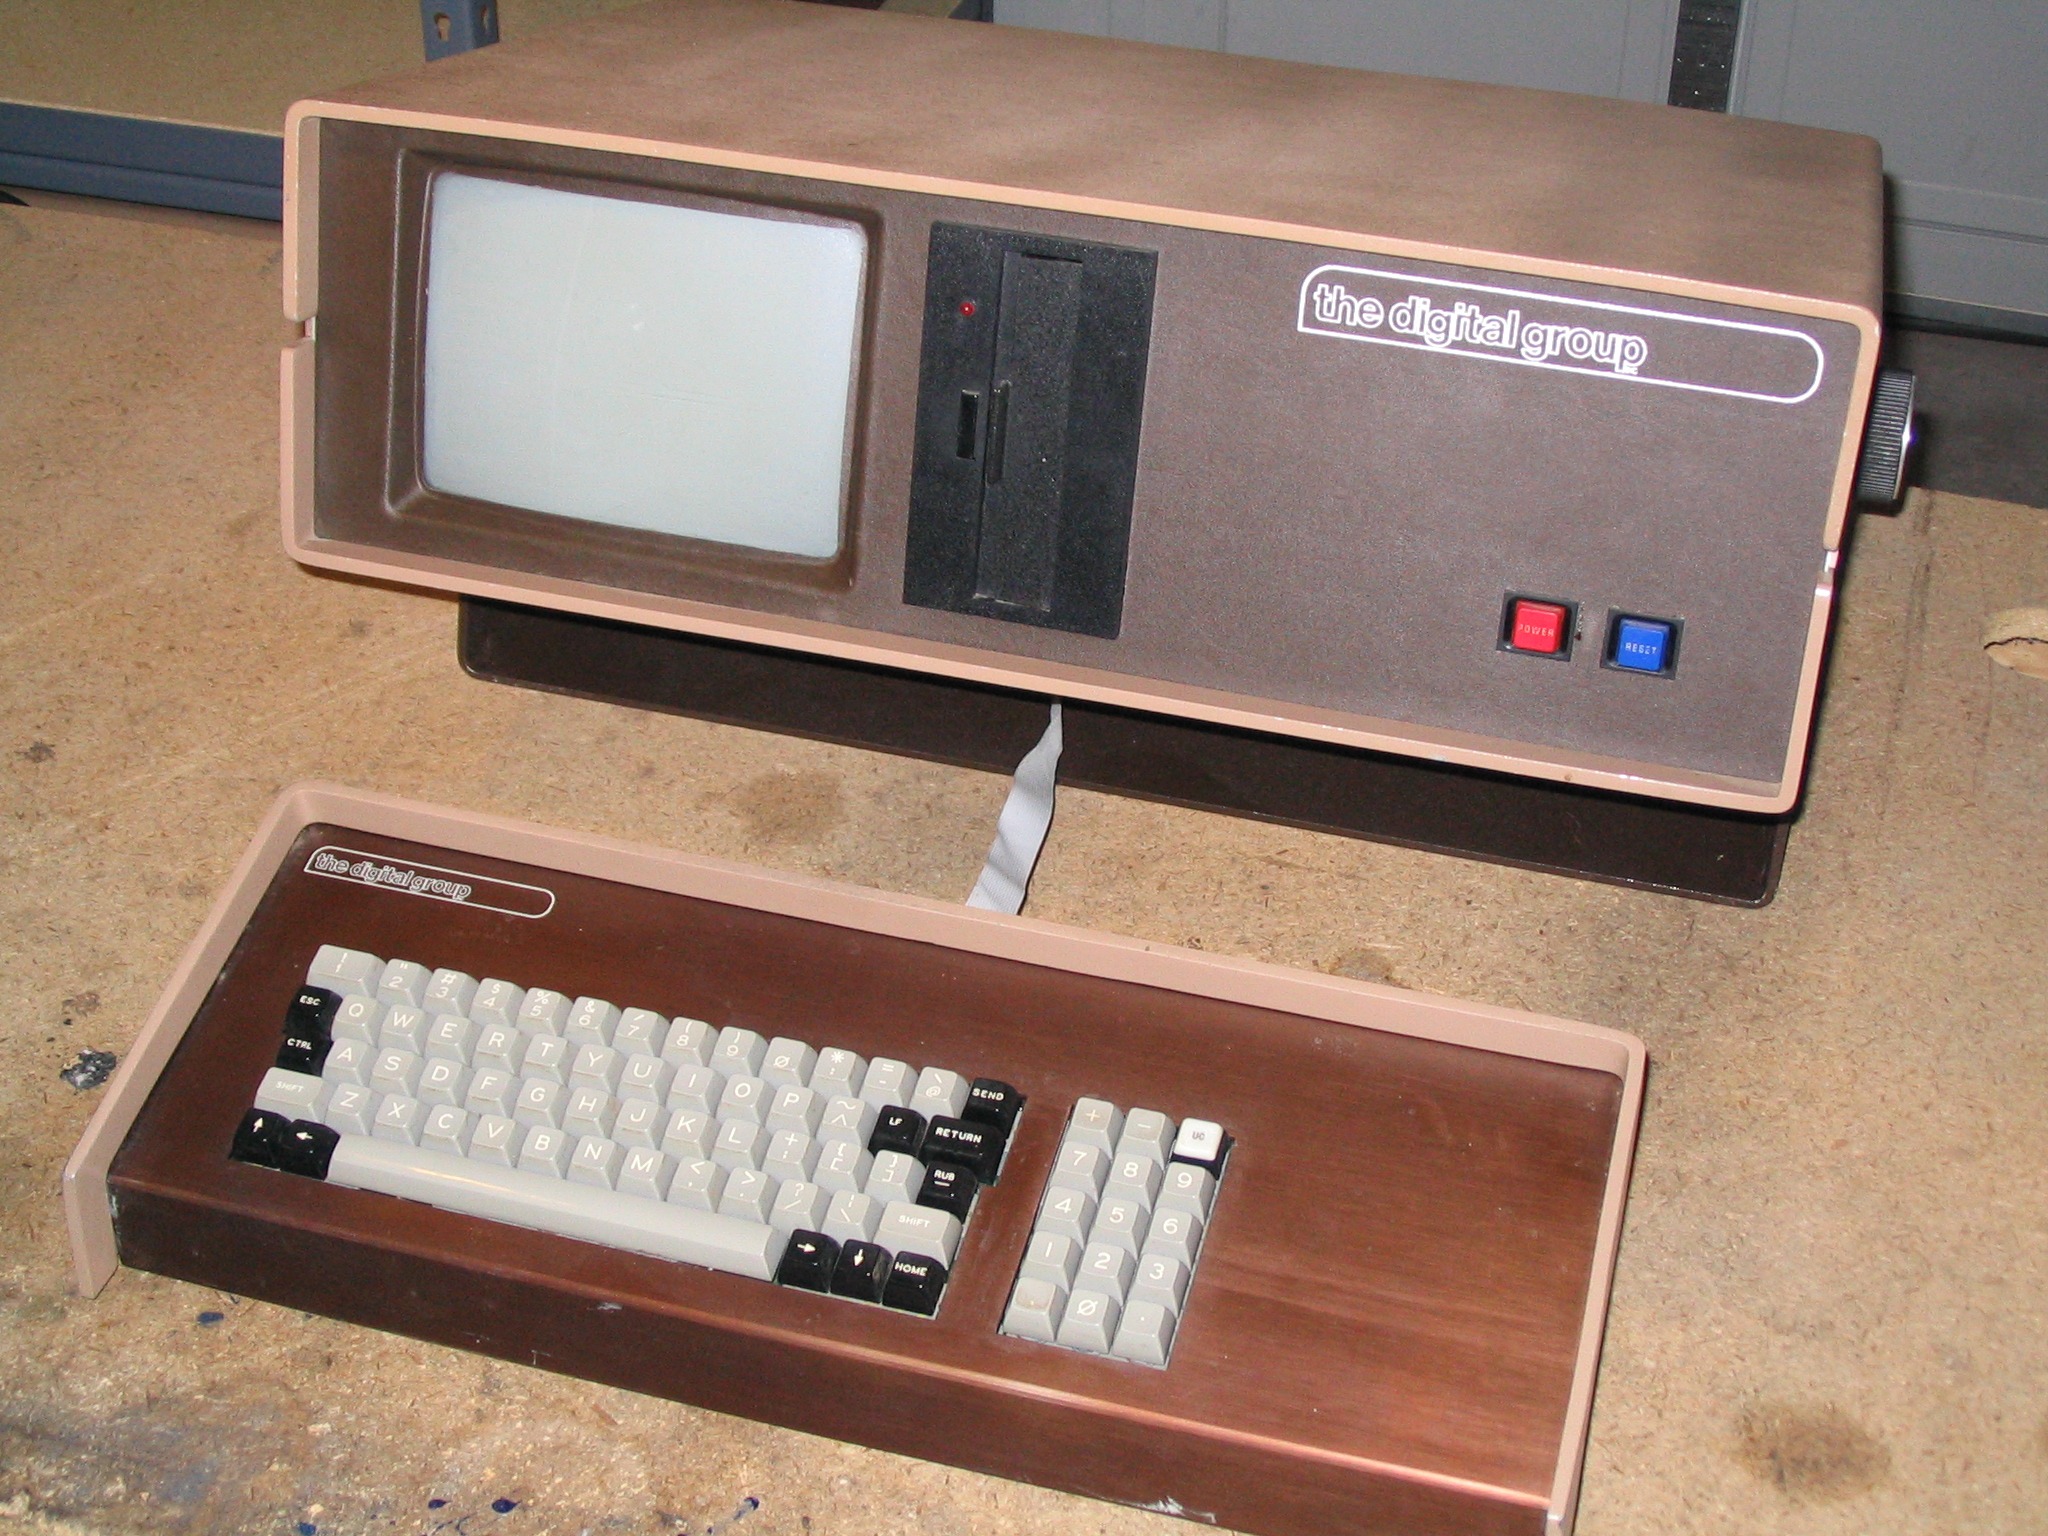
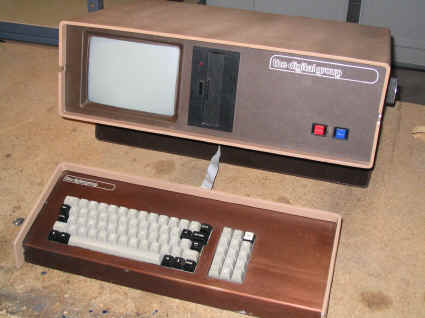
The Digital Group
| |

|
|
Restoring a dg Keyboard
The most popular keyboard used with a digital group computer was the
dg model KEY-1 capacitive keyboard made by Maxi-Switch. This is a nice
keyboard, good feel, durable, and very importantly: Restorable! This is
important since the design of the keyboard included foam under each key
that turns to sticky dust after these many years! |
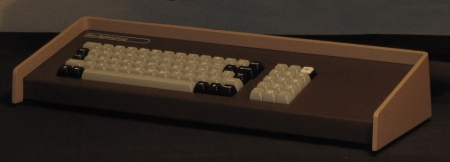
Fully restored and working perfectly!
|
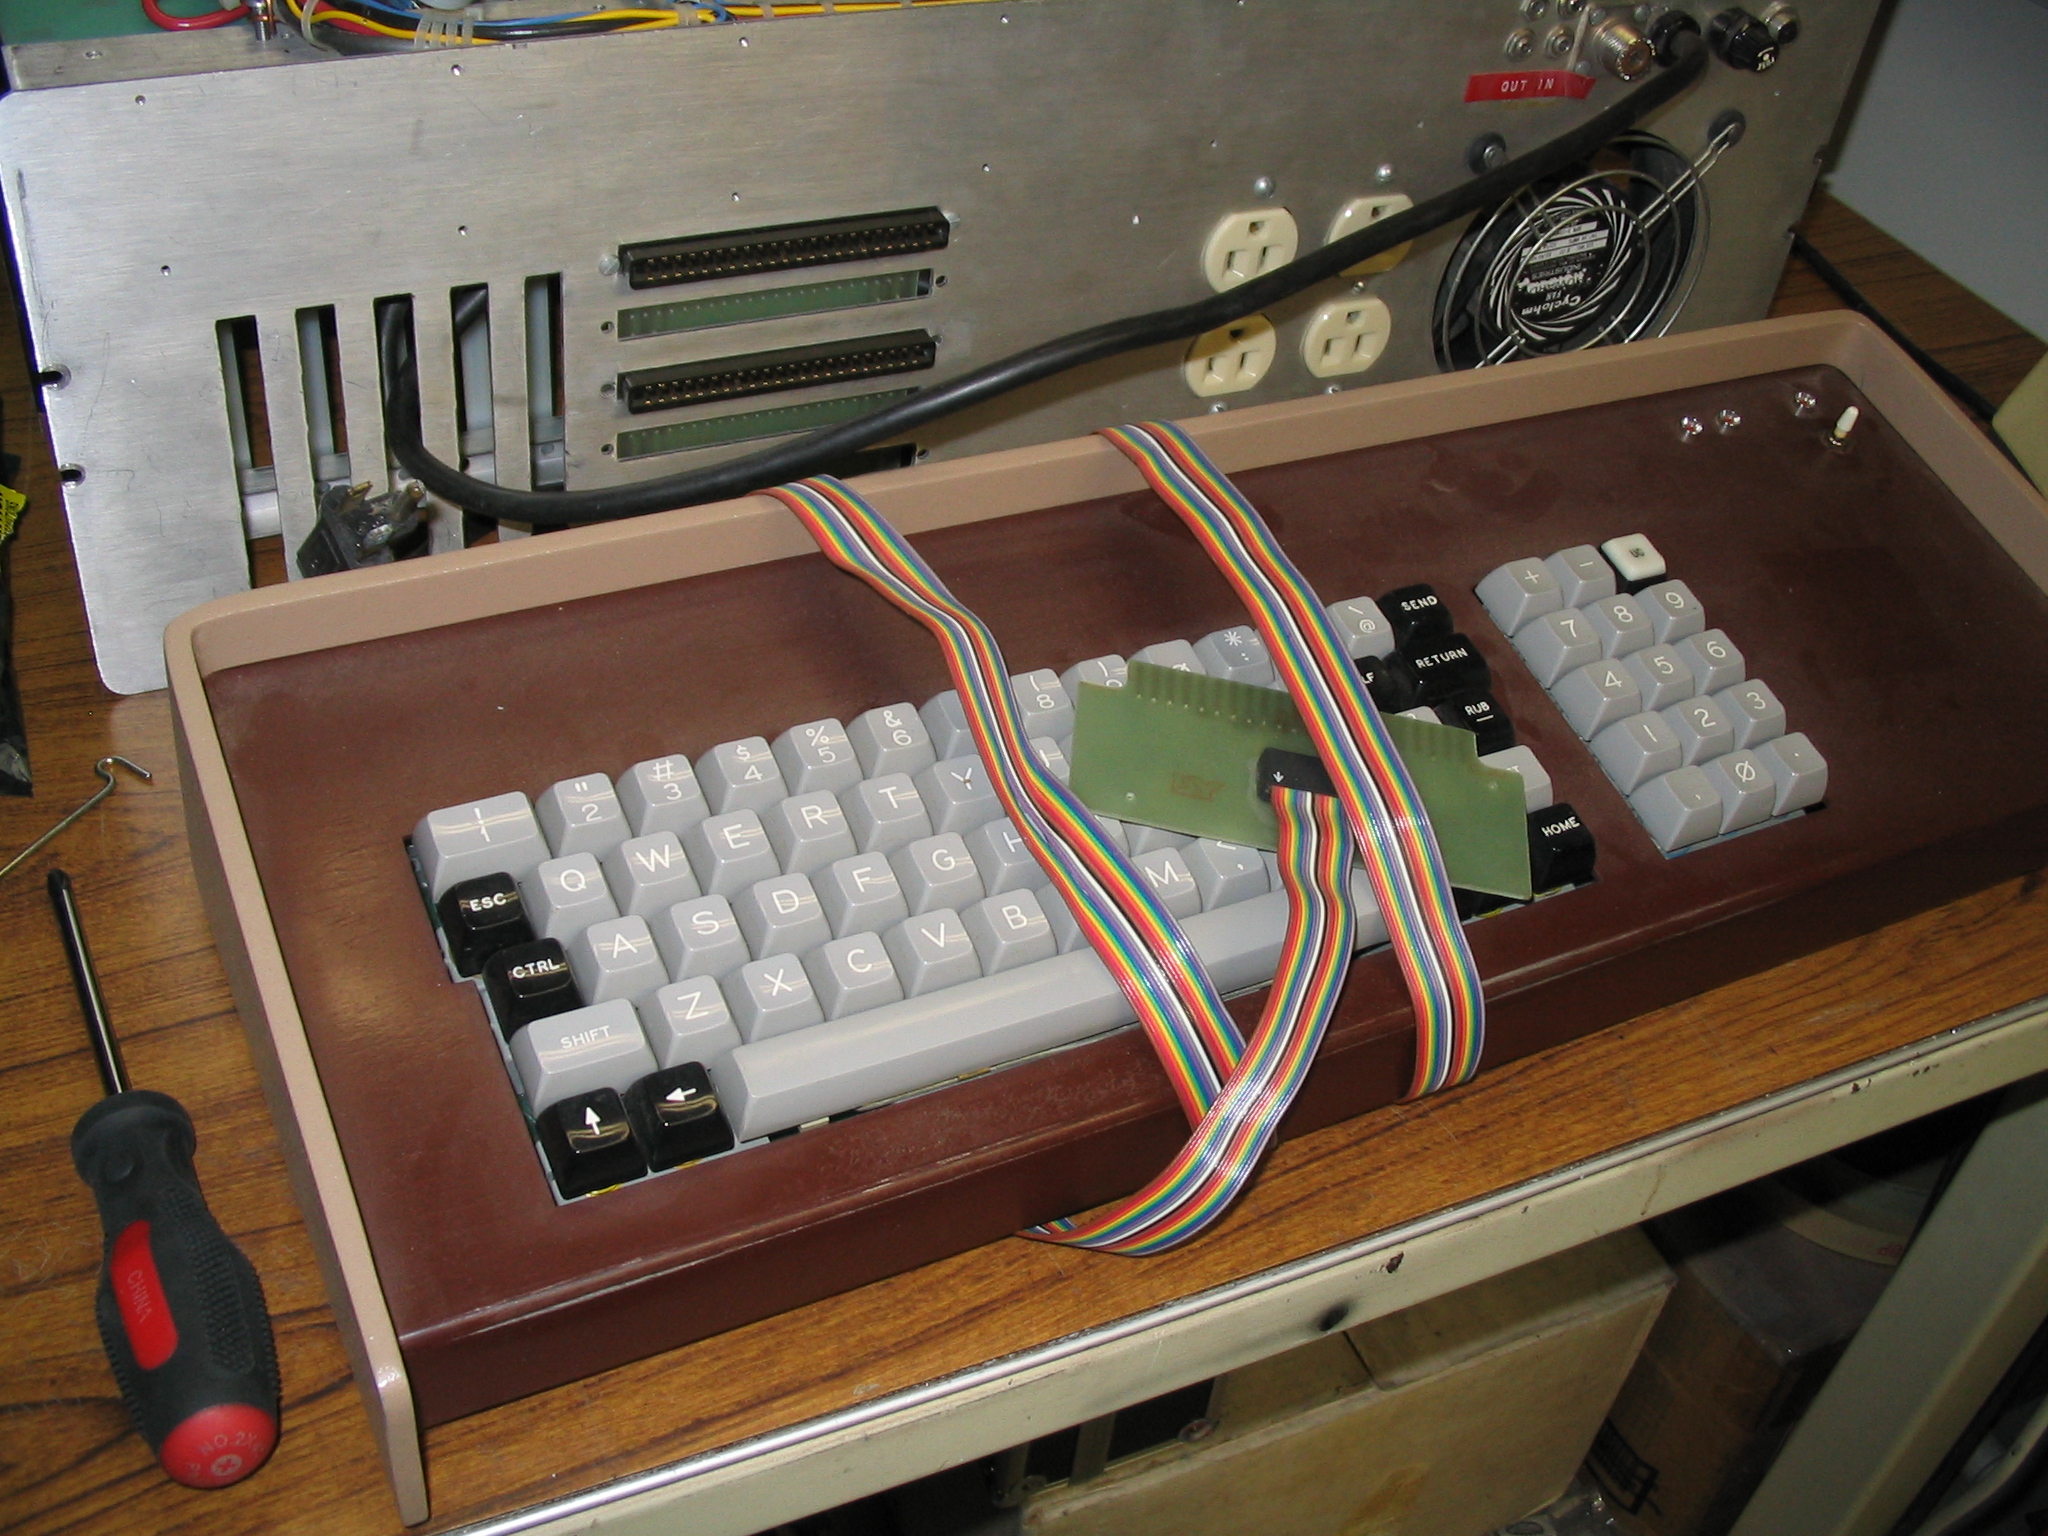
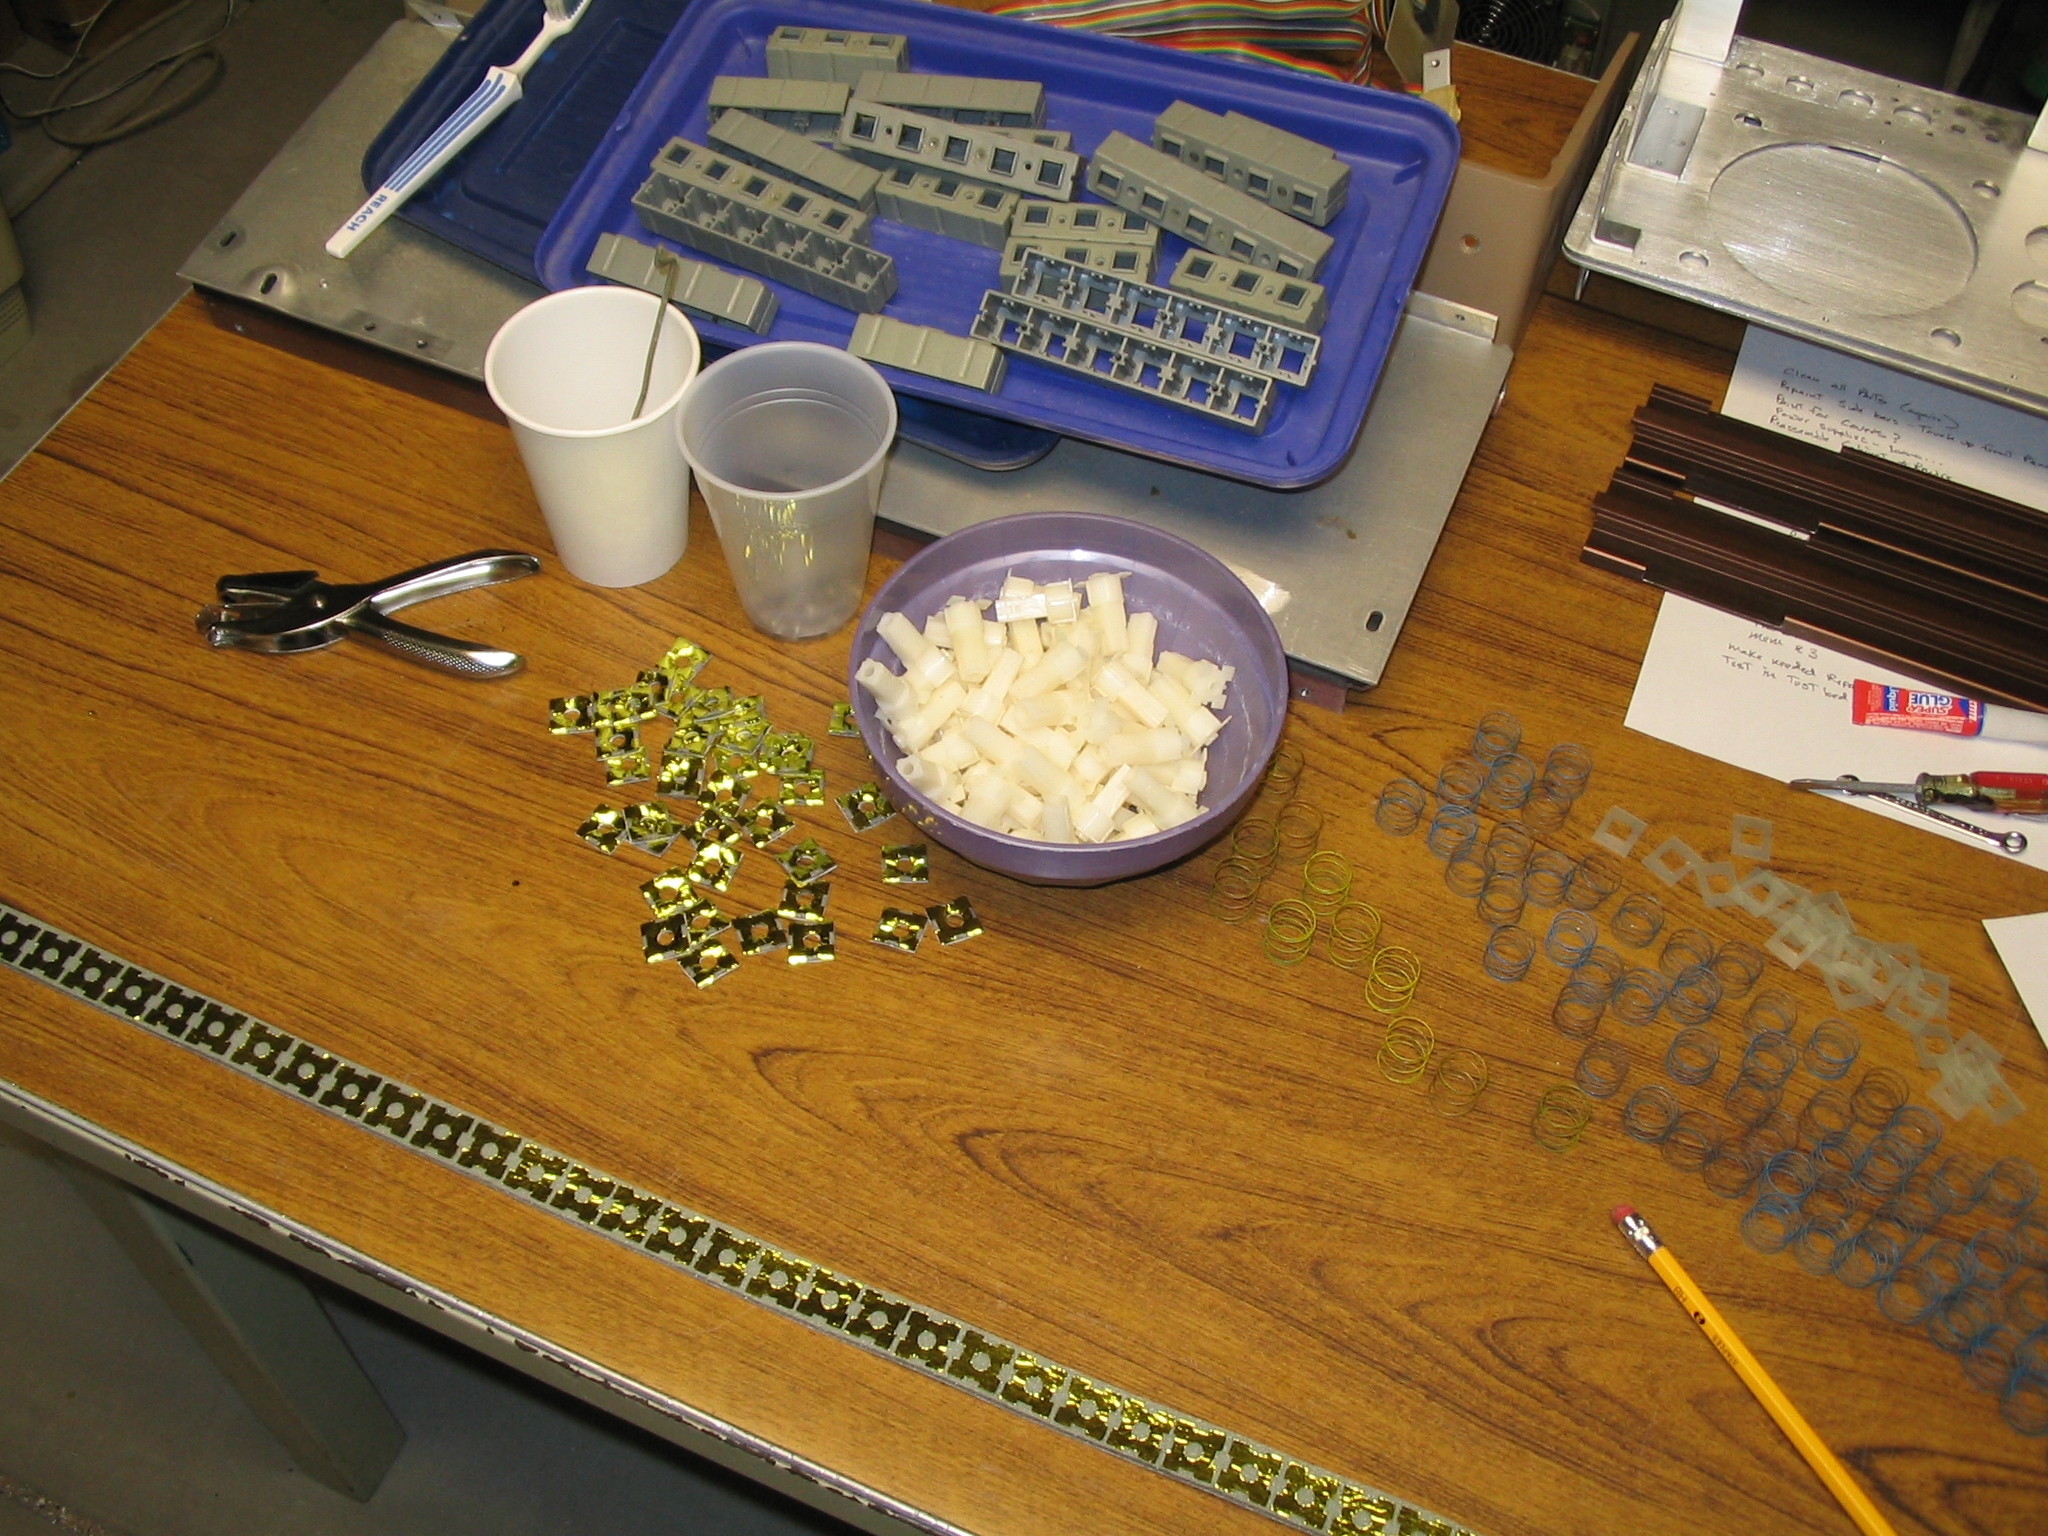
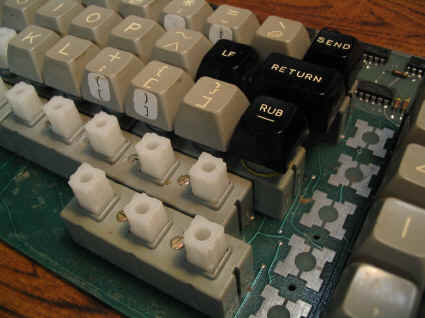
The keyboard is probably the most difficult of all digital group items
to restore. Hundreds of parts must be removed. cleaned, or rebuilt. The
key plungers must be carefully disassembled and the gold foil that makes
the capacitive key 'contact' must be cleaned and remounted to the
plunger with new foam. Here are a few photos of the restoration of two
of my keyboards, and a few tips on how to do your own. Enjoy.
|
|
Typical keyboard before restoration
|
|
|

Keyboard in poor shape
|
|
|
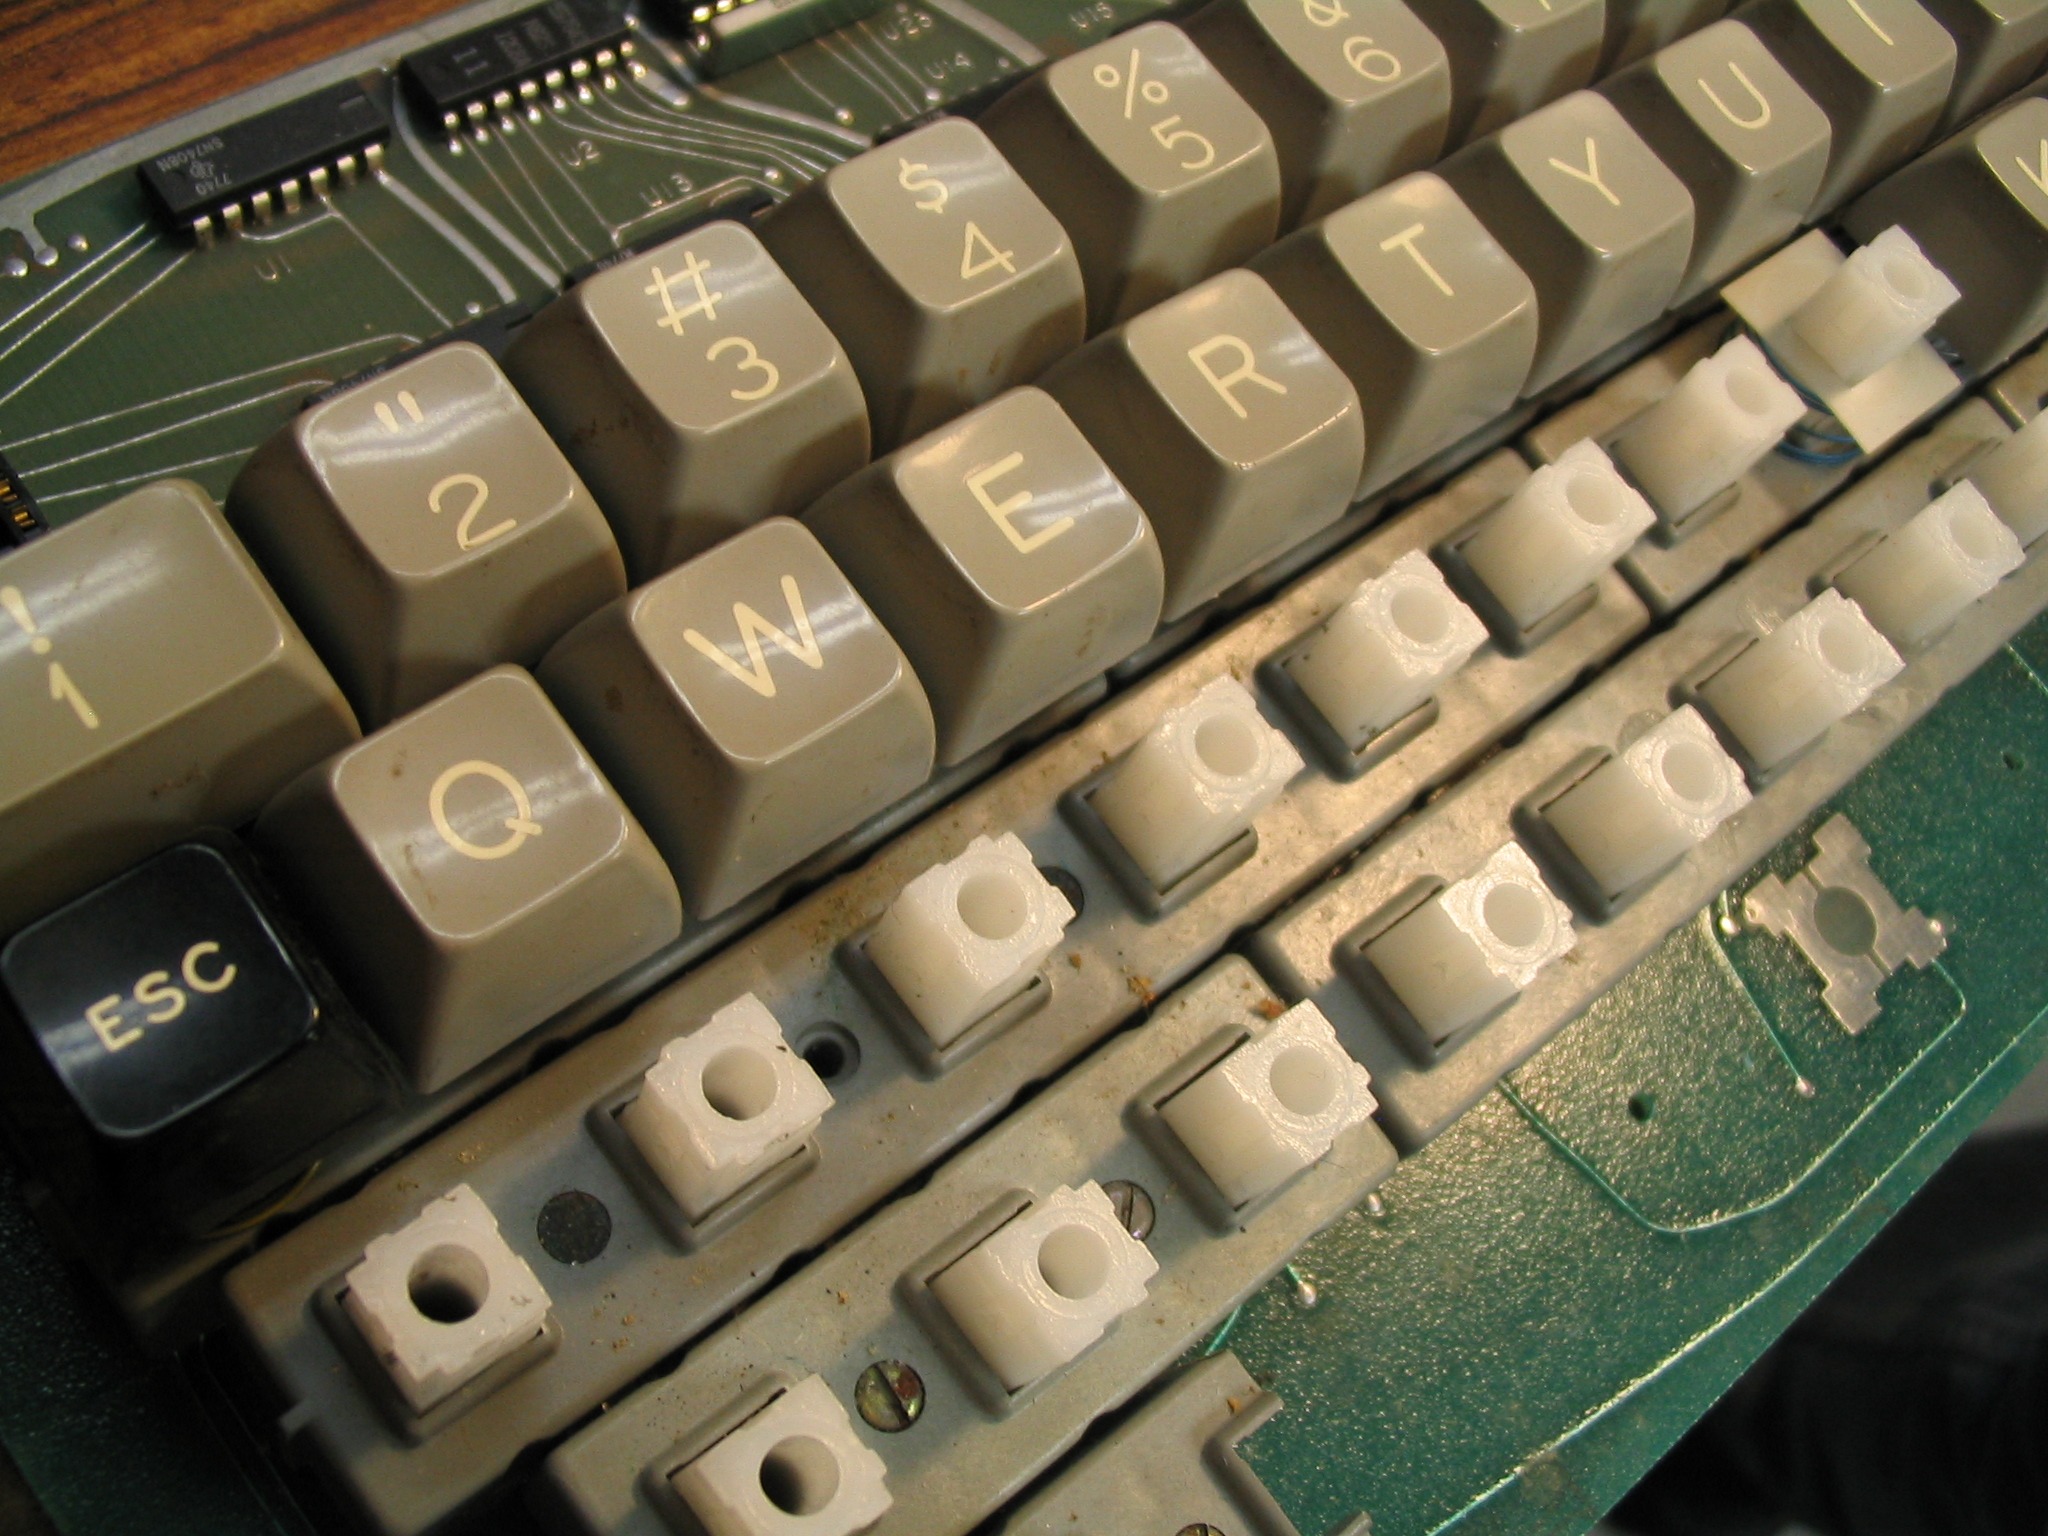
Pulling the keys
|
|
|
Documenting the custom labeling
|
|
|

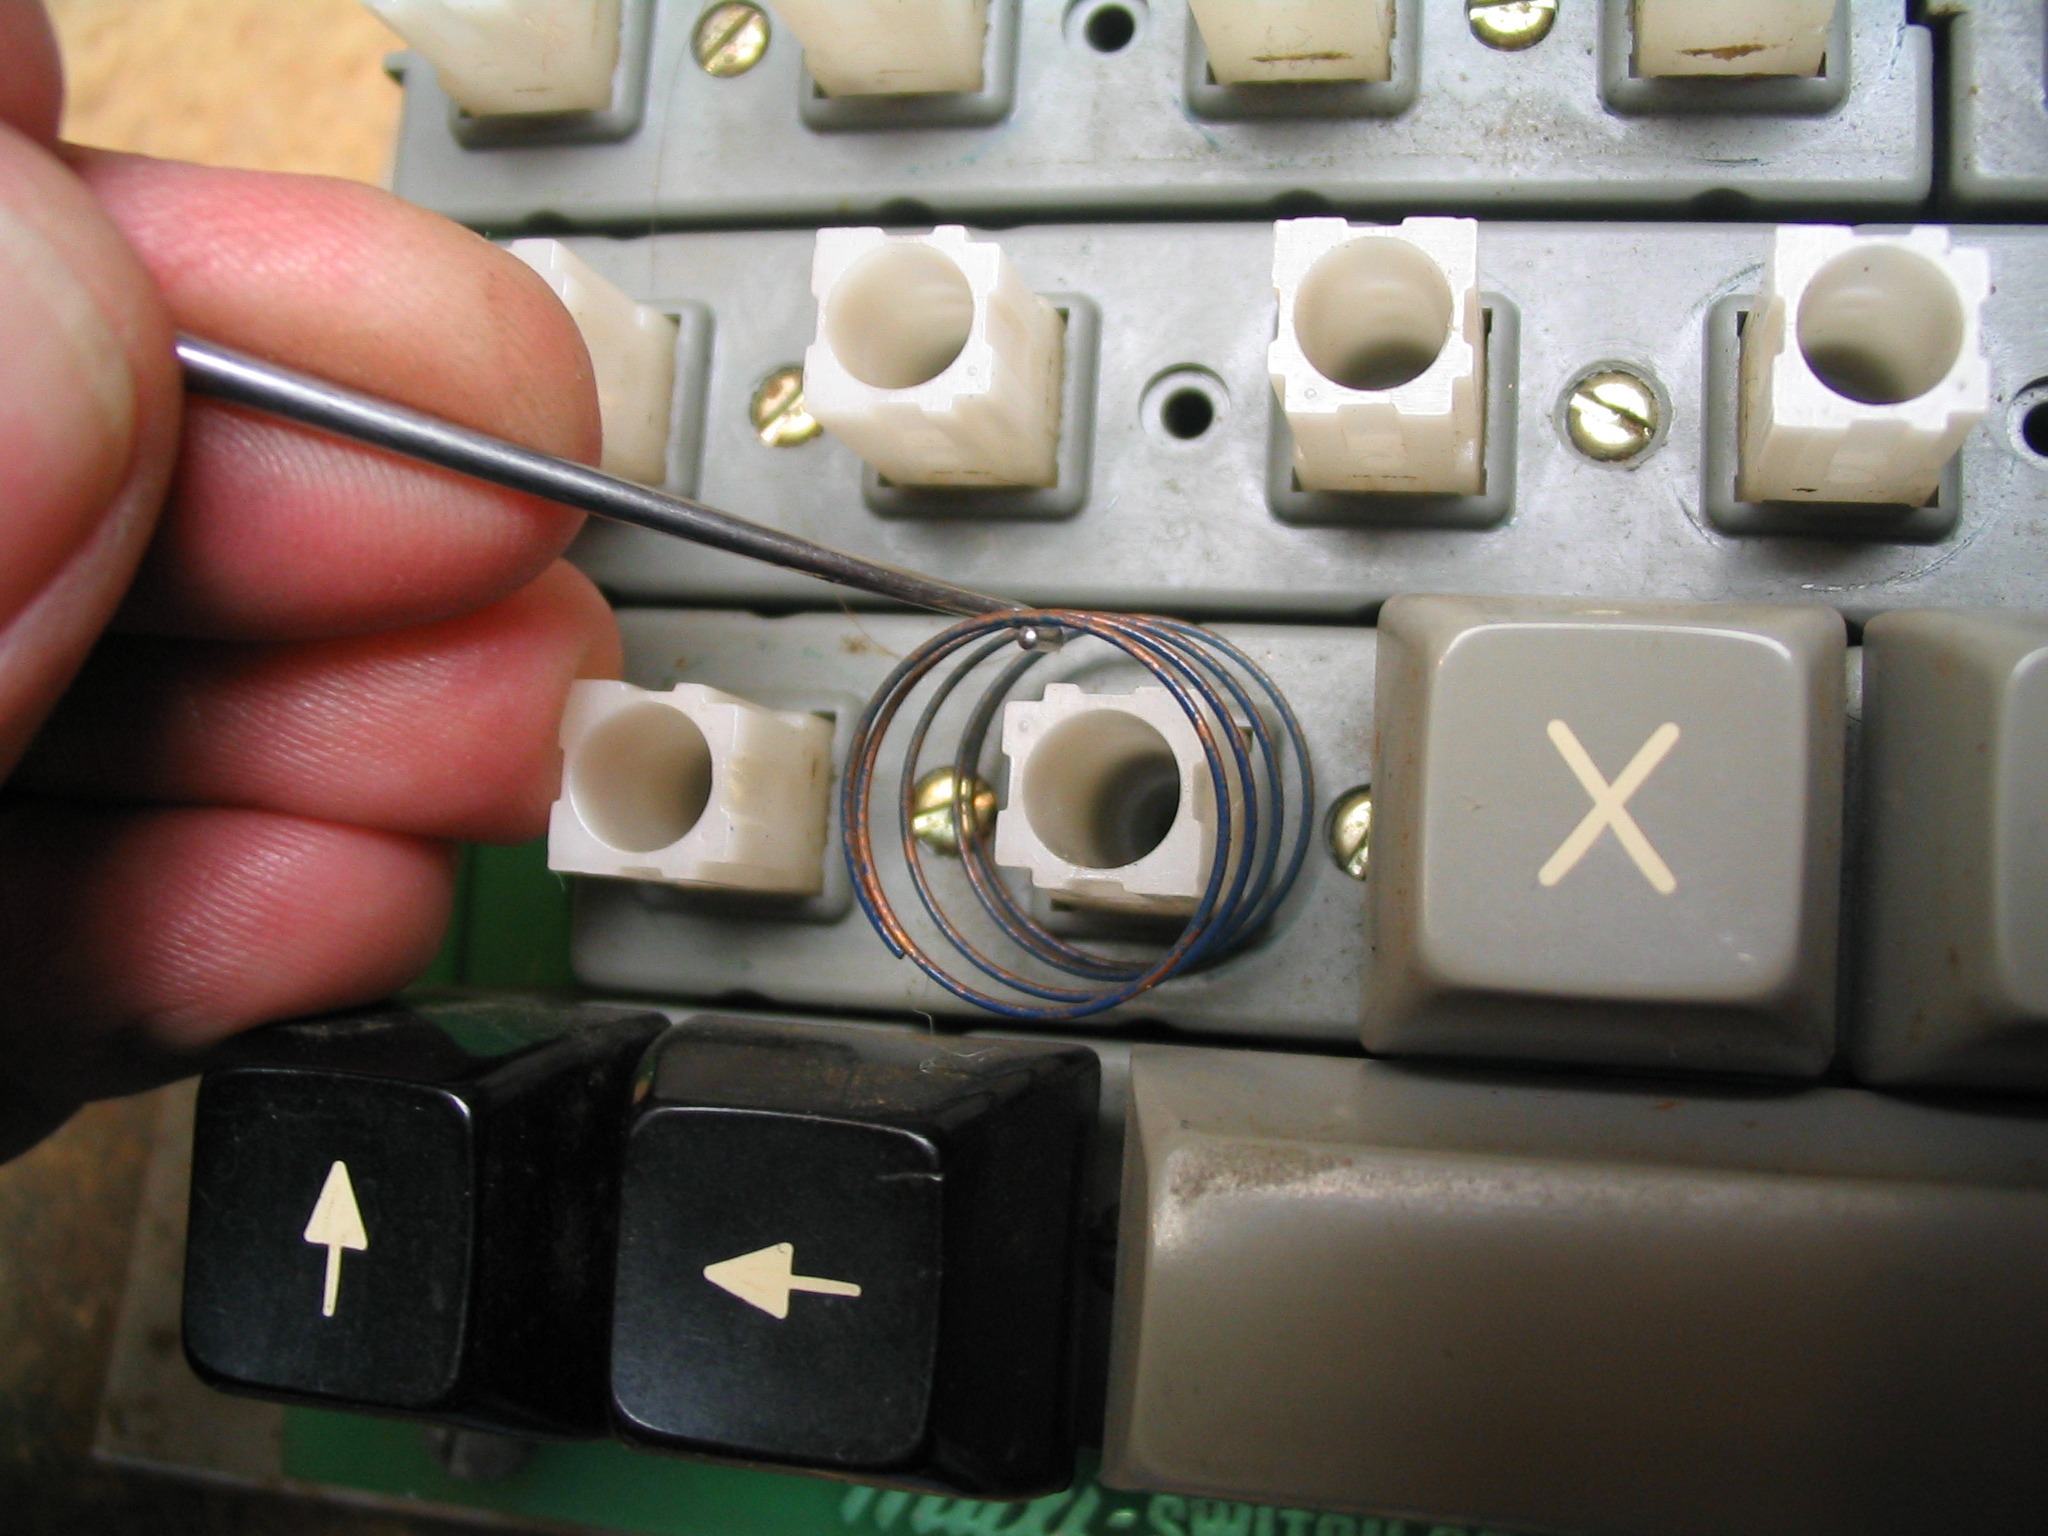
Spring under keycap
|
|
|
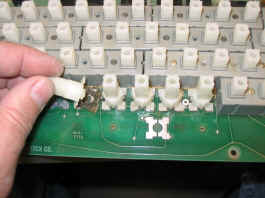
Attachment of the ribbon cable
|
|
|
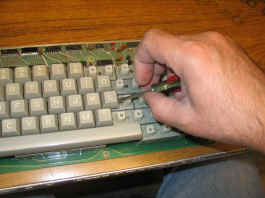
Using a small screwdriver to pry off keys
|
|
|
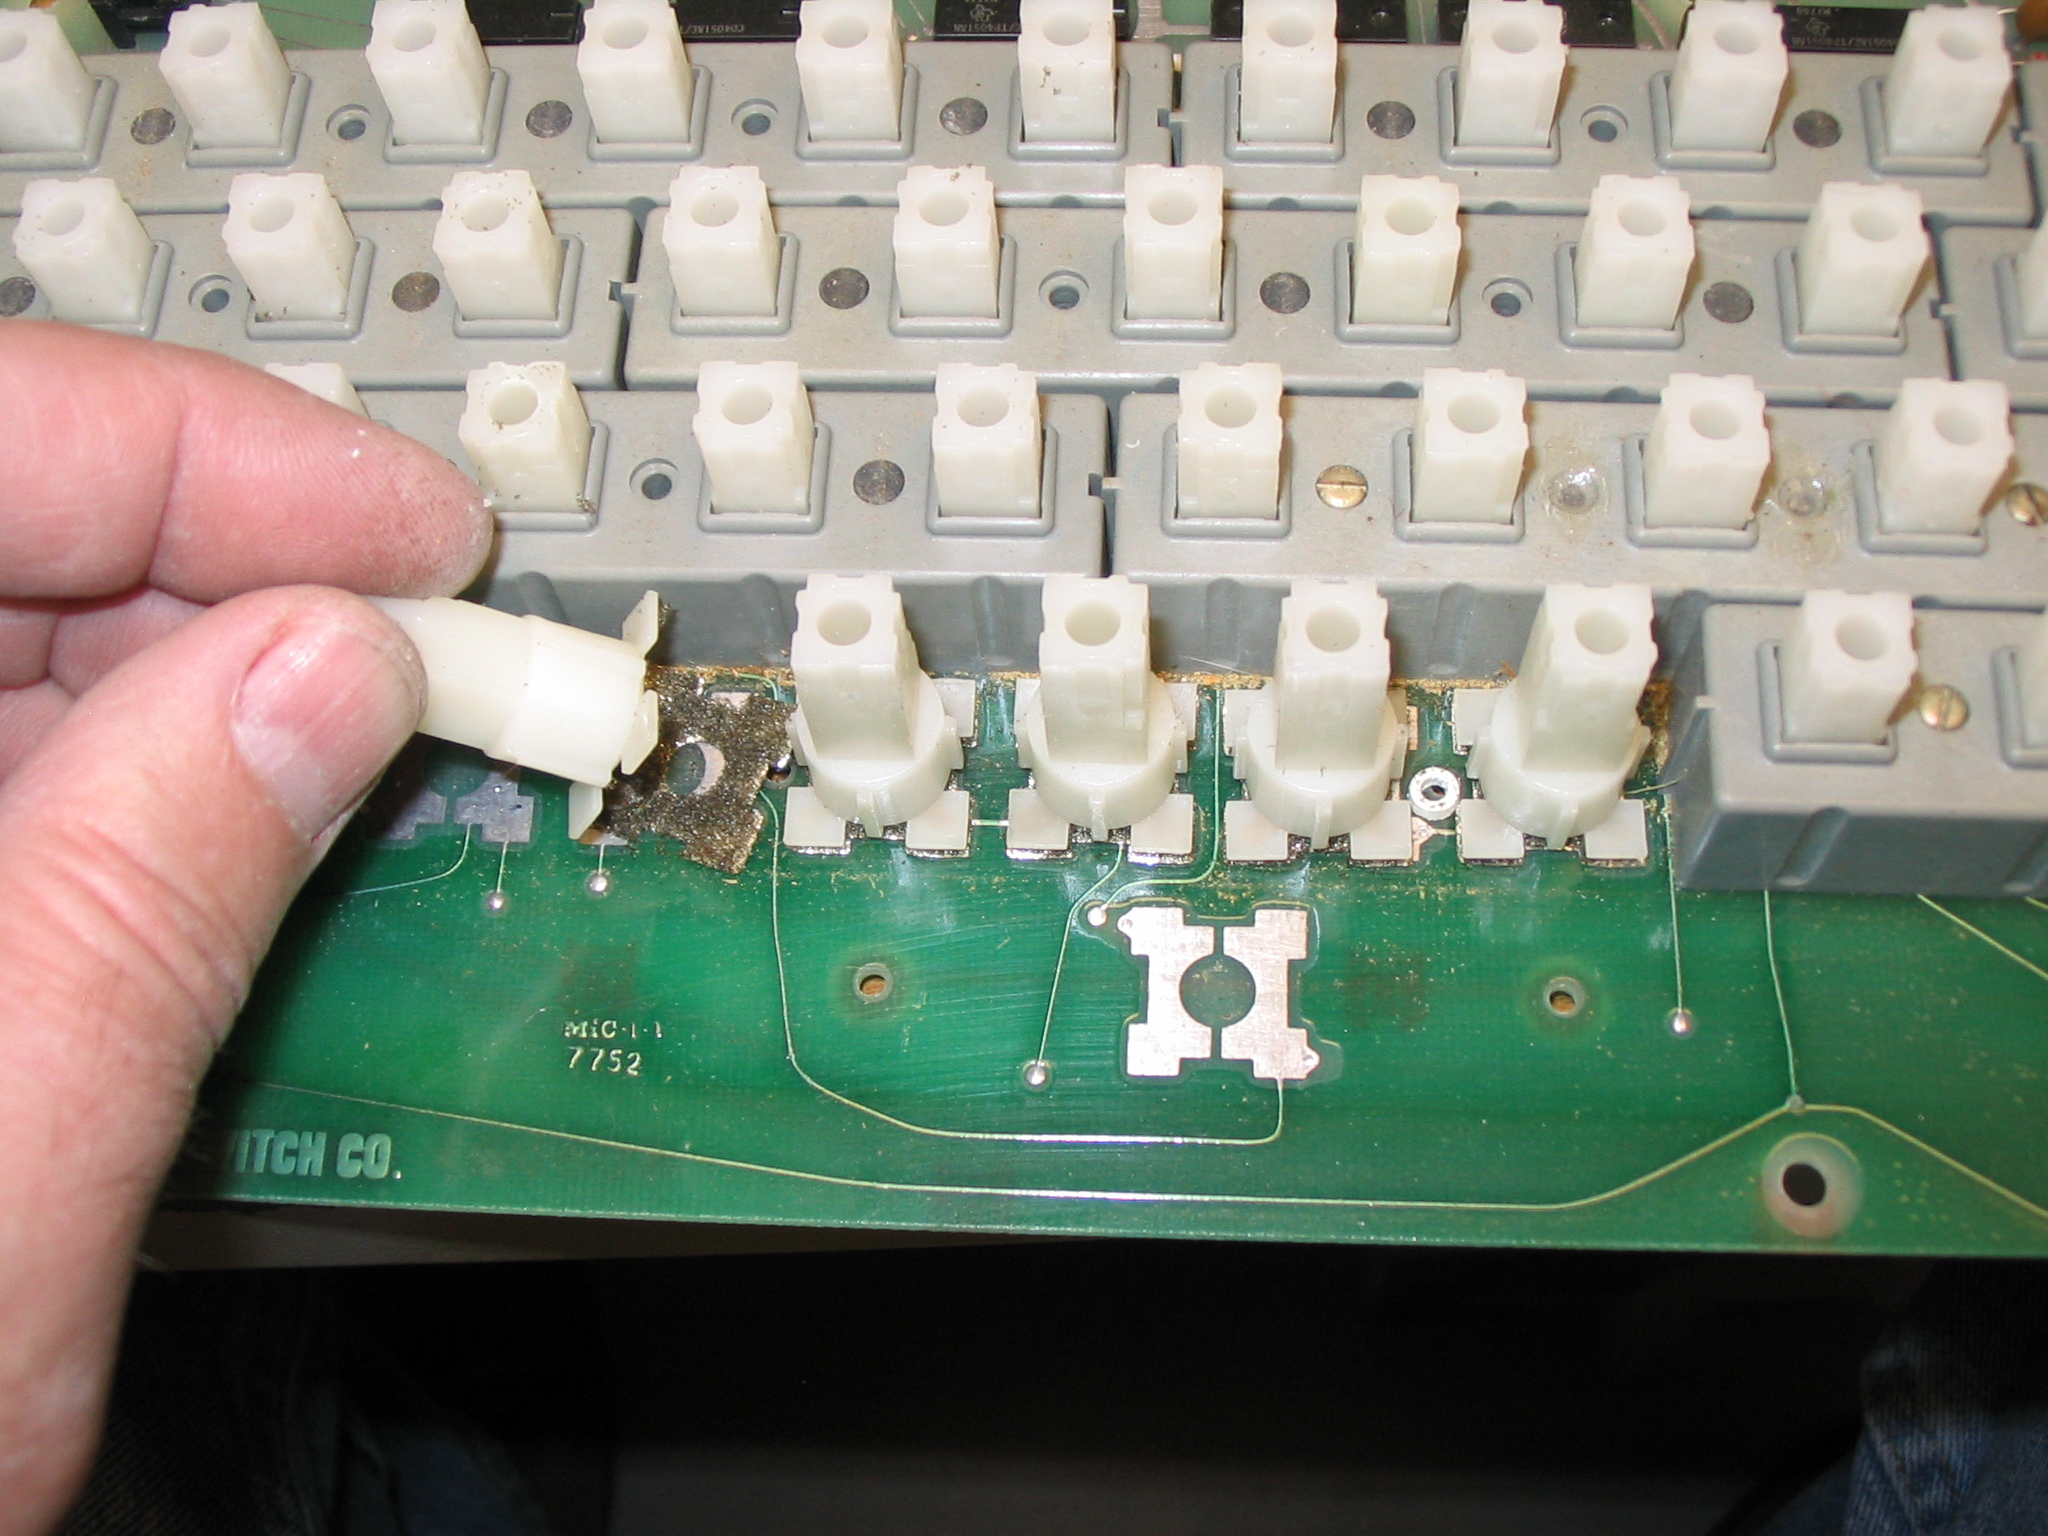
All the keys removed
|
|
|
Crumbly foam under each key
|
|
|
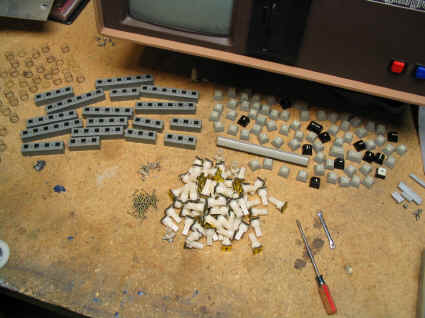
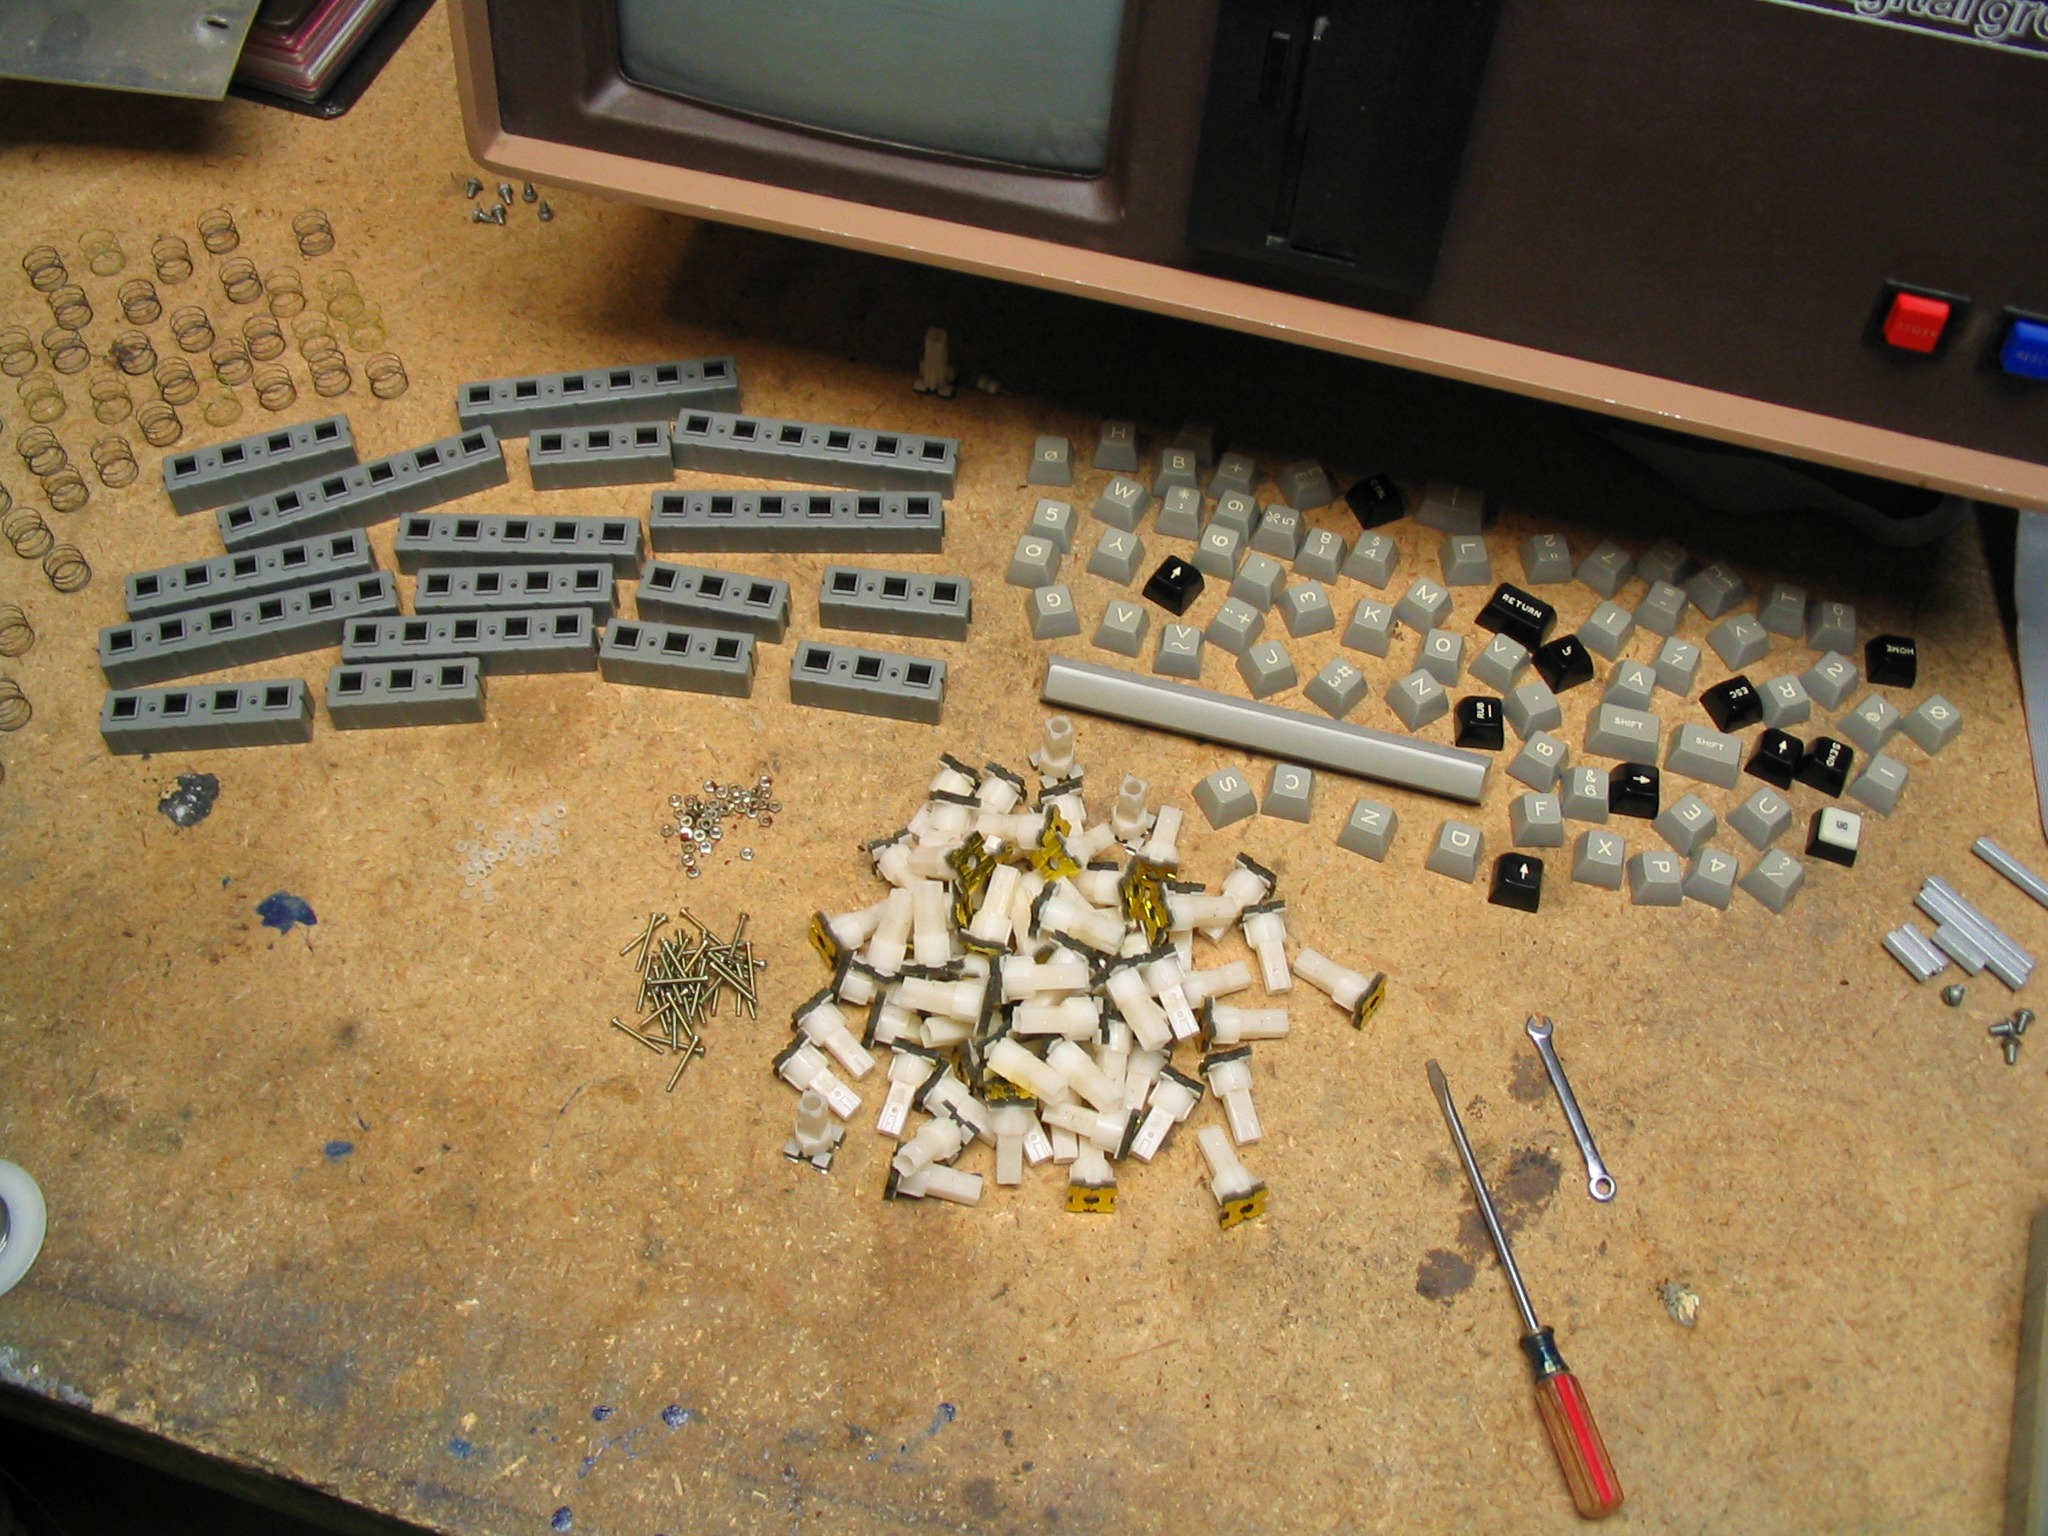
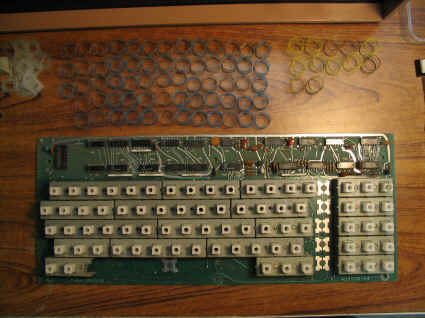
The parts pile
|
|
|

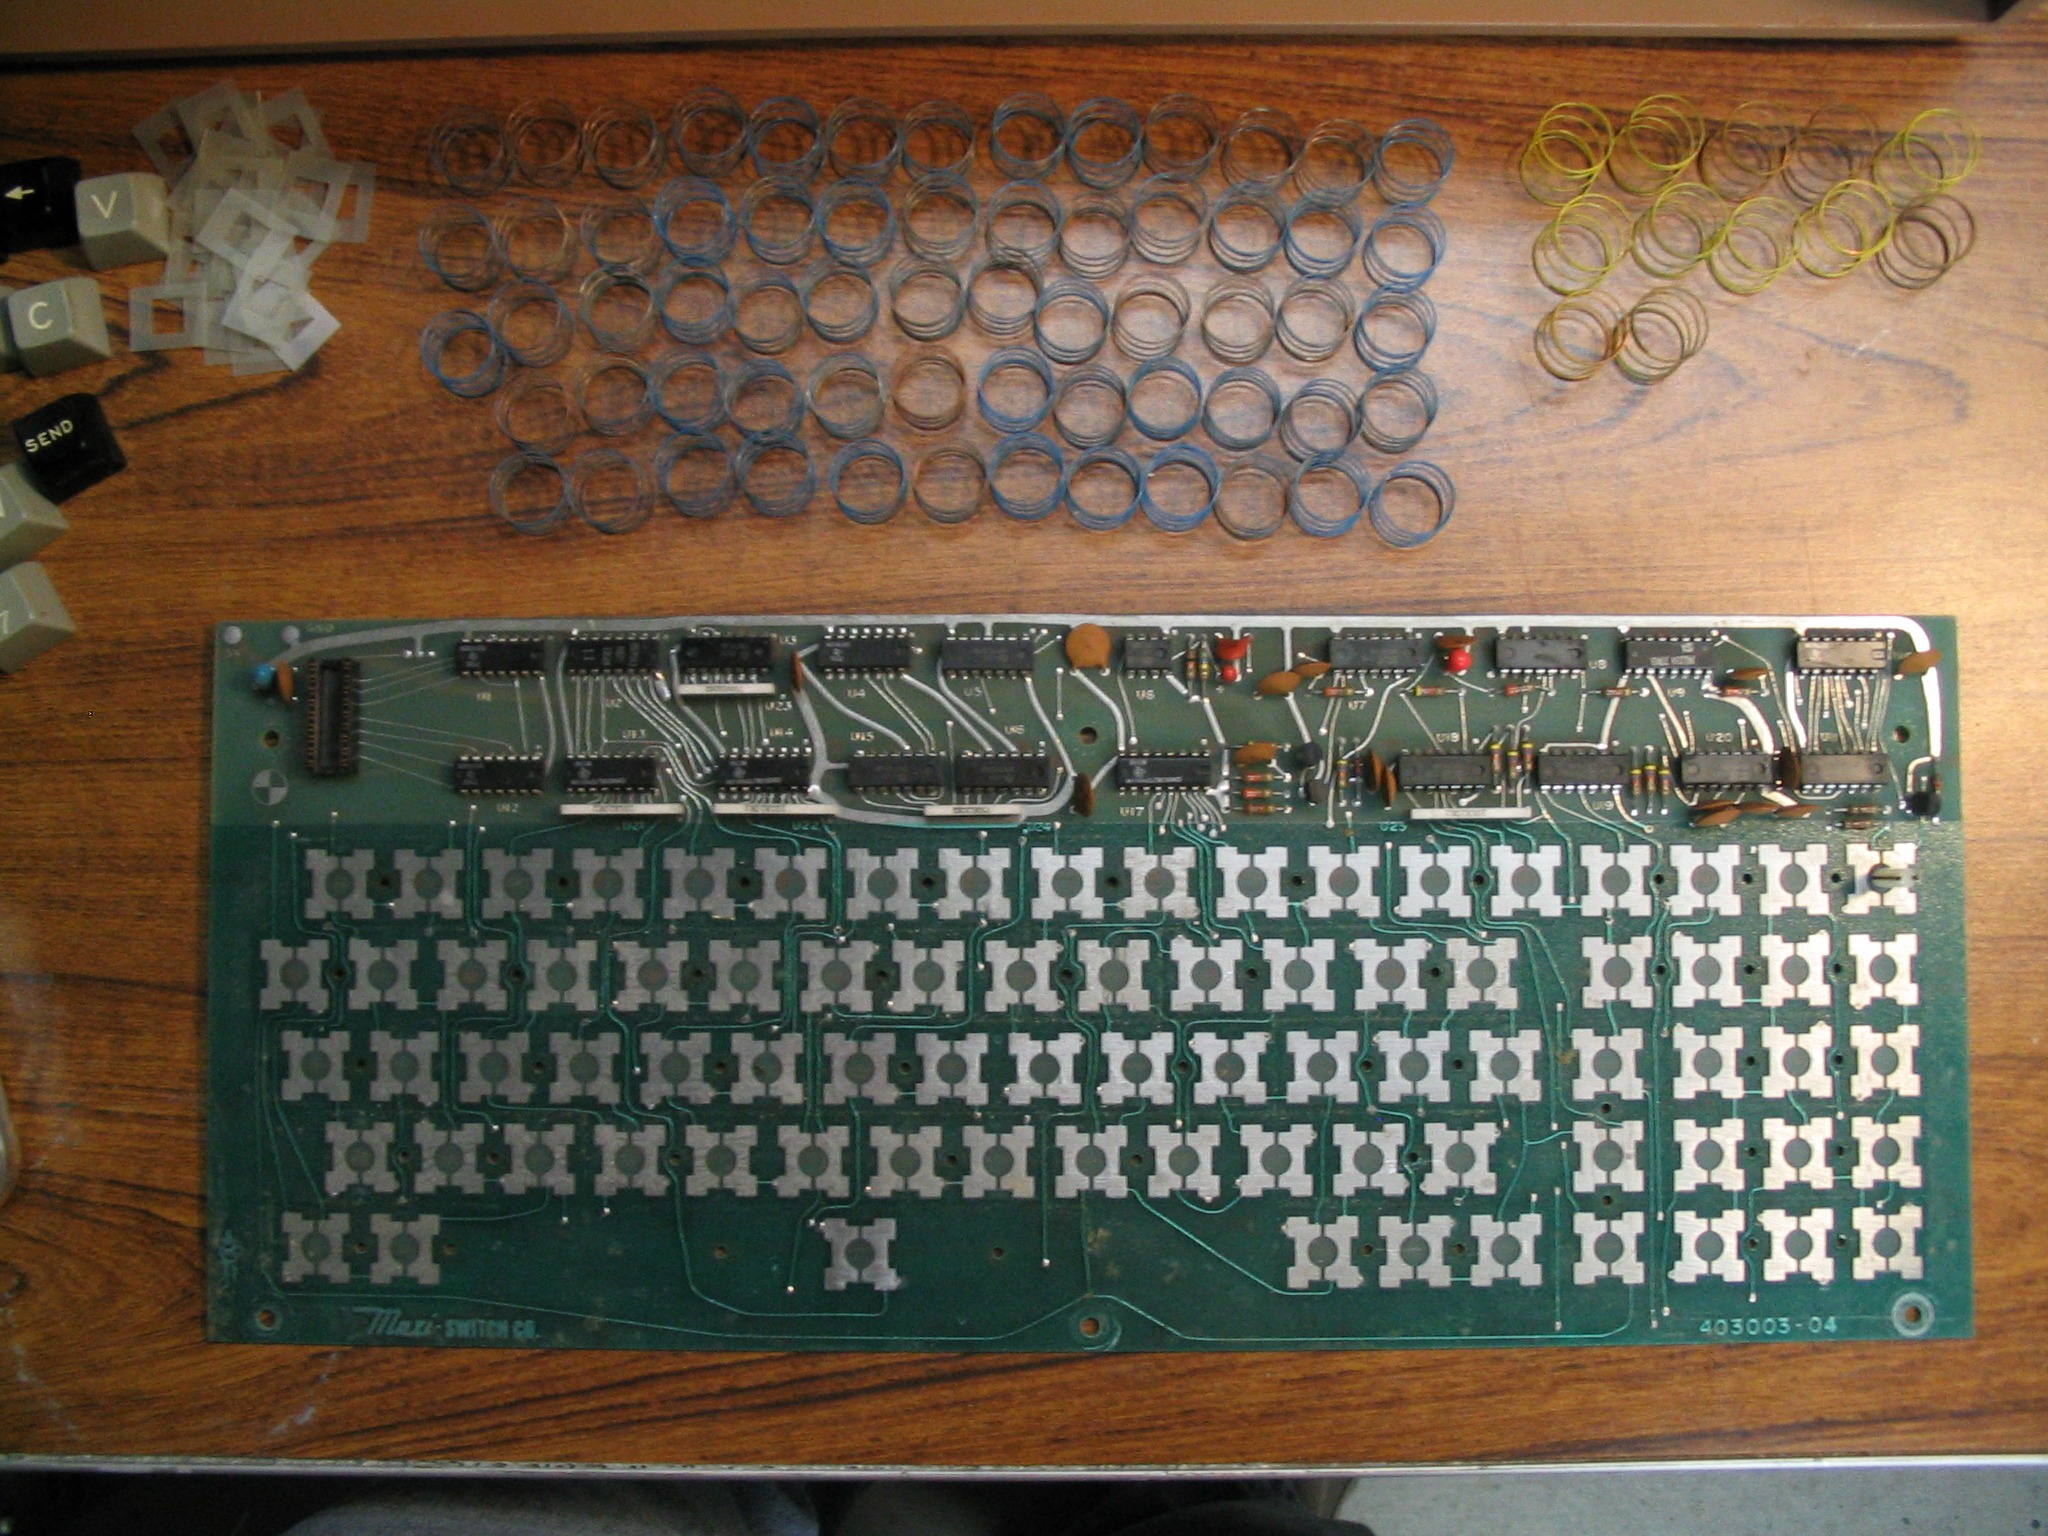
Stripped board
|
|
|
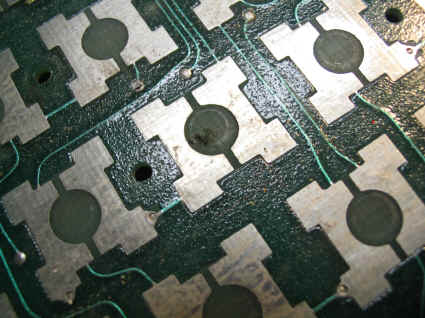
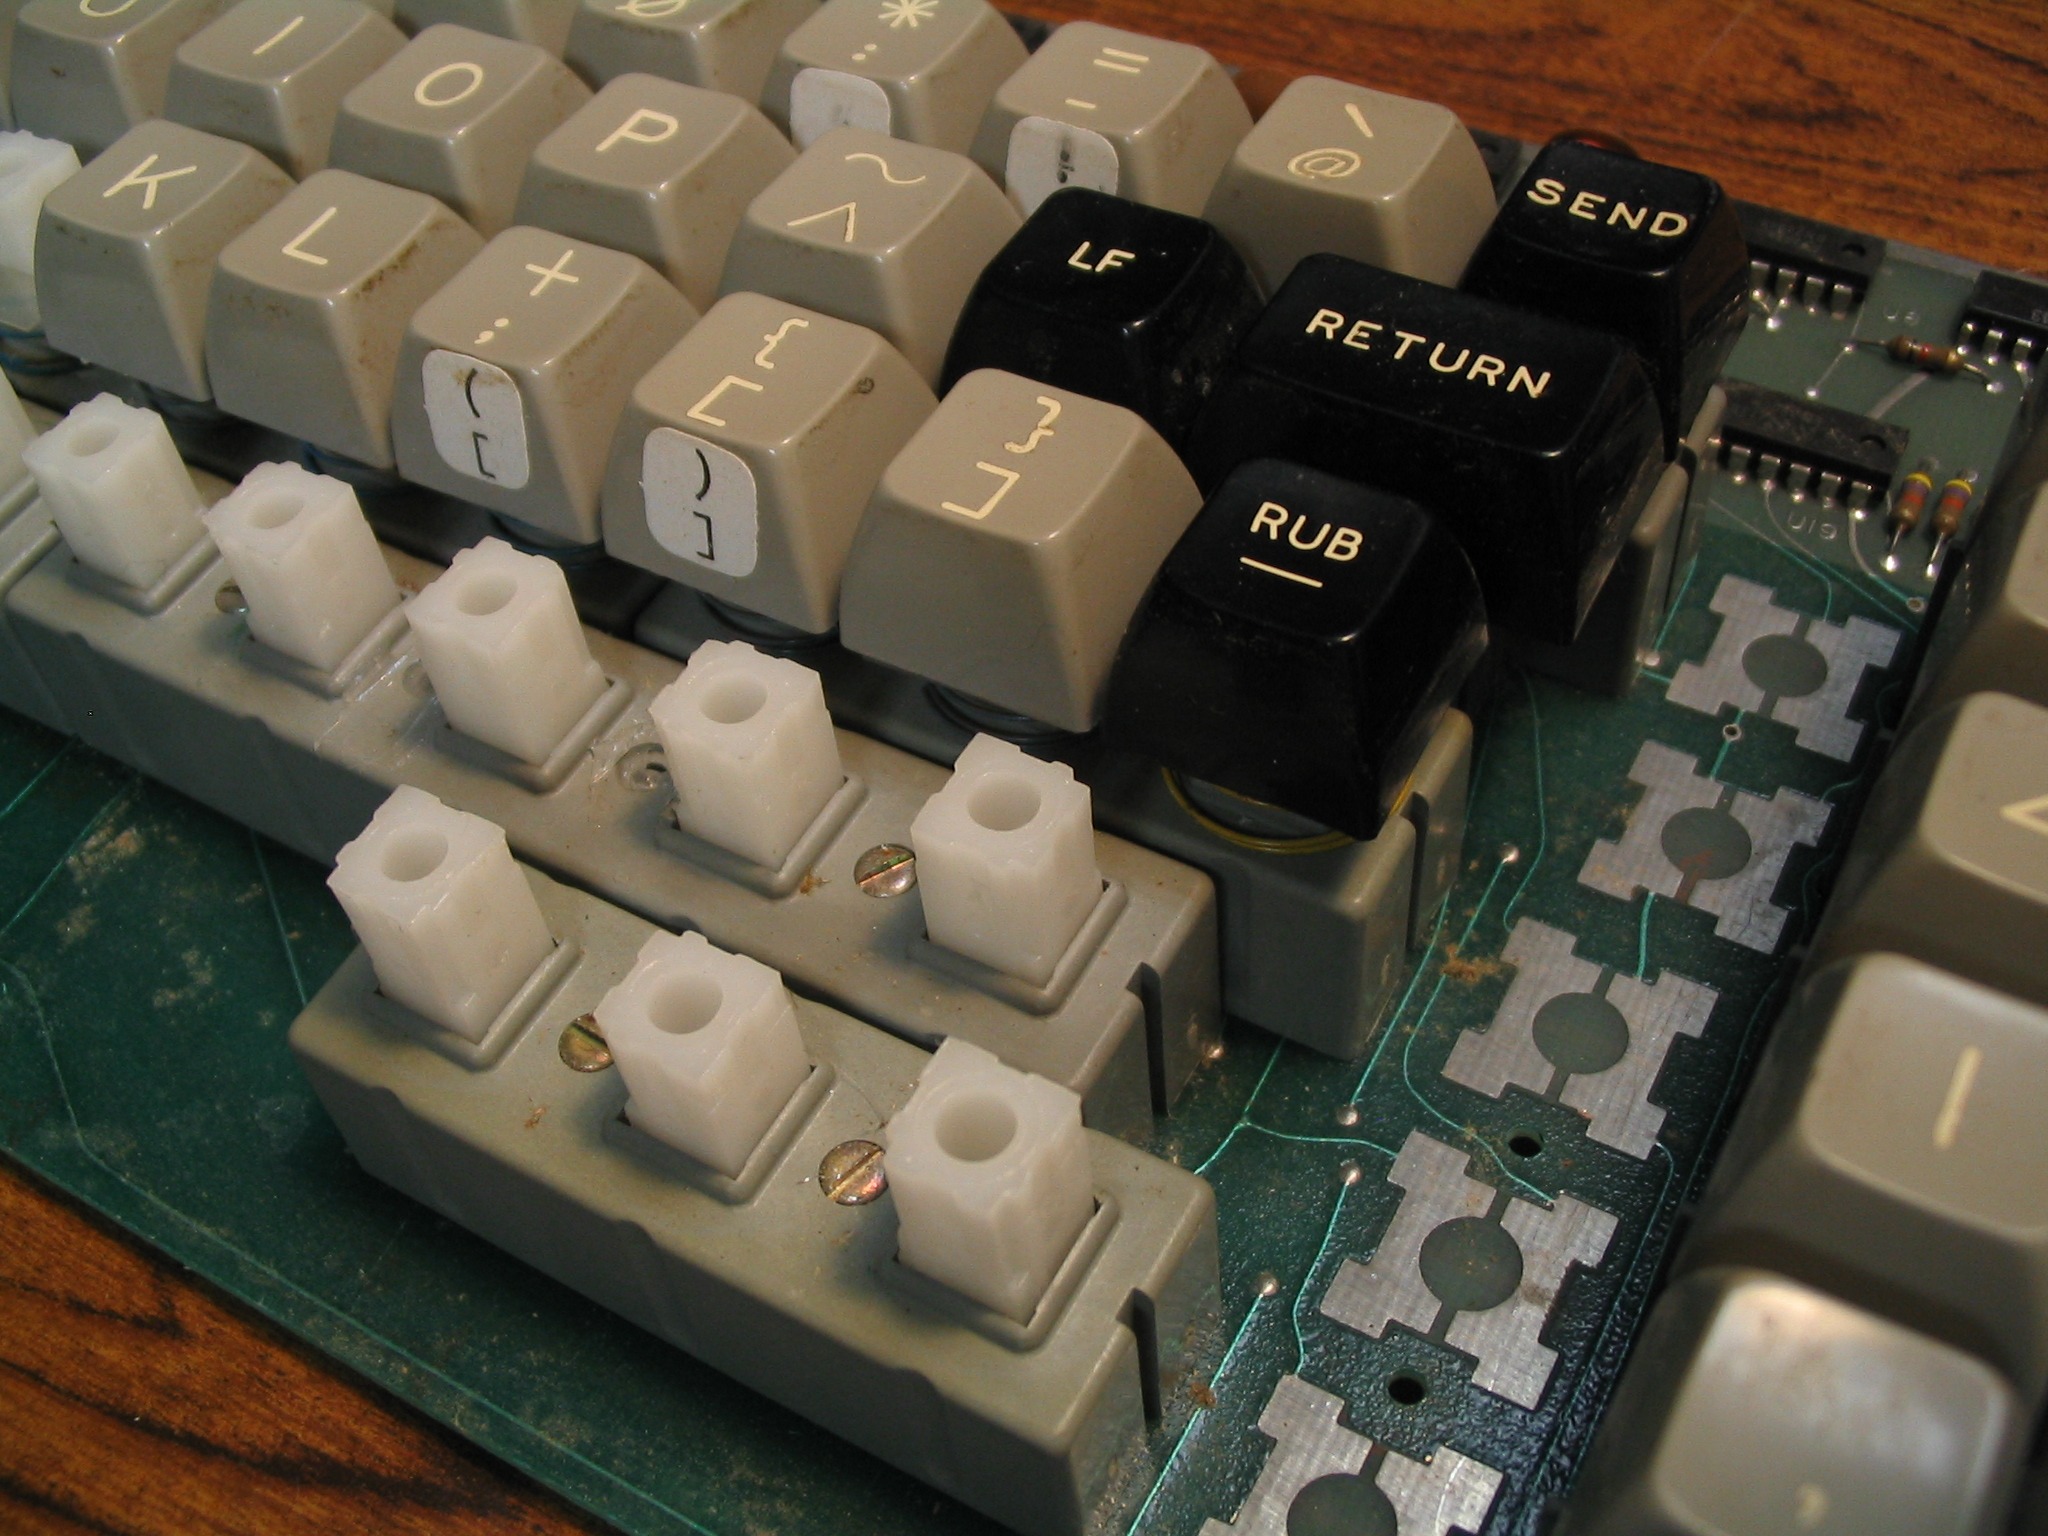
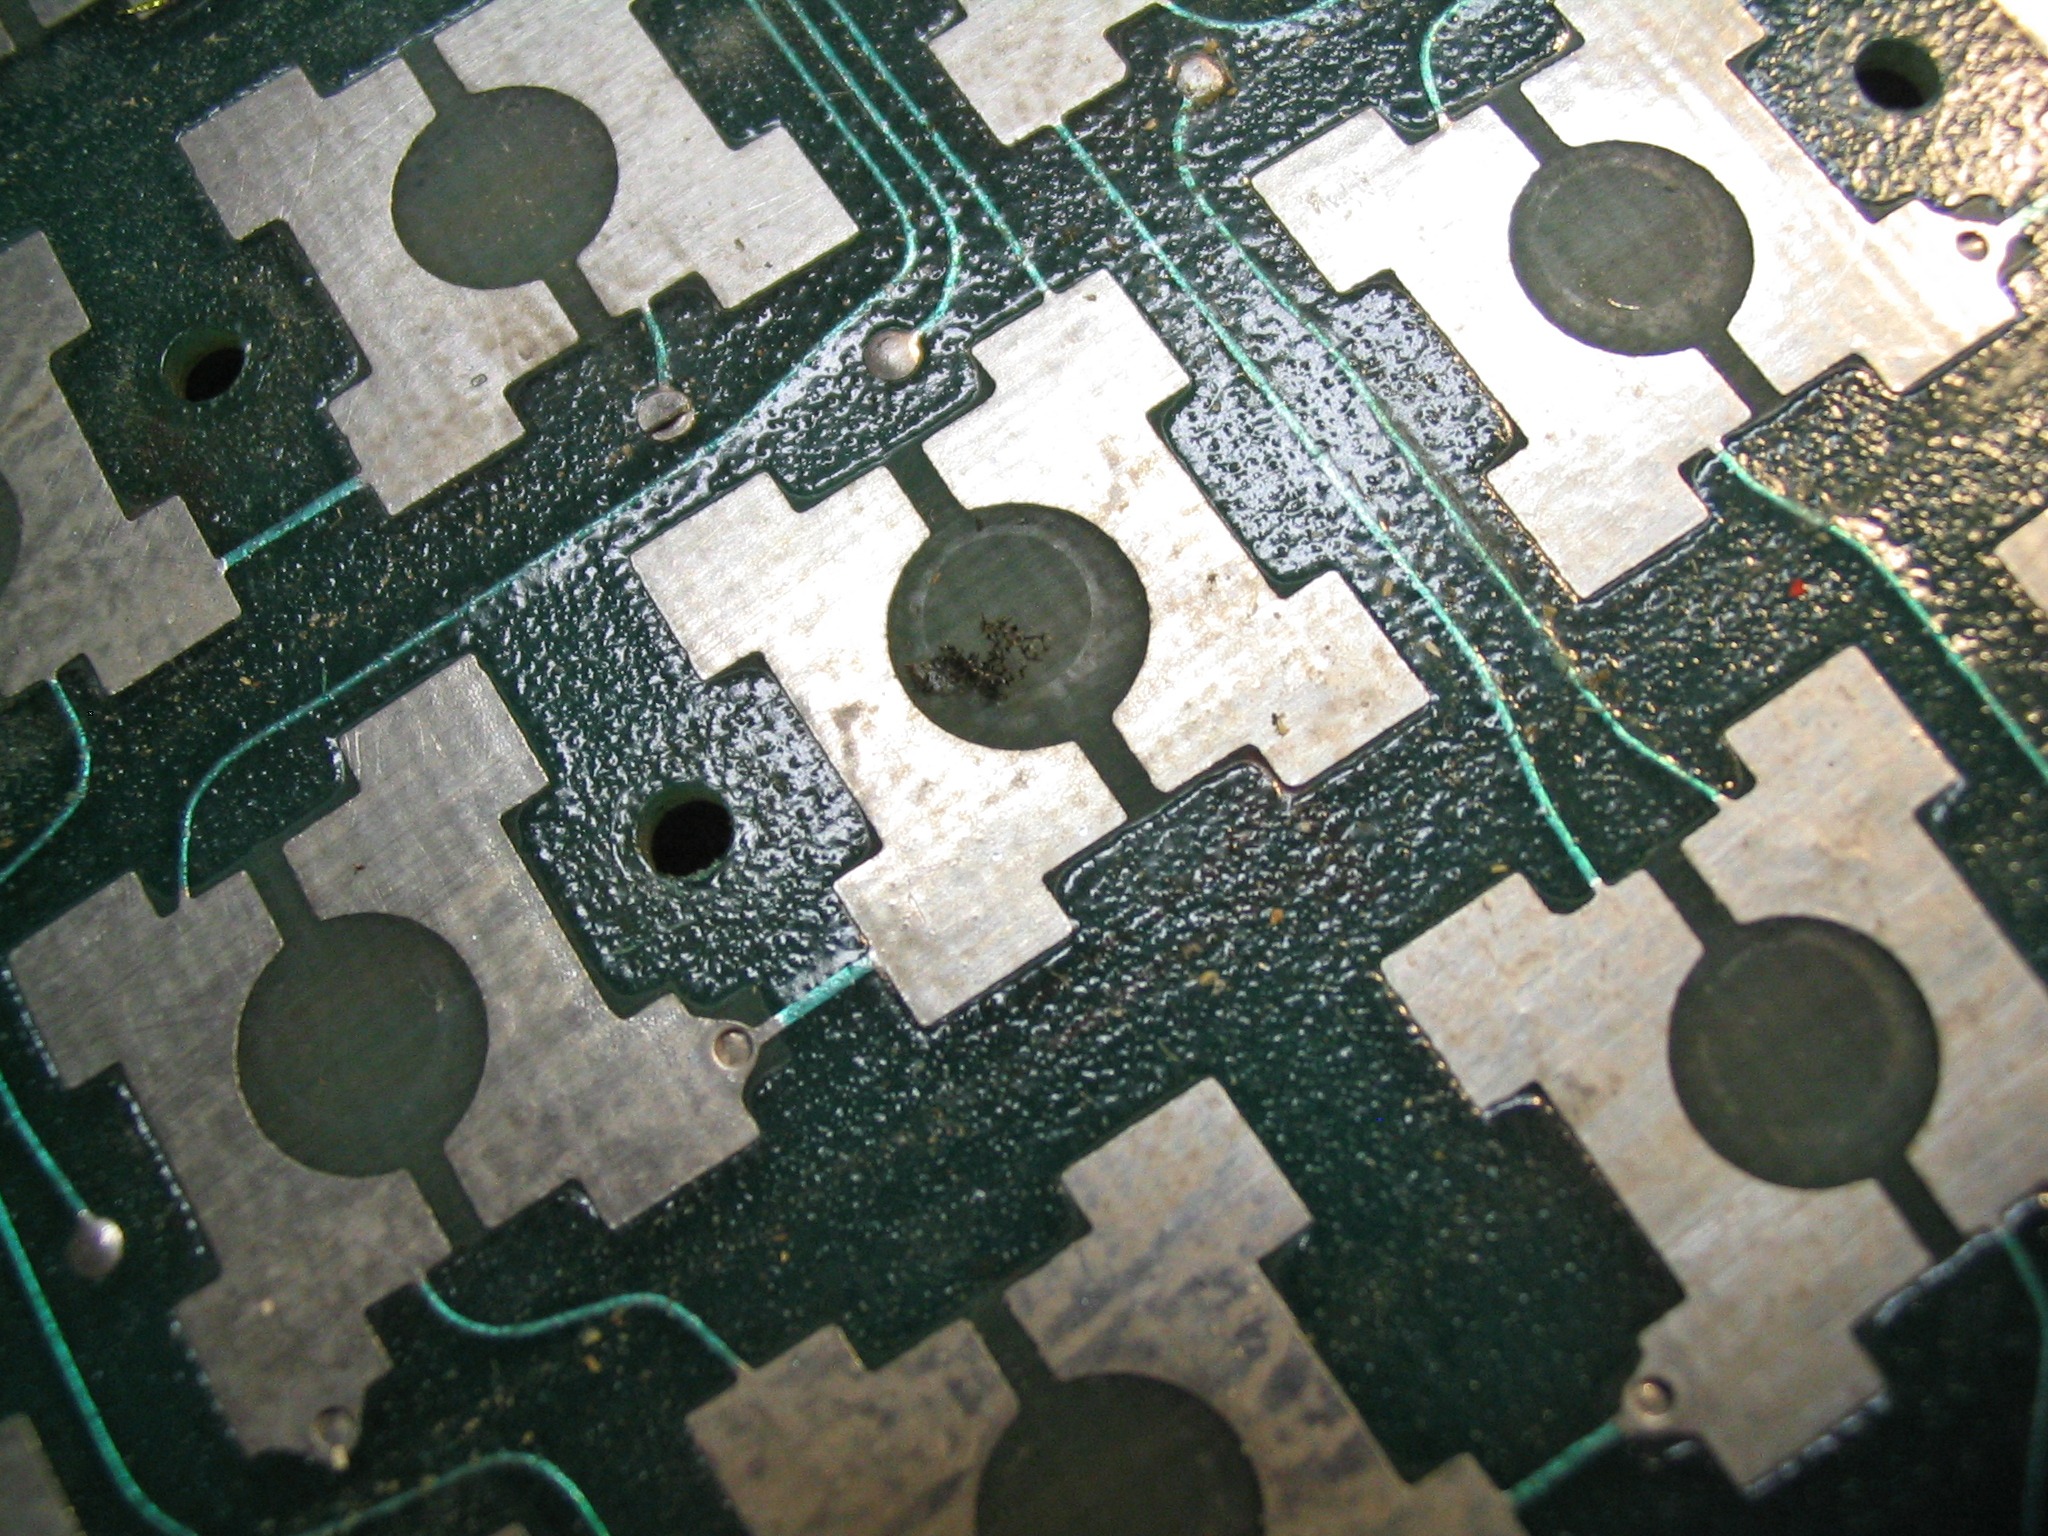
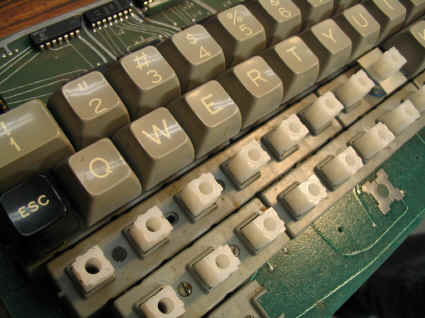
Close-up of the unclean contact area
|
|
|
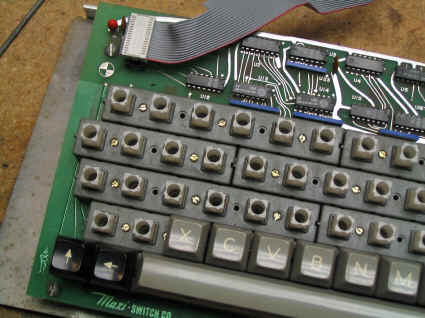
Disassembly and Cleaning
keyboard.pdf
contains an exploded view of the keyboard that can be used as a guide
for disassembly. Be careful not to scratch the finished parts! You may
find it a good idea to take notes during the disassembly to ease in
reassembly, and to work in an area that will not be disturbed until the
restoration is complete. Watch out for kids! The springs and keys are irresistible
to young ones--I learned this from experience. :)
|
|

Keyboard layout
|
|
| The keycaps pull straight off, and
originally, a square piece of plastic held the spring in place, this
also pulls straight off--I have never seen a keyboard that had all of
them intact. I have no idea why, perhaps they were not installed on all
keys. Also note that the springs are not all the same--they are color
coded for stiffness, but since I cannot be certain that someone before
me has not jumbled them, I cannot say for certain which keys had a
particular color. My guess is that the more often used keys (black keys,
e, s, etc.) had the stiffer springs (reds and yellows).
After disassembly, I strip the keyboard down as shown in the photos,
and wash everything in a mild dish soap with a toothbrush. The plungers
get washed AFTER the foam/foil pads have been removed, as discussed in
the next section. Yes, I wash the PC board the same way, taking
precautions to avoid static electricity along the way. Everything is
dried completely with compressed air before doing anything else.
Generally speaking, water does not damage electronic components or
boards unless the water cannot escape, and is allowed to sit. I blow the
water off with compressed air and then place the PC board on a towel in
an oven at the lowest possible temperature, usually around 150 degrees,
for an hour or two with the door just cracked open to the first
self-hold point. The heat pulls the humidity out of the air and dries
the board completely. |
|
Plunger Prep
The plunger with attached foam and foil is the main
focus of this whole restoration. Look at the photos, unless a keyboard
was preserved in some sort of fantastic time capsule, the foam will
crumble with great ease. The gold foil must be pulled slowly and
carefully from the plunger, taking great care not to tear the foil.
A razor knife is used to scrap the remaining foam from the plunger. The
foam clinging to the foil is a little harder to deal with. I have tried
numerous ways of cleaning the foil, and the best thing I have found is
to just "dust" the foam off of the foil with a soft tooth brush.
The sticky backing on the foil seems to strengthen the foil pads. Other
cleaning methods I have tried that removed the sticky goo backing altogether,
allowed (caused?) the foil to curl and tear much easier. This is bad--just
leave the goo--trust me on this! I've done many of these.
A destroyed or missing foil square can be replaced with
plain aluminum foil, but this is not preferred. This alters the design
from a capacitive keyboard to an electrical contact keyboard, it seems
to work fine, but the foil is far less durable, and I suspect that in
time, it may lead to more trouble.
|
|
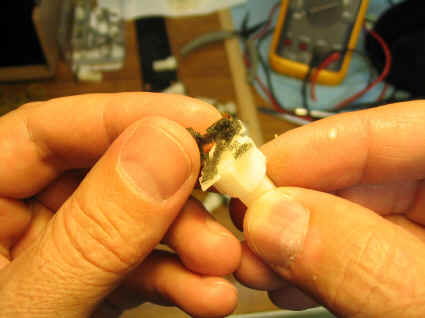
Crumbling foam
|
|
| After separating and cleaning the foil and
plungers, we are ready for the next step. I roll out a couple feet of
double-stick mounting tape (available from the local WalMart store), and
lay across my work table sticky side up. I use masking or clear tape to
hold each of the ends down to the table top so the tape lays flat. Then
I place each of the foil squares side-by-side with a pair of tweezers,
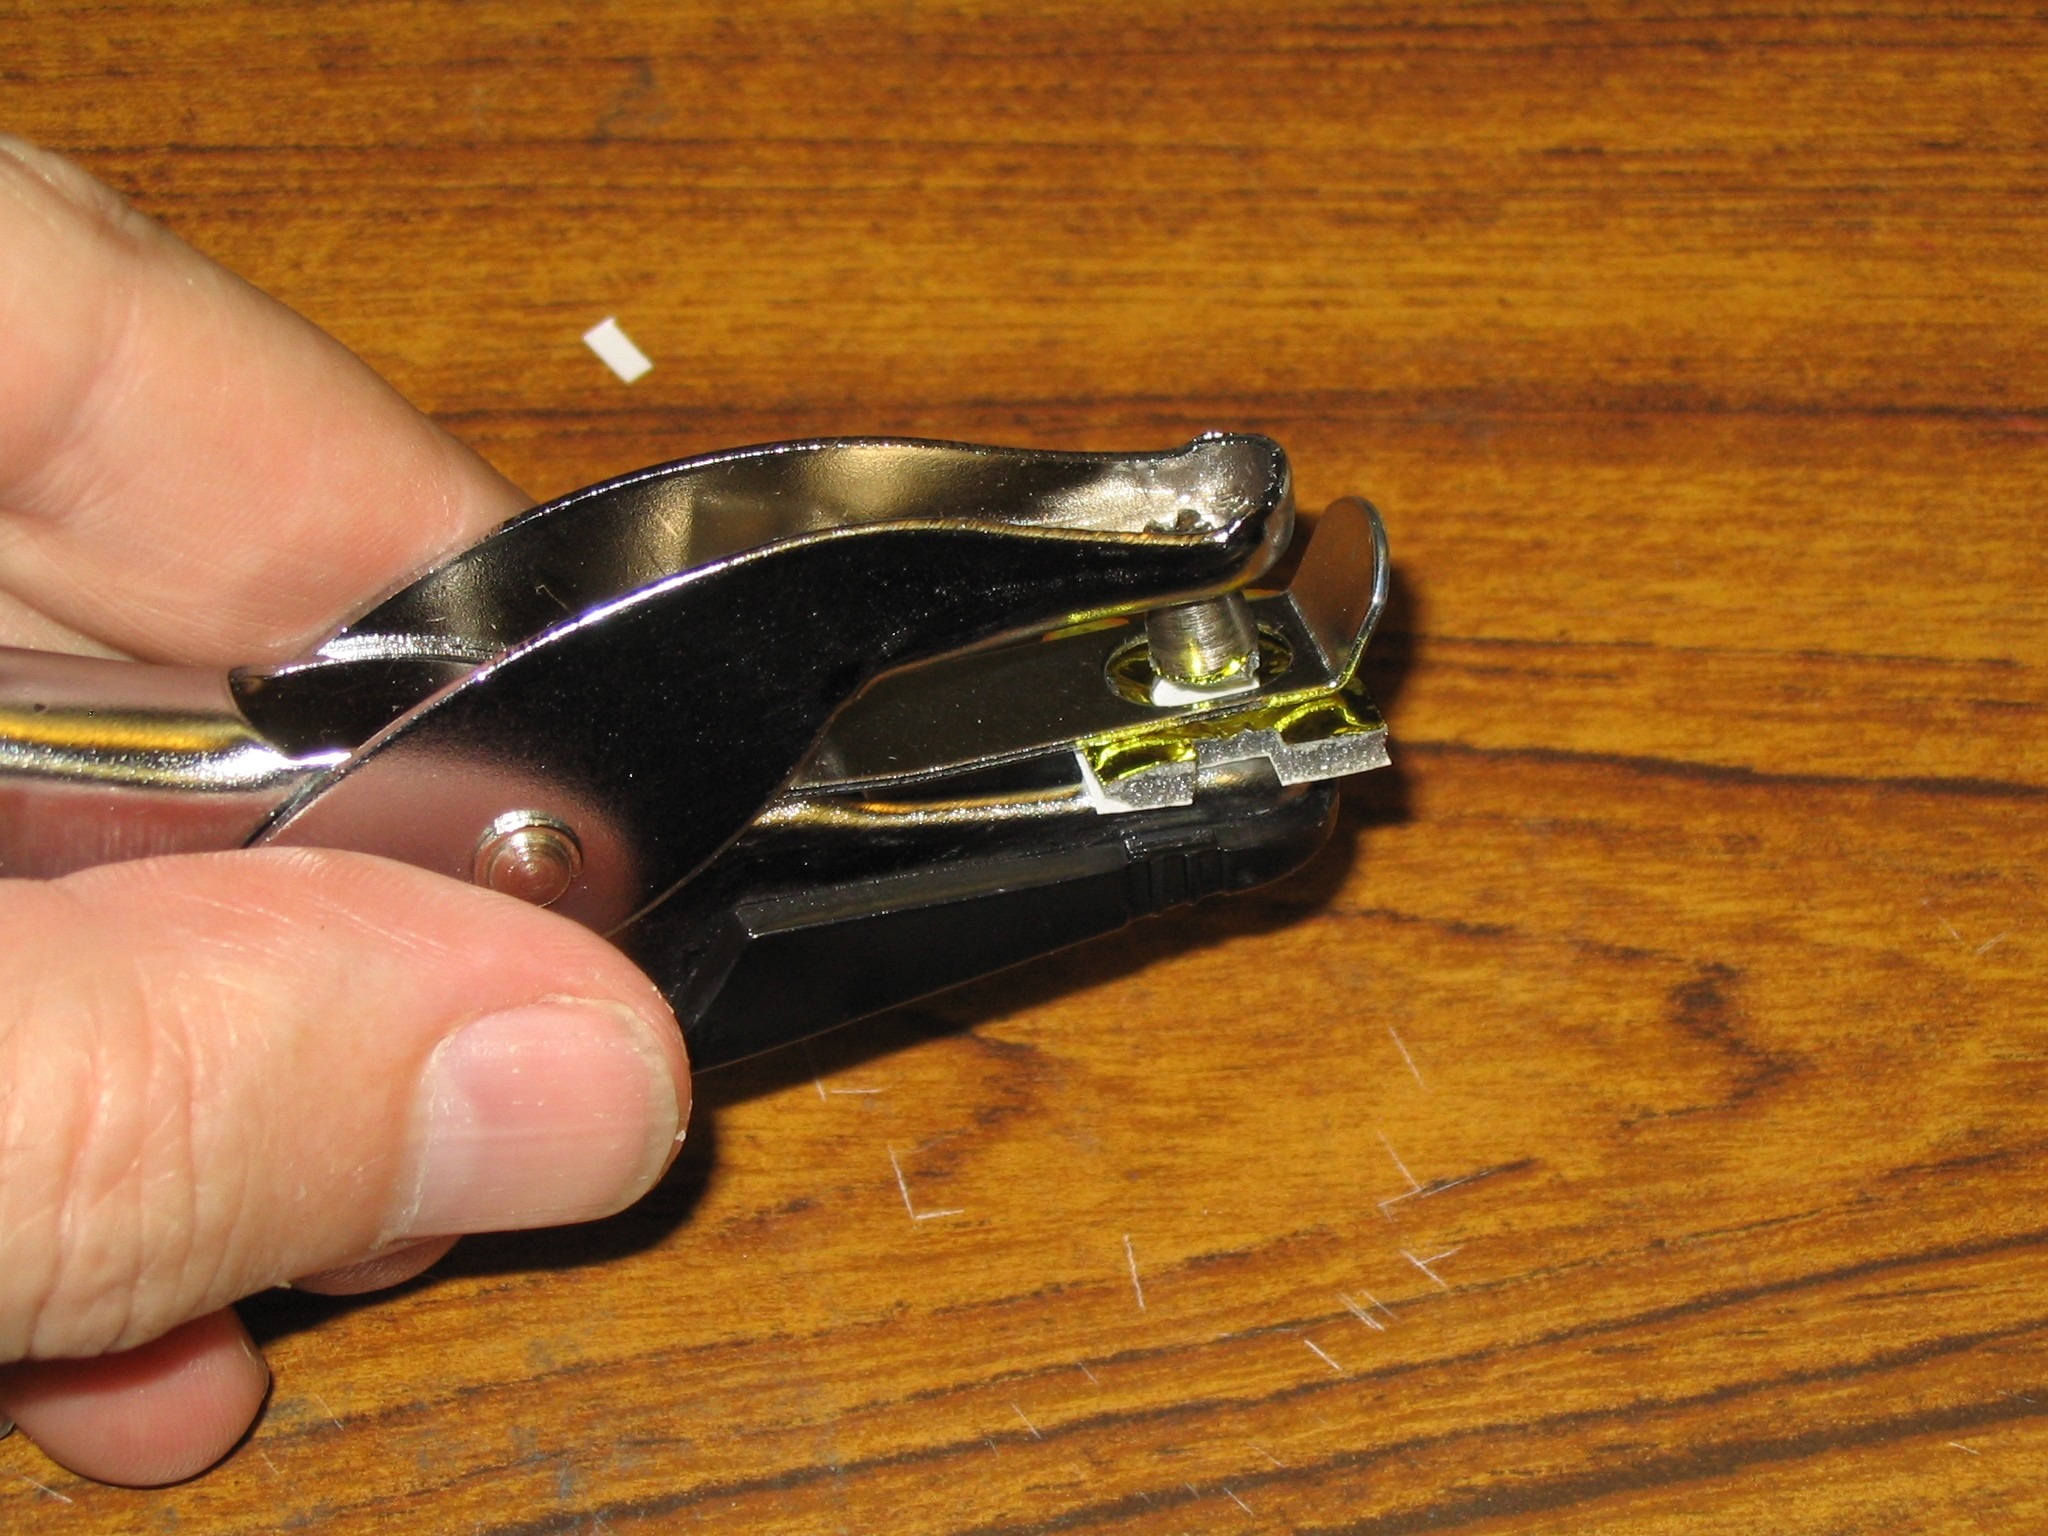
close but not touching, until I run out of room. Next, I cut each
foam/foil square from the strip with a razor knife by laying a metal
rule along each edge, and cutting in one careful stroke. (This will
damage your table top, use a work surface you are free to damage!)
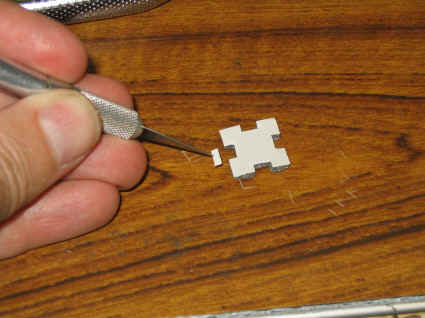
Repeat until all squares are done. After all the foam/foil squares are
cut free, I use the razor knife to notch them to fit the
plungers as in the photo below. The center hole is recreated with a
simple hole punch as seen below. Others have asked me if there might be an easier
way to do this. I have tried many ways, scissors can take the place of
the razor knife to separate the squares with good results, but they tend
to clog with foam goo after a while. I have got to the point where I
just use the knife. I also tried a specialized notching tool from a
scrapbooking store, but it clogged with goo after just a couple squares,
and quit working. The hole punch will also clog, but it continues to
work with only occasional cleaning. I know one collector who actually
had a die made especially to do this--could be a good route to go,
but at greater expense. The notches are really not that critical though;
they serve to keep the foam from getting in the way of the plunger
guides, and as long as they do that, all should be fine
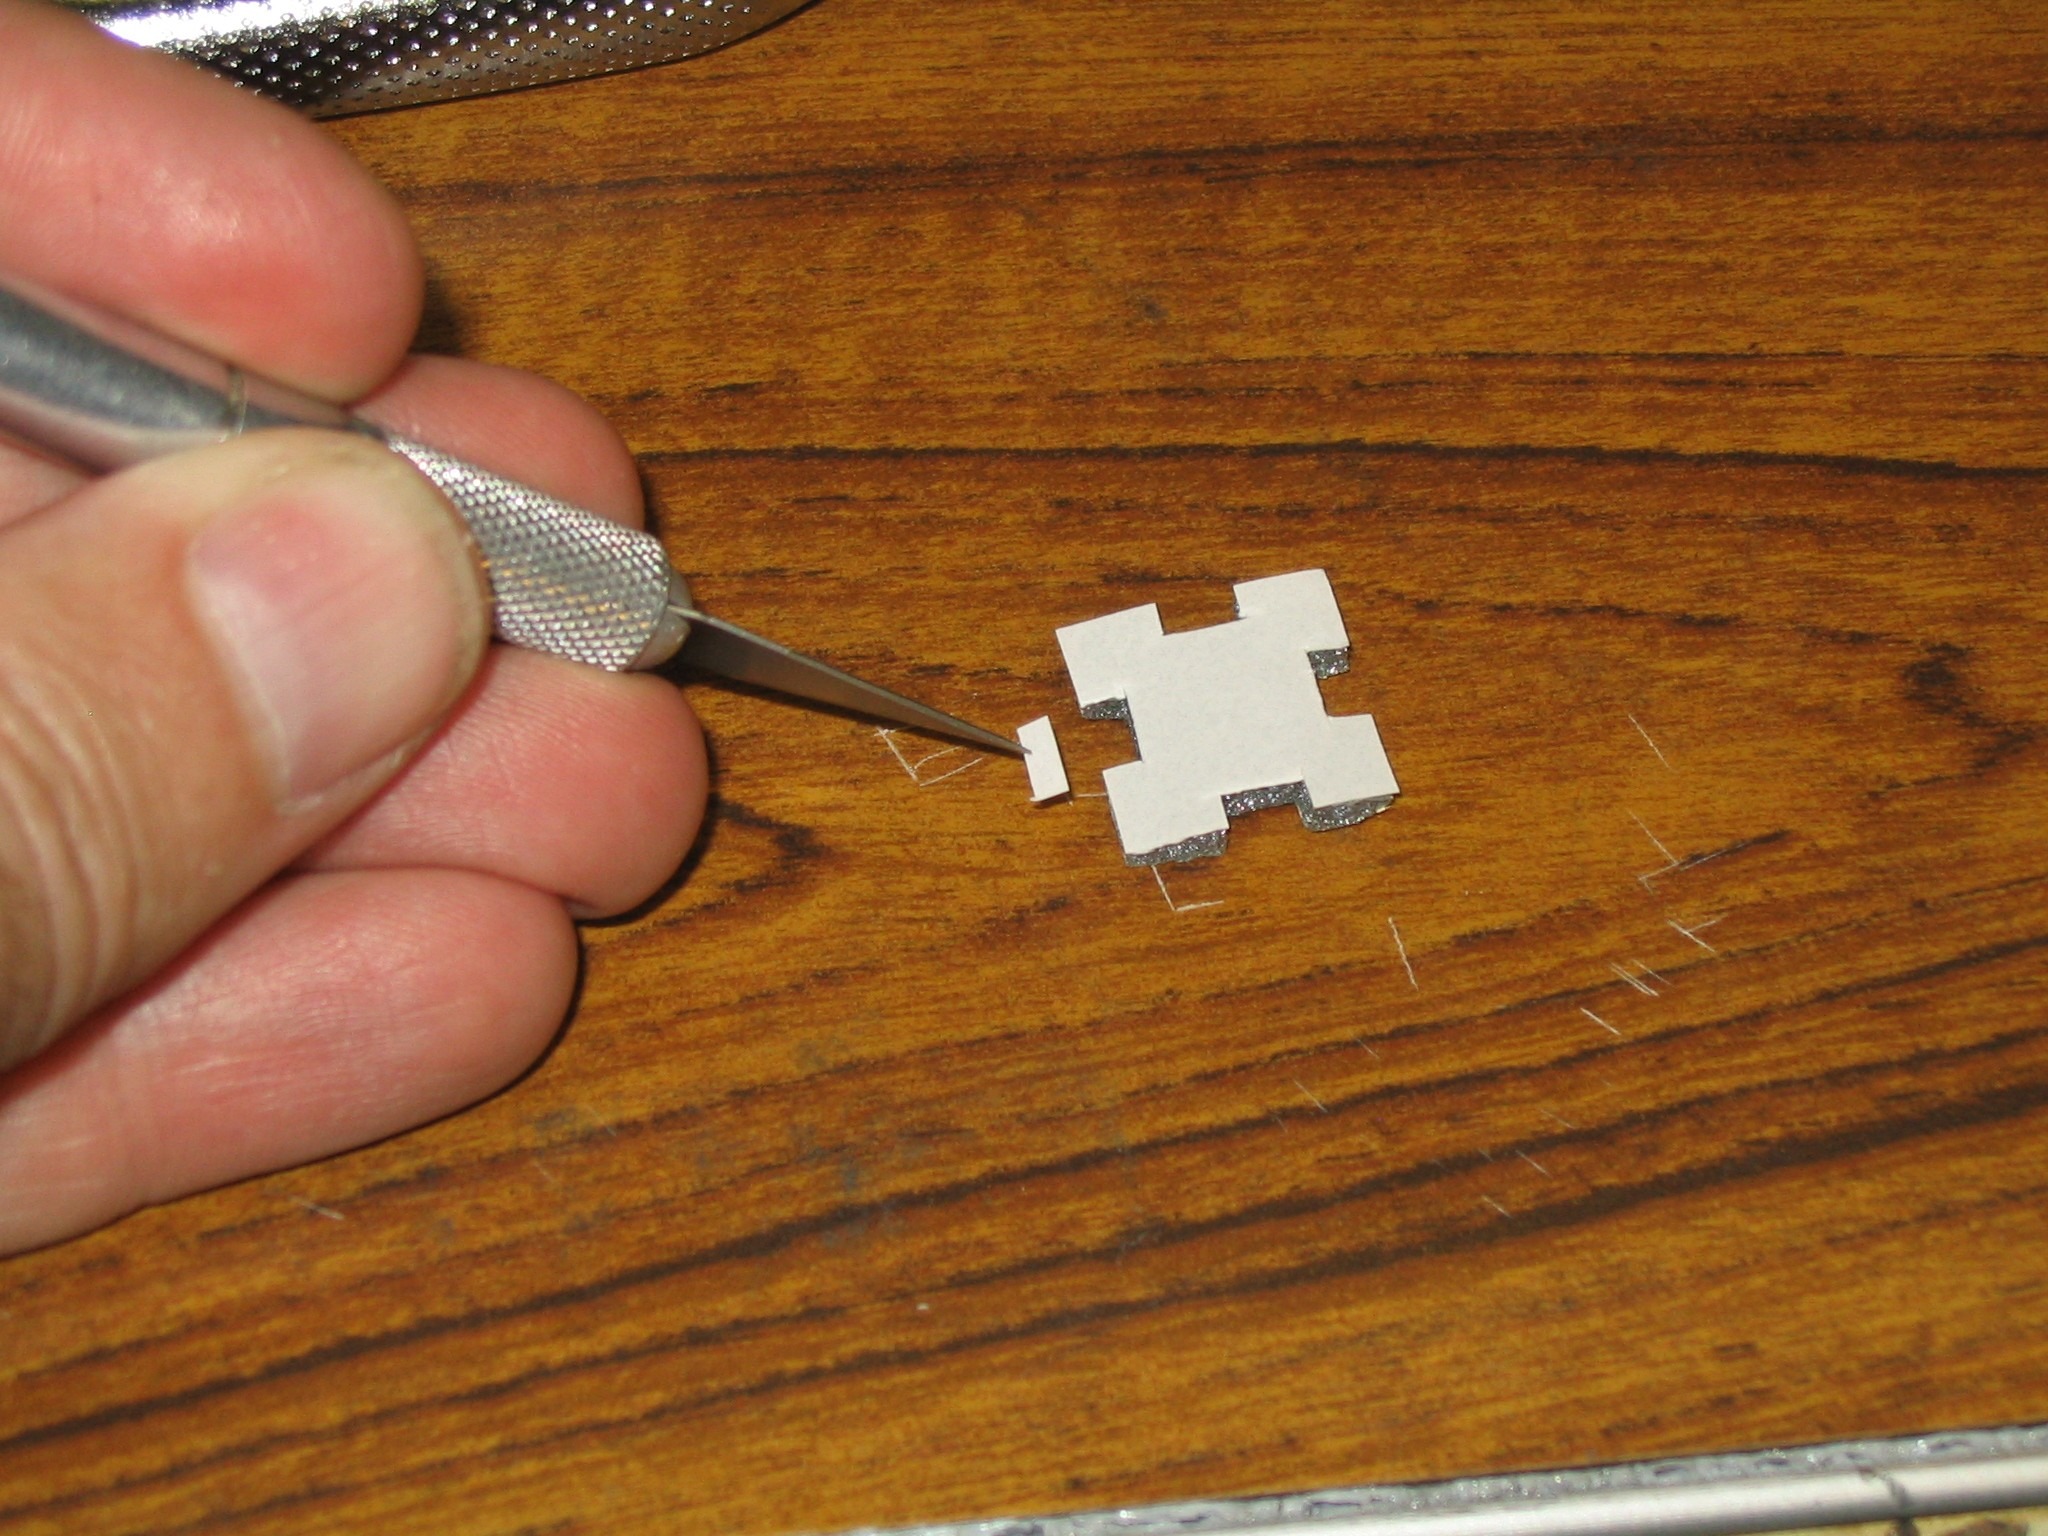
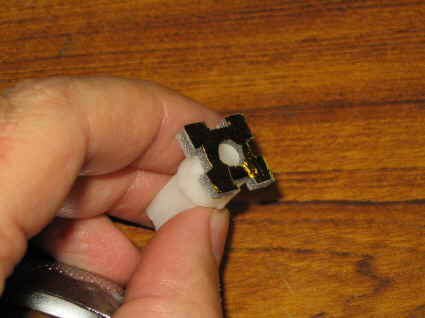
After the foam/foil squares are cut, trimmed, and notched, you will
notice that they resemble little pillows--all smashed down around the
edges. This is not good. After some experimentation, I found a good
solution: dip a small modeling paint brush in "Goof-Off"
(available at The Home Depot), and with the moist (not wet) brush,
stroke along the edges of the compressed foam. The foam will spring back
to form like magic.
I let the foam dry a while--maybe five or ten minutes, before peeling off the paper
backing and sticking
to the plunger. I have found that this works best. Interestingly, if you
let the foam dry too long (more than about a half-hour) they are much
harder get the paper backing to peel off. Not a huge problem, but
noteworthy.
|
|
|
|
|
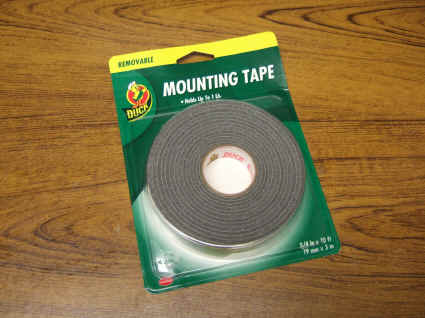
Replacement foam--from Walmart
|
|
|
Recreating the foam
|
|
|

The foam needs a center hole
|
|
|

Cutting and punching out little foam
pillows
|
|
|
About ten minutes of work each
|
|
|
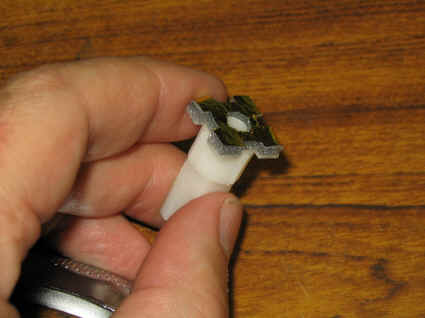
Restored plunger and foam. Pretty, ain't it?
|
|

Cabinet Restoration
I have done several of these, and every one has been different from
the others in the scope of work needed to bring the cabinet back to that
shiny new look I love. On one of my keyboards, I had to strip all the
paint from the tan U-shaped cover in order to be able to do a weld
repair. I have mentioned elsewhere on this site that I had to learn
aluminum welding to do other cabinet repairs, and those self-taught
skills have come in handy for keyboard repairs. They seem to take a lot
of abuse!
The cover also required a good deal of light dent pounding on an
anvil with a metal working hammer to smooth out a few years worth of
abuse. After these repairs, the cover was belt sanded to restore a consistent
finish. The painted finish was restored by priming with self etching
primer (a must-do before painting aluminum!) and then intentionally
splattering thick paint on the cover by removing the spray nozzle of my
compressed air sprayer, and modulating the spay with my finger. What a
mess. Trust me. It's harder to do than it is to explain. Again, this is
a self taught technique that may have no similarity to how it is done commercially!
After letting the splatter paint dry, I repainted the cover with a fine
mist of color matched paint.
The worst of the aluminum front covers (the one with key cutouts and nice
silk-screening) I have restored, was done by airbrushing matched paint
in light coats over the entire surface. Removing the paint after each
coat from the silk screen area with a Q-tip, tightly wrapped, and
barely moist with thinner. A light coat of clear enamel sealed the
finish. Fortunately, this worked terrifically, in
spite of the goofy technique. Lots of practice and restarts! The paint
covered an original anodized surface, so this actually changed the
original finish from anodized to painted. Since I have several of these
keyboards with a painted surface as factory original, I did not see this
as much of a compromise. The other possibility I entertained was to
simply re-anodize the cover. I found a local shop willing to do the work
for me, but they required a significant charge for the odd brown color,
and although the experts there thought it a good chance that the silk
screening would survive the process, there were no assurances. So had I
gone that route, it may have been necessary to redo the silk screening,
and I thought it better to try painting it first. I'm glad I did!
I have done other silk screened surfaces since with similar results,
so I'm sticking with it for now!
The bare aluminum bottom cover was restored by cleaning and then
using a rotary steel wire brush in a drill to lay down a nice smooth-ish,
consistent surface. This works beautifully. Not as easy to do as
sanding, but this uneven surface does not lend itself to sanding. This
technique is VERY time consuming, and must be done with a fresh, but
broken-in steel wire brush.
Well that's it--wish I had taken some pics of the metal work, but
since I work alone, this is sometimes forgotten--I kick myself. Oh
well, I'll be doing this again one day. --Pictures coming soon!!! :) |
|